8)
 For
a quilt with 20 diamond motifs like this one, I figured you will
need 14 strips cut from selvage to selvage of each fabric in the quilt.
That is assuming that I got 3 sub-cuts from each strip. For
a quilt with 20 diamond motifs like this one, I figured you will
need 14 strips cut from selvage to selvage of each fabric in the quilt.
That is assuming that I got 3 sub-cuts from each strip.
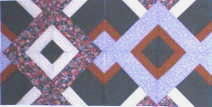
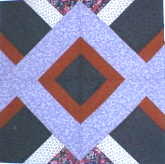
This is a quilt using 8 blocks across by 10 down. These are
the X blocks... remember that four X blocks make one whole pattern block,
or one of design's that forms the O rings.
This is a big quilt. With 10 inch X blocks (from a 14" strips
set) and a 2", 3", and 4" border it is 98" X 118".
If the same quilt was made from a 12 inch strip set which makes 8.5
inch X blocks and the same size borders, it would measure 86" X 103" .
It is the same amount of blocks only smaller in size, which of course makes
a smaller quilt. |
9)
 For
a quilt with 12 diamond motifs like this one, I needed to cut eight (8)
strips from selvage to selvage of each fabric in my quilt. That is
assuming that I got 3 sub-cuts from each strip. For
a quilt with 12 diamond motifs like this one, I needed to cut eight (8)
strips from selvage to selvage of each fabric in my quilt. That is
assuming that I got 3 sub-cuts from each strip.
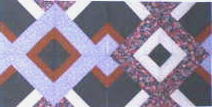
This is a version of the same quilt at left "cropped down"
to three diamond motifs across, using 6 blocks across and 8
blocks down. Depending on the size of your X blocks three across and four
down of the diamond designs could make a good size quilt top and I think
it looks nicely balanced, so that is what I will make.
This is a smaller size quilt than the one on the left. With 10 inch
X blocks (from a 14" strips set) and a 2", 3", and 4" border it is 78"
X 98".
If the same quilt was made from using the 12 inch strip set that
makes 8.5" X blocks, it would measure 69" x 86" with the same size borders.
It is the same amount of blocks only smaller in size, which of course makes
a smaller quilt. |


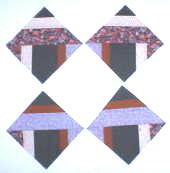
 This is my
strip set that I worked with for this first quilt. I used a 14" strip
set. I made some discoverers about the strip widths while playing
in Electric Quilt software. I designed several quilts in the software and
figured out how the different strip widths effect your quilt. I will tell
you about my discoveries and the width of your strips and strip sets
later.
This is my
strip set that I worked with for this first quilt. I used a 14" strip
set. I made some discoverers about the strip widths while playing
in Electric Quilt software. I designed several quilts in the software and
figured out how the different strip widths effect your quilt. I will tell
you about my discoveries and the width of your strips and strip sets
later.

 I
figured I could go 14", but determined you must have at least 43" of fabric
from selvage to selvage for each fabric, and line up one edge very
carefully! If you don't have this, you will end up short on
one of the strips. (Because I did it!) I ended up taking out the gold strips
that where too short and sewing in new ones. Very frustrating!
I
figured I could go 14", but determined you must have at least 43" of fabric
from selvage to selvage for each fabric, and line up one edge very
carefully! If you don't have this, you will end up short on
one of the strips. (Because I did it!) I ended up taking out the gold strips
that where too short and sewing in new ones. Very frustrating!
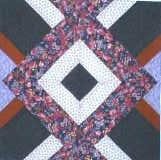
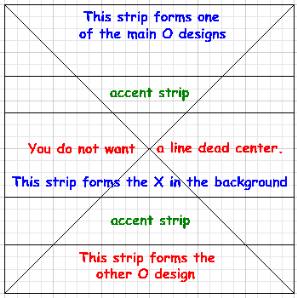
 I
drew the size block I wanted and divided it up in strip widths the way
I found pleasing. This sample is a 12 inch block.
I
drew the size block I wanted and divided it up in strip widths the way
I found pleasing. This sample is a 12 inch block.
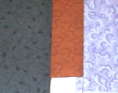
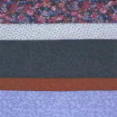 Real
fabric sample:
Real
fabric sample: