Object and Stamps heading

Joy's PI UFO Objects and Stamps

Page Two of Balcony Scene Tutorial


The shape of the balcony is Plaque 5, also in 3d chisel mitered corner and with 24 border and 30 depth. One light at 30 ambient.


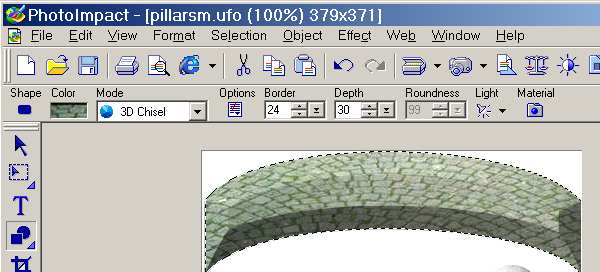
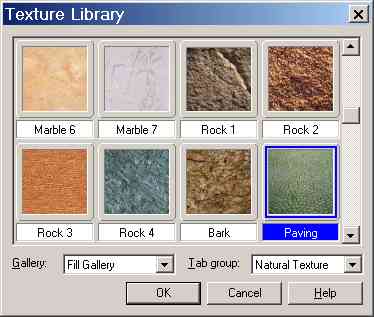
Natural texture is Paving.
  1. Duplicate object for top of bottom rail of balcony. Duplicate again. Add a shadow to the first bottom rail with default settings. Split shadow and drag is further down to make it a deeper contrast. Send to the back a second duplicate, flip vertically. You may need to stretch it with the resize button. Use the Magic Light to darken it. Place the orginal balcony so that you can only see the round part at the top of your picture. To contrast it slightly, add a shadow with default settings. Split shadow ,send to the top and drag it up just to cover the first indentation of the object.
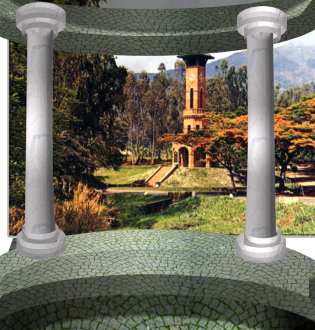
  2. Place your completed and grouped pillars on each side of the first rail. Be sure they are on top position. Then paste your selected scene and send it to the next to the last back position to cover points of lower second duplicate balcony object. Your own scene should fit exactly the width of your whole workdesk selection and about 2/3rds the length of your whole picture.

  3. Be sure to save often and save at least one piece of the various shapes with the bump and texture in your Easy Palette. Before merging scene, group all the objects together and use the Magic light to darken the balcony to a darker contrast if you are using a light outdoor scene or leave it bright for an night scene.

    Back to Page 1 of Balcony Scene Tutorial

    Back to Object,Stamps and Frames Gallery

    Back to the PI Gallery Index.


    Home Links: Free Cross-stich pattern, African Journals with Orginal MP3,Java Postcards,and Christian Newsletter.

    Copyright © 2005 NCM


    This page hosted byGet your own Free Home Page