Method 1: Reboot into Safe Mode. This is done by pressing F8 while your computer is booting up. This will get you access to the list of boot options. You should see Safe mode listed at the top. Windows will then begin loading, and you will be prompted to log in. I usually log in as the Administrator.
Now, go to your Windows\System32\dllcache directory and rename the shell32.dll file in there to something else, like shell32.old or shell32.bak. Copy and paste the newly customized shell32.dll file into this directory.
Then go one level up to the Windows\System32\ directory and rename the shell32.dll file there as well to shell32.old or shell32.bak. Again, copy and paste the new shell32.dll file into this directory.
Reboot and enjoy the changes!
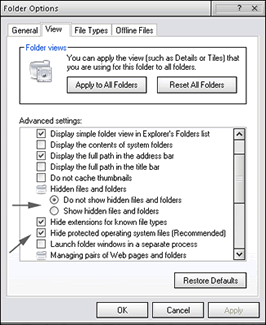
Method 2: Go to the directory Windows\System32\.Go to "Tools", then "Folder options". Select the View tab, and look for the option "Hidden files and folders". Tick the "Show hidden files and folders" option. Then look for the "Hide protected operating system files (Recommended)" option, and uncheck it (see diagram right). Click on OK.
Look for a folder called dllcache and go into it. Find the shell32.dll and rename it as something else, like shell32.old or shell32.bak. Click the back button to return to the Windows\System32\ directory. Look for the shell32.dll, and rename that to something else as well. Windows XP will then detect you have invalid system files and you will be presented with 2 Windows Protection Error dialogs. The first will ask you to insert your Windows XP CD. Just click on the "Cancel" option. The second dialog will ask whether you want to accept the changes. Just choose "Yes".
Now, copy and paste your new customized shell32.dll here. The 2 Windows Protection Error dialogs will appear again. And again, click on the "Cancel" option for the first dialog, and choose "Yes" for the second dialog.
For the changes to take effect, you may either have to log off and then log back on or you may be required to restart Windows.