There
are numerous things that you can do with Resource Hacker, but in this
tutorial we'll be learning how to hack the file that contains most
of the Windows default icons, shell32.dll.
But before you go and start hacking the file, it is EXTREMELY important
that you make a backup of the file. Go to your Windows/System32/ directory
and you see the file there. Make a copy of it (Right-click, "Copy")
and then store it somewhere else, wherever you like.
Now, start Resource Hacker, and open the shell32.dll file by selecting "File",
then "Open" (or Ctrl + O).
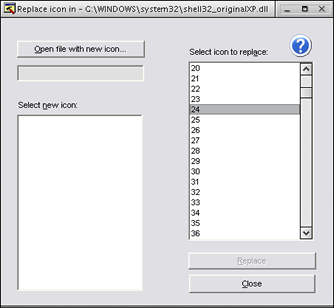
Now, select "Action", and then "Replace Icon". A screen
displaying the icon groups and a preview of the icon that accompanies the respective
groups
will appear (see diagram below).
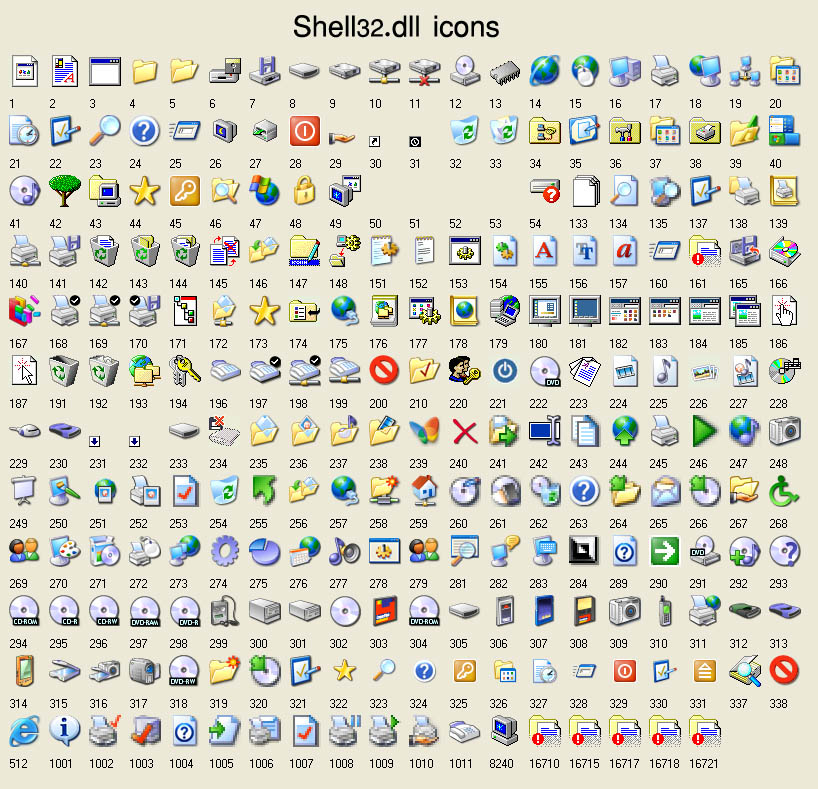
For instance, you can see that the 'Run' icon group is resource 25, while the
'Help' resource is 24. If you need more help on identifying the various icons,
here's a visual aid. Find the icon you want to replace on the right side of
the window. Click on the "Open File With New icon ..." tab. Browse through
your directories to look for the replacement icon and click "Open".
You should see your new icon on the left side with the old icon on the right
side. Select "Replace". Ensure that the replacement icon has
the same sizes as the original icon or it won't work. You can repeat
the steps to replace more icons.
Once you're done with replacing the old icons with new ones,
select "File" and
then "Save As ...". Choose where you want to save this new customized
shell32 file, for example on your desktop.
Once done, you would need to replace this new file with the old one. I'm going
to introduce two ways to do so. The first method is a little more troublesome
(requires rebooting), but it is a lot safer. The other method is more direct
and can be done running Windows. It's really up to you which method you wish
to follow.
