A quick trick by the Kevman. (Thanks to Bill Boyce for suggesting the concept idea.)
Intro
Skytracer is a great plugin
- it does some pretty impressive environments, and with the addition of
skywarps, it makes these sky's even more useable for applications that
need an environment that renders quickly, and can even be reflected by
other items in a scene (like an ocean for instance!)

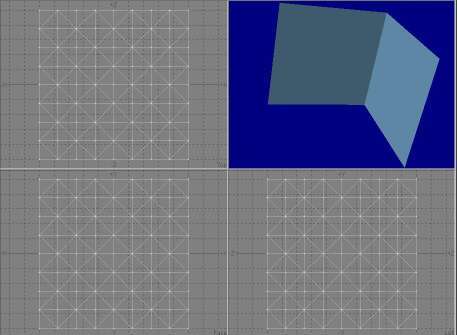
Note the corner appears when we look 'down' with our camera! |
But there is a problem with
skywarps... They are cubically mapped - That is, they are 5 images
mapped to the sides and top of a large cube, and although in most cases
this is not an issue, sometimes when that camera is high up and looking
down on that fleet of jet fighters flying past, the optical distortion
caused by the camera's angle/zoomfactor/position will reveal that all too
obvious square corner, ruining that illusion!
So, how can we get past this problem? If only the sky was spherical, then this wouldn't be a problem... Afterall, spheres don't contain any corners! Luckily for you, that's not such a hard thing to do! Yes, really... A simple trick can convert that square environment into something without corners, with the skywarp images seamlessly conforming to a spherical shape! Ok, lets stop nattering and show you how... |
The Process...
I'll have assumed that you've created that skywarp already - if you haven't its simple - Just create your sky in the Skytracer plugin, then click the 'Render Warp Images' button! :)
Ok, now that we have our
skywarp (scene, box and 5 images) we're ready to go.
 |
The first thing to do is
start modeler and load the skywarp box.
Now subdivide the box using Polygon / subdivide / facet. Repeat this 3 times. Triple the box as well. This will help us with not only any possible non planar rendering problems later on, but also creating a better sky sphere effect. Save this box as skywarp_box.lwo. This will become our new skywarp cube. |
 |
Finally click Tools /
Custom / Spherize to convert our box into a sphere.
An interesting thing to note is that when the box is spherized, it becomes 10 times larger as a sphere. Just something to remember when you are aligning the new sky to the scene... Now save this model as skywarp_sphere.lwo and exit modeler. That's all the modeling work
completed.
|
Start up layout. Load in the skywarp scene. The first thing to do is now objects / replace object the existing skywarp cube with our new subdivided version called skywarp_box.
Once you've done that, load in the new spherical object as well called skywarp_sphere. The spherical object will simply be used as a morph target, so you can either move it out of the way, or simply click in the object preferences 'unseen by camera' so that it doesn't render. Personally, I prefer to just move the object out of the way (i.e.. behind the camera, or several hundred kilometers into the distance!) so I don't get that confusing mess of polygons on the screen while I'm trying to work...
Select the skywarp_box,
and in object / deformations, we need to set the morph target
to the skywarp_sphere object, and make the morph amount = 100.0%.
That's it!
Now save the scene and
you're done! No more nasty corners to worry about if you plan of
playing with camera zooms, etc.! Mapping those images spherically
would have been a bit of a headache, but since morphing an object also
morphs the surfaces, there was little work involved...
|
The original cube shot |

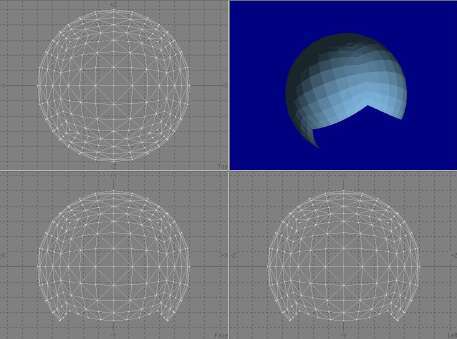
The EXACT same shot, but the sky has now morphed into a sphere! |
Note that some problems seem to occur if you have a sun in a direct corner of the cube. The rendered images would be distorted and wouldn't look too great - Even converting the skycube to a sphere didn't fix the problem since it was actually the images that were incorrectly rendered (probably due to the fact the images are probably calculated by rotating the camera view)
I found the easiest way to fix the sun problem was by simply 'hiding' it behind a lens flare.
Well, hope that trick helped
- More coming soon!
Kevin
'kevman' Phillips
This page/article Copyright
© 1999/2000 Kevin Phillips