 |  |
| |
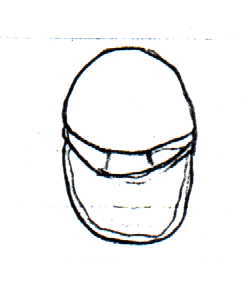
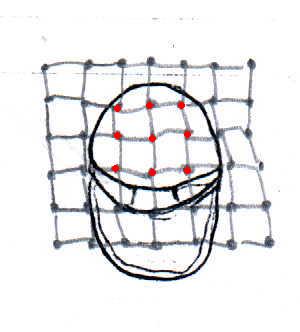
Step 6: Preparing and ataching the netting to the Boonie/BDU/helmit cover
Now that you've completed everything, time to do the Boonie
Hat/BDU hat/hemit cover. This is a cinch compared to the labor you just completed on the jacket
and pants or flight suit. In my opinion, using a BDU hat is by far the easiest thing to use, since you don't have to worry about the wide brim of the Boonie hat, and the awkwardness of the helmit cover. What we are going to do is get a piece of cloth: a rag, and old cut-up BDU jacket or pants, or some GI Induvidual Camo netting and cut off a piece to fit about 3/4 of the way around the Boonie hat/BDU hat/helmit cover. You want this to come to around the shoulder level, almost like a cape like effect.
 |
 |
 |
 |
 |
 |
If you are making the Bushrag type poncho, then you might want to consider making two BDU hats into ghillie hats; one of the hats for the darker colors, the other hat for the lighter colors. I havn't quite found out a good way to make the hat reversable like the poncho, so this is the best thing I can think of. If anyone has any suggestions, please let me know.
If you used the sewing method, take out the Shoe Goo or Goop now. Try to do this outside, in a well ventilated
area, preferably were the sun is shining. Just put a generous glob of the
glue over the knot area. Remember, your not trying to glue the knot to
the fabric here, just protecting the knot. Let the glue dry for about 30
minutes to an hour before going on to the next part and/or garment. After
everything is dry and settled, time to take the suit outside (preferably
on the grass or newspaper) and lay it down. Take out the flat black spray
paint and put a dab on every knot of netting on the jacket, pants, and
hat. Let dry for about 10 minutes, then come back and put another coat
on (remember, it’s better to have two or three coats then one big one).
| Back: Step 5: (part 1)Preparing and sewing the netting to the pants |