

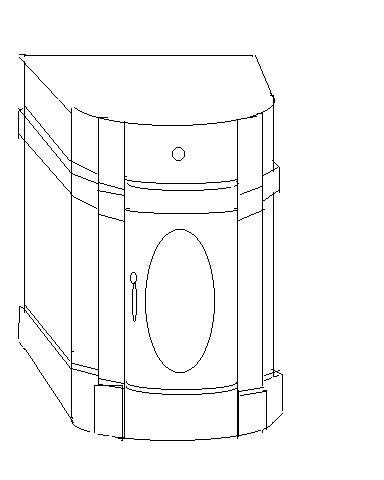
This is a good recycling project that uses empty cardboard boxes, old knobs, hotmelt glue, cardstock and paint. First find at least 2 large cardboard boxes. Decide how high and wide you want your cabinet. Determine if you want to be able to open the cabinet or if you just want it for show. I saw a small cabinet in the Petals catalog (can also go to petals.com) and decided to use it for inspiration. I chose the shape of my cabinet first then cut out the bottom and top pieces (a rectangle with rounded corners). Next, I took the larger of the two boxes and opened the one glued edge. It takes a little finesse but using hot glue on the edge of the top piece, I shaped the body of the piece around it. I did the same with the bottom piece. After the shape has dried/cooled for a few minutes, take the excess of the cardboard and fold it around the back. If you do not have enough to enclose the body, that is okay in the back (or you can add another piece of cardboard where needed). Use masking tape or mailing/package tape to hold the back seams taute until the glue dries/cools. Cut a larger piece in the shape of the top and bottom pieces (about 1 1/2 inches larger on the front and sides) and glue to the top.
Start decorative trim by using 3-4 inches of leftover cardboard strips, and glue to bottom of piece (overlapping up from the actual bottom by about 1 inch) to strengthen the bottom, glue another strip overtop of that one, allow to cool. Cut off at back, don't wrap it around or it will stick out from the wall.
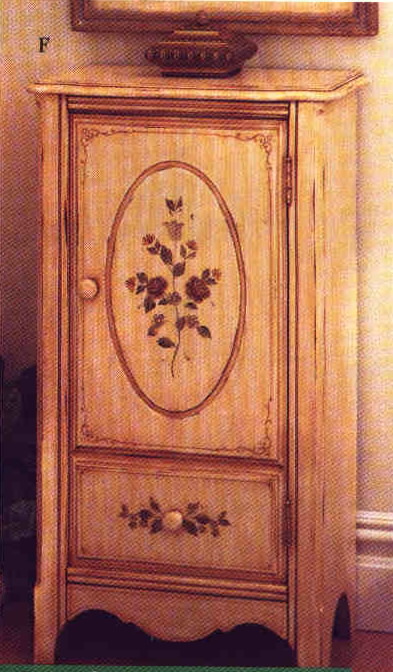
Inspirational cabinet from the Petals catalog.
Next, with 1-ply cardboard strips of about 1 1/2 inches wide, glue around the cabinet about 4 inches from the top. Use the same width and ply strips for the columns on either side where the door will be. Add an extra square of cardboard on top of the intersection between the column and the cross piece, do the same at the bottom, glueing an extra rectangle on the base where the clomu meets the base. To make this a little more interesting, shorten the rectangle just a little at the top to make it "bevelled."

With a sharp utility knife, cut out foot detail optional. Go over all joints and places where the cardboard shows corrogation or hollow holes with glue and cardstock (I put bigger strips over them and then trimmed the cardstock with the utility knife).
After everything has cooled/dried, paint as desired. Using the Petals cabinet for inspiration, I painted the whole thing light yellow, then painted some antique-looking roses on it then "weathered" the whole thing by using a very watered-down brown acryllic paint over the whole thing.
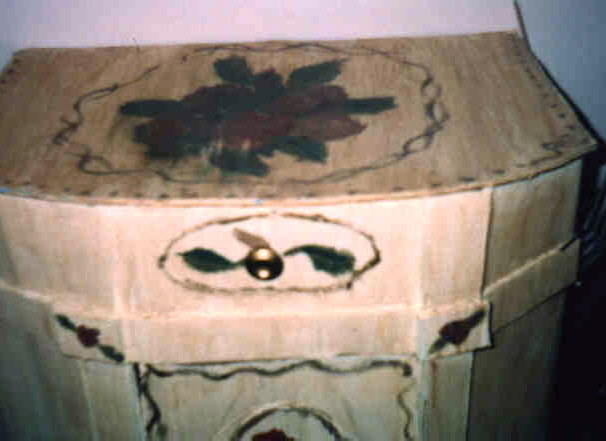
Last of all, cut the front door out on three sides and add an old drawer pull. Also (using an old plastic knob from a store-bought cardboard dresser-thing) glue a knob to the top to look like a fake drawer.
I personally use this little cabinet to hold all my shoes at the top of my staircase (because here is where I take them off in the evening and put them on in the morning). But it can also be used for anything relatively light. I wouldn't recommend books or anything too heavy, but my cat likes to get in there, so it can be pretty sturdy, depending on how well you make it.
HOME | FAUX FIREPLACE | CIRCULAR CANOPY
Sign Guestbook
View Guestbook