These cars were offered at Walgreen's for a while, but I have not seen them
recently. I was also able to find a Viper, '69 Z28, '70 Chevelle, '69 Boss 302,
'69 GTO, and a SSR. Those are future projects. For this car I built the chassis
from styrene.
To
build the chassis, I first put the body on the sheet styrene and marked the
outline with a pencil noting the location of the wheel well openings. Using
a straight edge and a razor knife, I cut out the chassis shape and 5/8"
strips.
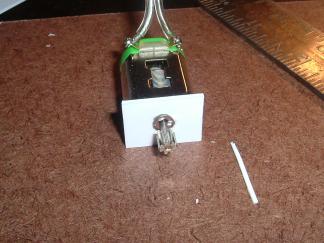
Using
the point on an Xacto knife, I bored a hole in one of the styrene strips for
the motor mount. I kept trial fitting until I got the hole snug to the motor.
Then I trimmed the styrene flush with the bottom and sides of the motor.
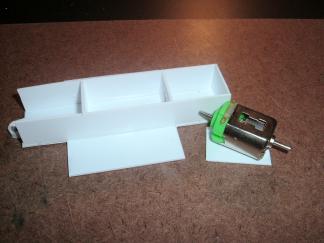
The
motor and mount were placed in the center of the chassis and using Testor's
Model Cement I glued a chassis rib to both sides of the motor mount and to the
chassis pan. Then I cut cross members and glued them between the ribs. I also
used the same technique with the Xacto knife to cut the hole for the guide flag.
Next was to cut out the styrene in the wheel wells.
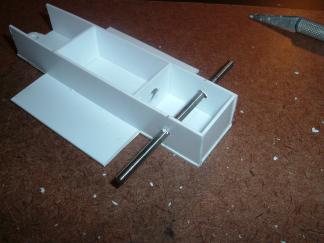
I
marked the location for the rear axle by marking the motor shaft height on the
side of the chassis. Then I determined how far back by the length of the motor
shaft through the motor mount. I drilled the axle holes with the Xacto knife.
These don't have to be exact because the bushings will correct for errors.
With
the guide flag and rear axle and wheels on the chassis, I located the height
for the holes for the front axle. I go by the tripod theory. I keep the front
wheels off the track surface by about 1/16". This allows for good handling
and minimal drag. As you can see, I made a mistake in locating the holes for
the front axle. It was easily fixed by glueing a gusset on the side and drilling
a new hole. I cut a slot in the rear of the chassis for the crown gear to stick
through. Then I cut styrene strips and glued them to the side pans for body
mounts. This is also a good place to put chassis weights.
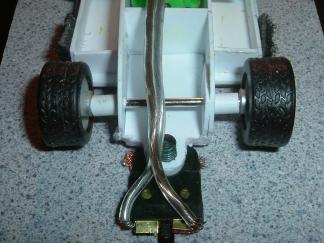
The
rear axle bushings are made from pieces of popsicle sticks drilled for the 1/8"
axles and glued to the styrene with Goop. The rear tires are old yellow dried
out sponge tires coated with black silicone. The front tires, wheels, and axle
came with the C5R toy car.
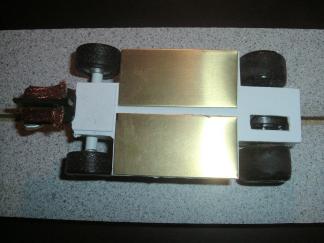
The
chassis is mounted to the body using Velcro strips. The motor is a SunTech 26,000
RPM motor from Slot Car Heros. It is secured to the chassis with a piece of
piano wire through the chassis. This makes for easy motor removal. To lower
the center of gravity in this lightweight chassis, I used double sided tape
to stick brass pans to the bottom of the chassis.
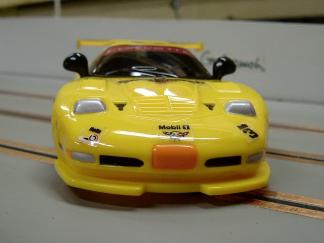
That's
just about it for building this car. Once it was all together, I had to do very
little tweaking to make this a very good runner. It handles surprisingly well
on my routed track with the silicone tires. Not bad for a decent car for under
$10!