After
building my road course and getting more into slot car racing, I got the bug
to build an oval track to run scratch-built modifieds and both new and vintage
NASCARs. However, I was limited to the space already taken up with my other
track. After much thought I decided to rest the oval on top of the road course
and hinge it to the wall so that it could be folded up out of the way.
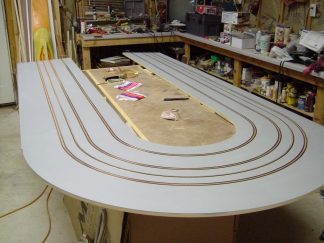
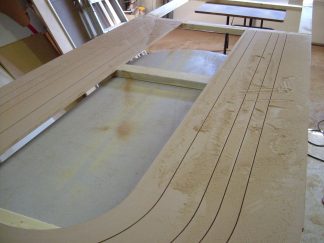
The
track is made from two 4x8 sheets of MDF end-to-end. I routed each end from
one sheet using a tramel for the first lane and offset router jig for the remaining
lanes. I used the same lane spacing as in the road course for HO as well as
1/32 and 1/24 cars. Since all laps will be counterclockwise, the gutter is wider
(6") on the back straight to allow for sliding room. On the front straight
coming out of the turn I made an extension to allow for sliding room. The gutter
on the front straight is 3". The infield was cut out to reduce the track
weight and to clear the timing monitor mounted on the wall.

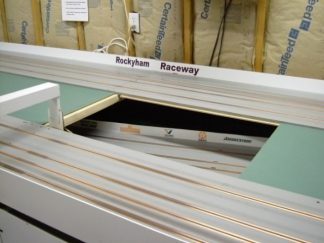
I
painted the track with three coats of gray semigloss latex floor enamel, sanding
between each coat. I applied the paint with a foam roller and then brushed it
out with a foam brush to remove the roller texture. I ended up with a slick
surface which is great for silicone/silicone-coated tires as well as most stock
rubber tires. I used 3/16" copper tape 1.5 mil thick rolled down with a
wood wallpaper roller. Each section of track was mounted to a 2x4 frame that
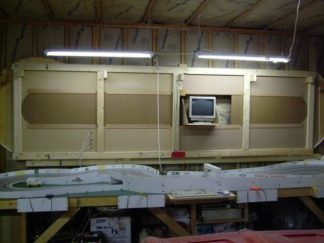
was hinged to the wall of my shop.
The track had to be offset from the wall to allow for the 2 1/2" tall track
walls when folded up. The walls are made from 1/8" thick tile board. The
infield is made from 1/8" sheets of green chalk board attached to supports
with Velcro for easy removal. One section is removed when folded to clear the
monitor and replaced when the track is down.
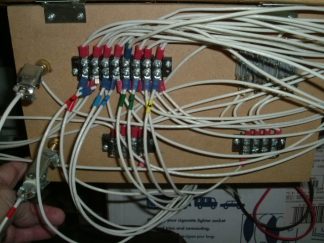
To
simplify the wiring, I connected the power to the wiring panel on my road course.
That way, both tracks are hot all the time and the same driver stations can
be used for both tracks. Nothing has to be rewired or connected to switch between
tracks. Right now I only have one power tap to this track and it seems to work
just fine.
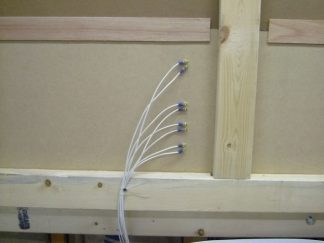
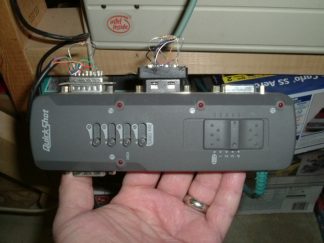
To
keep things simple, I also wanted to use the same light bridge for the timing
system on both tracks. Before lowering the oval, I remove the light bridge from
the road course, run it through the infield, and attach it to the oval over
the photo transistors. Since I am using Lap Timer 2000 with the photo transistors
connected to the joystick port on the computer, I connected each set of photo
transistors to a joystick switching box. I just flip the switch to change tracks.
Now
that I have built the oval, I am glad I did. It is a blast to drive, especially
with open-wheeled cars. Best of all, I can switch between the road course and
the oval in less than a minute. The best of both worlds in my limited space!