Simple Star Trek Ship Tutorial 3
page 3
the body
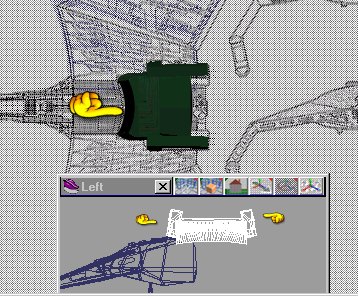 Looking from the top .Select the poly spline line tool and trace the cab. Now select the face edit tool and sweep up, maybe a little back . See pictue on the right .
Select the box shape . move to the side of the cab area and rotate sligly . See picture to the right . Copy the box and put it on the other side .Paint all with green panel. I paint the side of the boxes with a darker green. More on that later.
.
Looking from the top .Select the poly spline line tool and trace the cab. Now select the face edit tool and sweep up, maybe a little back . See pictue on the right .
Select the box shape . move to the side of the cab area and rotate sligly . See picture to the right . Copy the box and put it on the other side .Paint all with green panel. I paint the side of the boxes with a darker green. More on that later.
.

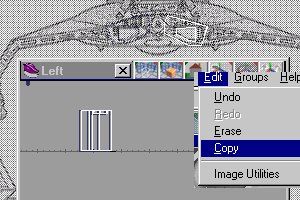
Select the poly spline tool again and trace this area in front of the cab. I select it and sweep it , see picture on the left.
We sepect ot with the face edit tool and sweep upwards.See picture below.

We will paint this with a no light corrigated metal color, the lines want to run from the front to the aft.

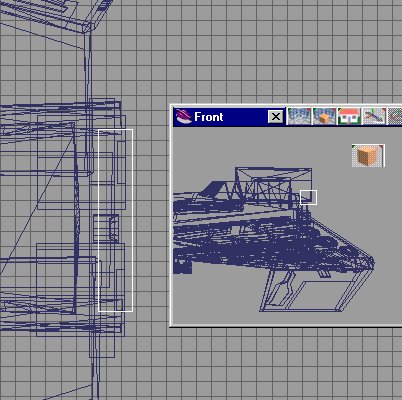
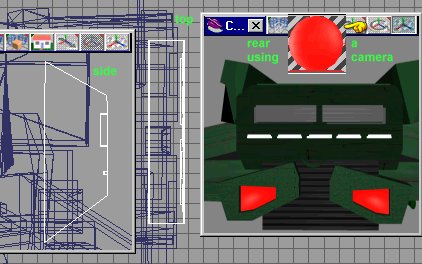
Look at the top view again , but look at the rear of the ship , picture on the left.
We will now make the impulse engine area. Select the poly line tool and trace around the edges as seen in the picture on the left.
Select the face with the face edit tool and sweep upwards.

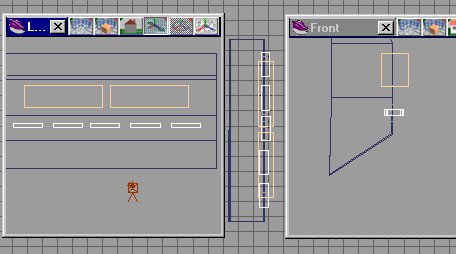
Now select the poly spline line tool again and trace the smaller area . Select its face and sweep upwards .
Now move it to the position as show in the picture to the right.
We will subtract the little pox from the big box, using the object subtract tool .
Copy and then hit mirror tool. move to the possition as shown in the picture to the left.
Paint
these with green panels and glue them together.

We are now ready to rotates these sections .
First rotate 90 degrees to stand this object up , then rotate 90 degrees to align with the body . Move the shape and shrink to fit the schematic
While I'm thinking about it , select the paint brush and paint the cutout area a bright red on both parts.

The area right above the impulse engines is the rear Torpedo launching tube, did you know that was there?.
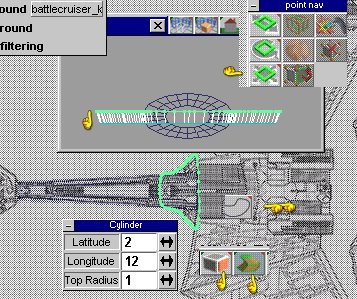
Anyway , select the poly spline line tool and trace the shape in the top view. Select it with the face edit tool and sweep upward .
Sound familiar.Paint it a dark green. Next select a cylinder from the shapes, rotate it and place as the picture indicates.
I select the end of the tube and do an inverse sweep , (sweep into the tube) paint the shape green and the tube green but the end of the tube black. Glue all this together and rotate to stand up, then rotate to align withthe ship body.
The rear of this ship has a lot on it , sadly we dont see much of it, if at all.
But our model is going to have the correct stuff.
We are ready to add the rear observation deck and the shuttle bay.
Wow , I didn't know Klingon ships had all this stuff
We will start off with a box shape and stretch it to fit (see the picture on the right).
If you look to the left you will see , I selected
and copied more boxes and shrank them and positioned them.
I will now glue them all together and make a new cutting tool.
The boxes on the bottem I will paint bright white . The boxes on the top will be the cutouts for the shuttle bays , so I paint them with a dark corigated metal.Then glue the boxes together . Select the
big box and the object subtract tool and cut .

After the cut you should have and object like the picture on the right.
Don't forget:
If you wish to see any picture with more detail , just right click it ans select view image.
You model should look like this :
Move the new shuttle section into possition as shown in the picture to the left.
Now we go to the front of the ship. Select a cylinder , rotate it sideways.
Stretch it to match the schematic. Select the end and shrink to match the schematics.See picture , below to the right.

From the top view select the poly spline line tool and trace out the shroud area.
We will select the face using the face edit tool and sweep upwards.
I also expand just a bit. Paint both of these shapes with the green panels color.
You can see this if you look to the image to the left.

You can add small boxes and or panels to add some detail here.
Next load up the wings and the body . Glue all together.SAVE
Now you have a ship body , SAVE IT
Do I say that enough? Your ship should look like the picture on the right.
next comes the command section of the ship . That part will be on page four.
Page Four