RMS Titanic Fiber Optics
Things to remember before starting this project.
This is a time consuming project. Don't rush !!! Your
patience and attention to detail will pay off !
Make sure you have enough FIber ! Don't be stingy on
the fiber. Given the price of the model and the various materials needed
(photo-etched sets) the fibers are a small investment with execllent
returns.
Try to balance out the lighting. Don't over light the
bow and under light the stern. (patience is a virtue)
Materials needed :
2 6.5 volt 0.5 Amp mini
bulbs .
1 12 volt 1.0 Amp transformer
(don't go over the wattage or amperage)
10 ft speaker wire. (preferrably thin)
1 female connector to match male connector on transformer.
Electrical tape
Approx. 40 Ft of Fiber Optic cabling or alternate
material
Xacto knife
Instant Ca glue
Pinvise and very small drill bit. (size is dependant
on fiber thickness)
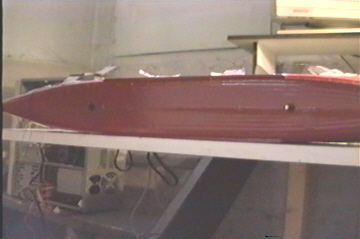
Step 1
The first thing you want to do is drill out all the portholes
on the hull.
I used a cordless drill with two different size bits.
The hull is pre-marked so try to
match the drill bit to the right porthole size.
Once all your portholes have been drilled out, lightly
sand down the interior of the hull
to remove any loose plastic from the holes. I added a
few extra portholes at the very top of the stern
and the bow.This is where the hull will be have the white
strip. The academy kit doesn't have
these premarked, but these existed on the real Titanic.
In drilling the portholes, some of them don't
actually line up correctly so I tried to compensate a
bit. This is important cause when the model is lit
up you want your row of lights to line up horizontally
as much as possible.
You will have to visually inspect all your portholes
cause sometimes excess material gets stuck in the hole.
Remove any excess material !
You can also fill all the portholes with Krystal Clear.
I didn't do this myself but I hear the effect is nice.
Another idea is to line the inside of the hull with waxpaper
after you've painted it. This will make all
the portholes white and you won't be able to see the
bulbs.
Step 2
The next step would be drilling the bottom of the hull
near the keel where your bulbs will eventually sit.
It's important to do this step now cause you'll need
these two holes as we continue on.
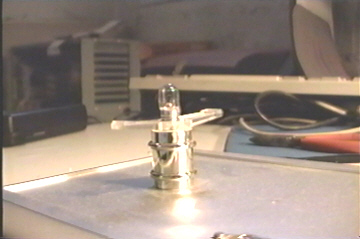
Dry fit the Gold and clear plastic supports to your display
stand. Drill through the supports and through the display stand using a
??? size drill bit.The bulbs should comfortable sit in the clear plastic
and not go through to the gold parts.
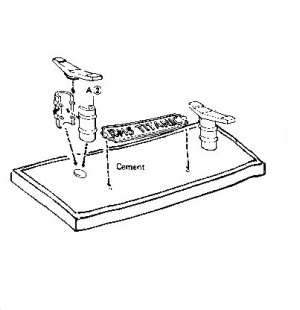
Place the hull on it's supports and the display stand.
Slide your stand with the hull sitting on it gently off the table until
only half the stand is sitting on the table. Using a felt tip marker, mark
the hull by inserting the marker underneath the stand, through the supports.
These marks will show you where to drill your holes on
the underside of the hull.
Drill the two holes at the marks using an appropriate
size drill bit.
Try sitting the hull on the stand with the two bulbs.
You should not have to force the bulbs through the hull. It should sit
comfortably and be easily removed. This will make it much easier should
you have to ever replace a bulb on the finished model.
Step 3
The next step would be to paint the inside of the hull.
Pass some string through the two holes and hang the hull
upside down for painting.
If you've already painted the exterior of hull, make
sure to cover it so you don't screw up your
black or red exterior.
With the hull hung upside down either airbrush or spray
paint the entire inside of the hull. Make sure you use a High Gloss Enamel
White acrylic. Try to give an even coat everywhere. You practically have
to get underneath it ! Paint in two or three light coats as opposed to
trying to cover it all in one coat. This will
be more effective in covering the entire inside of the
hull and won't bunch up and drip.
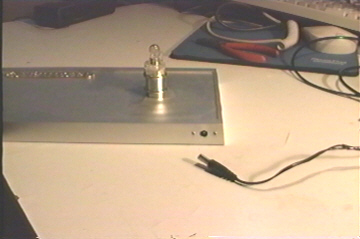
Step 4
With the inside of the hull painted, it's time for our
wiring and display stand assembly.
This step should be done now cause it will enable to
have a functional light source to test the
various light points later in the project.
You can use the display stand that comes with the kit
but I preferred a nice picce of 1.5 inch
Oak board. Stained and varnished it will add more prestige
to the finished model.
The wiring is fairly straight forward.
You want to connect your bulbs in series so they
share the voltage and amperage.
Suprisingly if you've followed the specs, your bulbs
won't heat up and they'll last a long time.
It's still a good idea to buy extra bulbs if every these
burn out though.

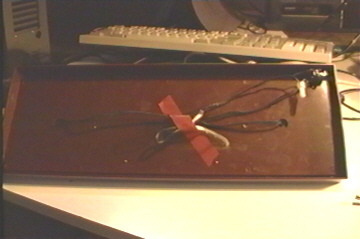
The above diagram depicts the wiring. Make sure you test
your circuit before soldering and permanently
attaching to the stand.
. 
Where
to get the Fiber Optics ?
Back to Titanic
Fiber Optics