ALTERNATOR MOUNT PG.1
BACK TO MY MENU
HAROLD'S HOME
This all started when I was having trouble with my Generator on the new trike. I had put 2 generators on it and 3 voltage regulators. I then decided to put a Bosch one wire alternator on it. Then I found out they are going up in price also they are becoming scarce. Now this is the kit made for the VW. I had seen where a person had mounted a chev. alt. on a bug with a single carb. I said why not with 2 carbs. Now the different twin carbs have different linkages so take this into consideration before you jump in. My system might not work with your linkage, but I am sure with a little planning you can make mounts that will work with your setup.
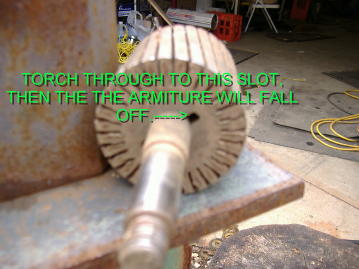 The first thing I did was strip the old generator. I removed all the guts. the armature, brush holders and communtator. I tried to beat the armature off the shaft, no way. By torching through to this slot, it just fell off.
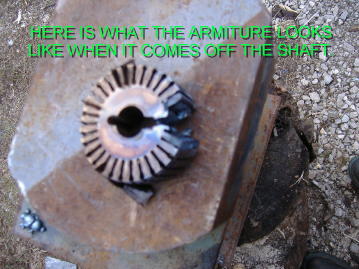 This is what the armature looks like when you get it off the shaft. It consists of thin disk's with slots in them for the wire.
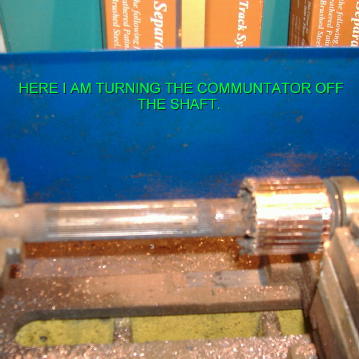 The next thing I did was turn the communtator off the shaft. You could probably remove this with a chissel, as it is made of copper and a fiber material.
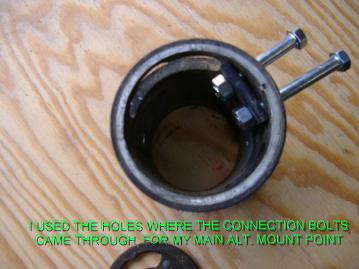 Then I enlarged the holes where the connecting bolts came out of the gen. This was where the wires connected. I drilled them out to 3/8". If you had a mill or a good drill press where you could mount the gen. steady, you could drill and tap these holes and not use the backing plate, like I did. I had them drilled out before I thought of that.
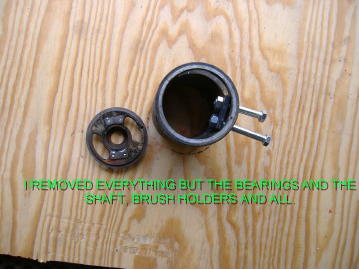 I cleaned out the gen, down to the bearings, shaft and housing
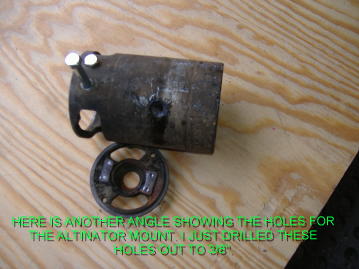 A couple more shots of the Gen to show where I drilled.
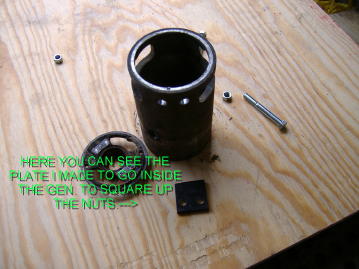 Here you can see the plate I made to go inside the housing to square the nuts up.
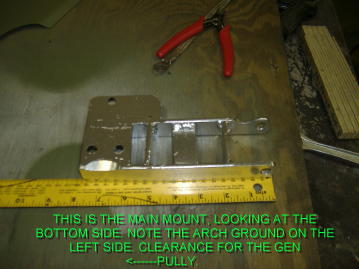 Here is the main Alternator mount that will bolt onto the gen. It is 2" between the sides and about 7 3/4" long with 3, 3/8" holes to mount to the gen.. You see the bright shinny spot on the left, that is a place groung out to clearance the gen. pully. There is also a clearanced spot on the upper right hand side. This is clearance for a hump on the alternator. This is looking at the bottom side of the mount, that goes down toward the gen.
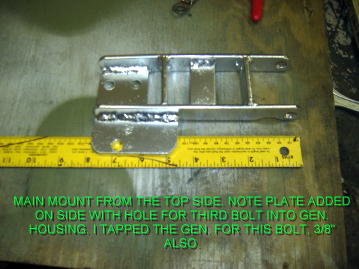 This is a picture made from the top side. You can see the holes through the beams on the right. This is where the alternator will mount too. All these dimensions are not critical, but you must keep an eye on clearances. You have a lot of play to take up the slack in your belt.
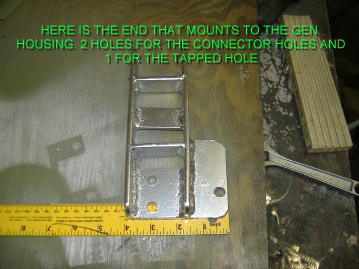 Here you are looking at the end that will bolt onto the gen. I tapped the generator housing for the 3rd hole, on the right.
BACK TO MY MENU
HAROLD'S HOME
PAGE 2