ajware .. resource centre

Photoshop / GIMP tutorial (basic technique):
I`m using Adobe Photoshop CS and GIMP 2.2.13 to do coloring of my sketches and making speech bubbles. Here`s some technique that I`ve used in the both software. This technique level are basic, more advanced technique coming soon..
You can view the GIMP tutorial 1st if you want to.. Please click here ,Thank you.
Photoshop technique:
Brief history about Adobe Photoshop : Photoshop is hugely popular image editing software , very powerfull but yet very pricey. I only have an old version of the software, and thats is , the CS version (or version 8). If you have the newer version, this technique also apply the same, not much difference.
more info can be found at
http://www.adobe.com/products/photoshop/
extra reading can be found at wikipedia at http://en.wikipedia.org/wiki/Adobe_Photoshop
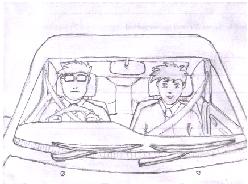
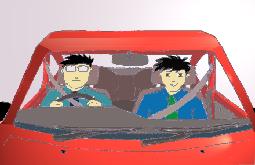
The Technique : After drawing my doodle/sketch , I scan my sketch/doodle using a normal scanner and then I start using Photoshop to start colour it.
So here`s the technique that I`ve used to color my sketch using Adobe Photoshop.
1. After you have done drawing your sketches and upload it, load the image in photoshop and it really helps if you draw it very nicely and scan in as a BMP/PNG or high resolution file types.
2. The image that you have load in the photoshop (your sketch), first you must set the brightness/contrast. Possibly if you could set it so the white area is pure white and the black area is pure black but not jaggy edges, also in this step if you found some sketch area maybe you want to clean it up first. (Photoshop menu = Image - Adjustment - Brightness/Contrast)
3. When the setting of contrast/brightness is correctly configure, go to the layer menu (Photoshop menu = Windows - Layers) , copy the image that you have done and paste it again to create another layer automaticlly (or you can simply create new layer and paste it). So now you have 2 layer, delete the bottom layer (or the older layer) so it become blank.
4. Same in layer menu, find yourself a channels tab , click the Load Channel As Selection , its a cicle button new the new layer button on the same Layers window.
5. The Load Channel As Selection will select all the white area on the image, make sure you have selected Layer 1 in layer channel , not the empty layer, and then press delete (to delete the white area)
6. In Photoshop CS , the layer will automaticlly "Preserved transperency" , so you will see what yo`re colouring.
7. Create a new layer, this new layer will be in between the background(empty) layer and the sketch layer.
8. Select the layer you have created, click the polyganol lasso and then select the place you want to colour. (Photoshop menu = Windows - tools , you have to finda the polyganol lasso tools, its in the lasso tools it self)
9. The polygannol lasso tool will select the area you want to paint, to paint the selected area, use the paint bucket.
10. Ok, heres where you skill as a drawer comes in. After finish colouring the base, Select the area you want to make an effect , lets says "Lens flare" effect, select the area using the lasso tools (I used polyganol lasso tool) , afetr selecting it, select in Photoshop menu = Filter - Render - Lens Flare
11. Now , you know the basic, try experiment with other tools in Filter menu, and try adding more layers so the original work you have done will not be messed up, in no time you will become pro .. nothing pays better then hard work !!
12. After you have finish editing the images, save it, but to save in other format lets say JPG, you have to flaten the image first (Photoshop menu = Layes - Flaten Image)
All this tecnique and tips came from http://www.cablenet.ne.jp/~japanime/tutorial/cgmain.html
you might want to check it to know the full details that i get..
Ok then , continue to the GIMP techniques ... Click here to go the my GIMP personal technique..

ps: yes its true I admit , my drawing is not yet perfect, still ugly ..