
The Guide to DIY Lens Adapter
step 1:Get the required materials. These are the must haves.
wet surface epoxy putty x 2
step down ring or step up ring with one filter
wrapping plastic or plastic bag
insulating tape
an old but clean slate (this is optional depending of whether your housing comes with a diffuser element or not)
step 2: This step is to make a schematic drawing of the diffuser element. skip this if your housing comes with one.
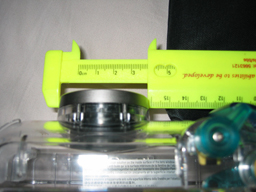


make measurements of the housing's barrel diameter
measure the distance from the top and from the edge to the barrel's edge. the area should cover internal flash position
draw paper the shape of the diffuser element, cut it out and trace the shape on the slate. cut the slate using a strong scissors first then use a pen knife to fine tune the curved part.
step 3: The lens adaptor.

cut out a piece of wrapping plastic enough to cover the housing's front.
mark out the barrel's location cut a hole so that the barrel can go thru. you should cut such a way that you start from the centre of the barrel's circular mark, forming teeth like edges.
put it on the housing with the barrel sticking thru the hole. use insulating tape to tape teeth to the barrel's side.
place the step down ring with filter attached on the barrel's top. depending on the size of the barrel, the step down ring male side should just slip over the barrel. it is important that the filter is fitted one while doing this. this is so that after the whole process, the threads of the ring can mate with that of the filter after the epoxy hardens.
mix the epoxy putty as told on the instructions, a bit at a time.


start by putting on the putty from the barrel side and work your way to the bottom. be liberal especially where you want to place the slate. use your imagination here a bit. it's like playing with clay. make sure you only put the epoxy on where the plastic sheet is covering.
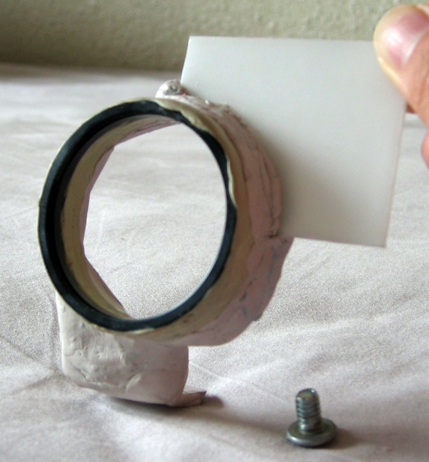
before the epoxy hardens, push on the slate that you made to where it will cover the internal flash of the camera. push it hard.
after it hardens, you can remove the molded adapter by holding on to the barrel and twisting it a gently. it will come off eventually. after that just peel off the plastic.
step 4: Making the attachment module


next is step is the building of the screw plug. cut a small piece of plastic position it at the screw's head.
cover the plastic and screw head with epoxy. shape it and allow it to cure.
step 5: Aesthetics
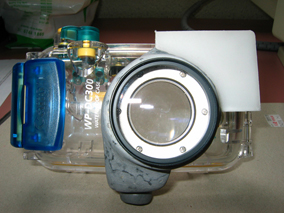


Congratulations! you now have a fully functional DIY lens adaptor.
epoxy putty x 2 : $10
step down/ up ring : $8
old slate : $5
insulating tape : $0.50
plastic bag : free
total cost : $23.50
| Home |