TablesWe are going to start putting it all together by showing you how to make more complicated page layouts using Tables and Framesets in your website. Tables allow us to define certain areas of space where we can insert either images or text. We can also build Tables inside of Tables allowing for very complex page layouts. So lets layout a basic table that is two rows with two table cells in each row (giving us a window pane look) using our new TABLE Tags.In its most raw form the tags look like. <TABLE> <TR> <TD> </TD> <TD> </TD> </TR> <TR> <TD> </TD> <TD> </TD> </TR> </TABLE> If you're starting to figure out the tags the<TABLE> tag startts the table and conversely the </TABLE> ends the table. The <TR> and </TR> what will be included in each row. Notice there are two sets of <TD></TD> Tags in each row. These are the two Table Cells which exist in each row. If I wanted three cells in each row I would put three sets of these <TD></TD> Tags in each row. So if you save this and look at iy with your browser nothing appears. Strange right? ..Not really... its because we havn't defined our TABLE variables and haven't included any text or images inside of each cell. Inside our Table tags we can define a few basic variables that give the Table its form. Also we will type some information into each cell area so we can see it when we save it and view it in our Browser <TABLE BORDER="2" CELLSPACING="2" CELLPADDING="2"> <TR> <TD>item 1 </TD> <TD>item2 </TD> </TR> <TR> <TD>item 3 </TD> <TD>item 4 </TD> </TR> </TABLE> which displays a table like this
The variable BORDER tells the TABLE what size its frame should be. CELLSPACING defines the distance between cells and CELLPADDING defines the area inside the cell which acts like a buffer zone to the text (much like HSPACE did to your images back in Lesson 2). Play with these numbers assigned to the variables and see what they do. Increase them individually to 25 and view the changes one at a time to see what area is affected. If you want your BORDER to go away so that the words are just floating on your webpage tell the table BORDER=0. So what else can we do ? We can also give a TABLE a unique background color by defining a BGCOLOR variable iside the TABLE Tag. Such as <TABLE BORDER="2" CELLSPACING="2" CELLPADDING="2" BGCOLOR="FF0000"> <TR> <TD>item 1 </TD> <TD>item2 </TD> </TR> <TR> <TD>item 3 </TD> <TD>item 4 </TD> </TR> </TABLE> which in my example displays a red background
We can also assign variables to the <TD> Tags inside the table. Variables we can assign are WIDTH and HEIGHT. Remember though that if you declare a Table Cell to be a certain number of pixels wide it will also affect the cells directly below it. Also if you tell a Table cell to be a certain number of pixels high it will affect all Cells located in that row. For example. <TABLE BORDER="2" CELLSPACING="2" CELLPADDING="2" BGCOLOR="FF0000"> <TR> <TD WIDTH=100>item 1 </TD> <TD>item2 </TD> </TR> <TR> <TD>item 3 </TD> <TD>item 4 </TD> </TR> </TABLE> displays the first cell to be 100 pixels wide like below
if I now tell that same cell to be 100 pixels in HEIGHT <TABLE BORDER="2" CELLSPACING="2" CELLPADDING="2" BGCOLOR="FF0000"> <TR> <TD WIDTH=100 HEIGHT=100>item 1 </TD> <TD>item2 </TD> </TR> <TR> <TD>item 3 </TD> <TD>item 4 </TD> </TR> </TABLE> it affects only the cells in that row
so now if I tell my item 4 cell to be HEIGHT=100 it will increase the height of item 3 cell <TABLE BORDER="2" CELLSPACING="2" CELLPADDING="2" BGCOLOR="FF0000"> <TR> <TD WIDTH=100 HEIGHT=100>item 1 </TD> <TD>item2 </TD> </TR> <TR> <TD>item 3 </TD> <TD HEIGHT=100>item 4 </TD> </TR> </TABLE> like this
You can also give a BGCOLOR variable to each individual Cell by declaring it in the <TD> Tag of that cell <TABLE BORDER="2" CELLSPACING="2" CELLPADDING="2"> <TR> <TD BGCOLOR="#11AA44" WIDTH=100 HEIGHT=100>item 1 </TD> <TD BGCOLOR="#A61076">item2 </TD> </TR> <TR> <TD BGCOLOR="#FFFFFF">item 3 </TD> <TD BGCOLOR="#FF0000" HEIGHT=100>item 4 </TD> </TR> </TABLE> displaying 4 different colors like below.
and since we didn't need the BGCOLOR variable in the TABLE Tag you will notice I deleted it in this previous bit of code. Another important thing to know about tables is that each cell can be affected by whatever the largest image or continuous line of text is and there fore can affect its neighboring cells. So if you declared that a cell is WIDTH=100 HEIGHT=100 and you put an image in that is 200 pixels high and 200 pixels wide the cell will expand to the picture size(200x200px) which means all cells below get affected by its width and all cells beside it get affected by its height. Also it is important to know that by default all items in that particular cell will automatically align to the middle part of the cell. Notice in my examples above that every where it says item 1 or item 2 etc. ..they are located in the middle of the cell and by default along the left edge of the cell. To align what is contained in a cell... to the top edge of the cell... there is another variable we can put in the TD tag. It is VALIGN=top. <TABLE BORDER="2" CELLSPACING="2" CELLPADDING="2"> <TR> <TD VALIGN=top BGCOLOR="#11AA44" WIDTH=100 HEIGHT=100>item 1 </TD> <TD BGCOLOR="#A61076">item2 </TD> </TR> <TR> <TD BGCOLOR="#FFFFFF">item 3 </TD> <TD BGCOLOR="#FF0000" HEIGHT=100>item 4 </TD> </TR> </TABLE> Notice now item 1 aligns at the top of its cell
<TABLE BORDER="2" CELLSPACING="2" CELLPADDING="2"> <TR> <TD VALIGN=top BGCOLOR="#11AA44" WIDTH=100 HEIGHT=100>item 1 </TD> <TD BGCOLOR="#A61076">item2 </TD> </TR> <TR> <TD BGCOLOR="#FFFFFF"><P align="right">item 3</P> </TD> <TD BGCOLOR="#FF0000" WIDTH=100 HEIGHT=100><CENTER>item 4</CENTER> </TD> </TR> </TABLE>
So we can also put images in our Tables by using the IMG SRC Tag. I premade some images and saved them as .jpgs and placed them in my images folder. And then call them the way I would normally call them. <TABLE BORDER="2" CELLSPACING="0" CELLPADDING="0"> <TR> <TD><IMG SRC="images/one.jpg" ALT="one"> </TD> <TD><IMG SRC="images/two.jpg" ALT="two"> </TD> </TR> <TR> <TD><IMG SRC="images/three.jpg" ALT="three"> </TD> <TD><IMG SRC="images/four.jpg" ALT="four"> </TD> </TR> </TABLE>
Notice I turned my CELLSPACING and CELLPADDING down to 0. If I also tell my TABLE BORDER=0 the borders will go away and the images will appear to float. <TABLE BORDER="0" CELLSPACING="0" CELLPADDING="0"> <TR> <TD><IMG SRC="images/one.jpg" ALT="one"> </TD> <TD><IMG SRC="images/two.jpg" ALT="two"> </TD> </TR> <TR> <TD><IMG SRC="images/three.jpg" ALT="three"> </TD> <TD><IMG SRC="images/four.jpg" ALT="four"> </TD> </TR> </TABLE>
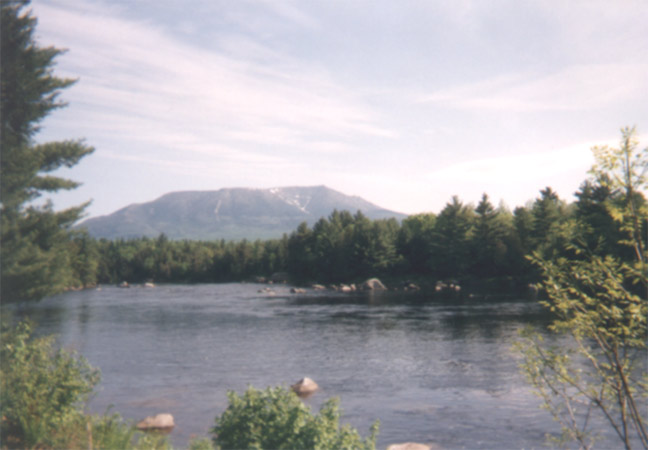
So now I could call back up my picture of a mountain put it in a cell.... with some text describing the scene in one cell... maybe a Title in another cell and of course use some of my FONT variables to affect the text areas and get something like:
Notice my image is still a hyperlink which launches the larger image. A Table can also exist inside a Table for more complex layouts. Here I initially make a Table that is one row with two cells. Giving myself space inside each cell so I can visualize where my next table will go I also tell the first cell to be WIDTH=144 <TABLE> <TR> <TD WIDTH=144> </TD> <TD> </TD> </TR> </TABLE> Then I create a two row table with 2 cells in each row and paste it inside the second cell of my first table withe the information from my mountain example and I also write some text in my main table's first cell and I will align center <TABLE> <TR> <TD WIDTH=144> <CENTER> This<BR> is<BR> my <BR> first <BR> column<BR> which<BR> is<BR> really <BR> the<BR> first<BR> cell <BR> of <BR> my <BR> main <BR> table<BR> </CENTER> </TD> <TD> <TABLE BORDER=2 CELLSPACING=2 CELLPADDING=2> <TR> <TD><FONT SIZE="4" FACE="Arial">Mt.Khatadin<BR>Northern Maine</FONT> </TD> <TD><A HREF="images/mtnlg.jpg"><IMG SRC="images/mtnsm.jpg" BORDER="0" ALT="two"></A> </TD> </TR> <TR> <TD> </TD> <TD><FONT SIZE="2" FACE="Arial">A scene from Abol Deadwater<BR>on the West Branch<BR>of the Penobscot River<BR> looking at Mt.Khatadin</FONT> </TD> </TR> </TABLE> </TD> </TR> </TABLE> and what you see is a column of text with the example of the mountan in the right cell.
To make the BORDER go away make sure the BORDER on each table is set to 0 One other note : You can tile the background of a table cell by using the background="nameof.gif" inside the TD Tag of that cell. This allows you to use Text or other images on top of the background image. So as you see you can get as complex as you might ever want to by using Tables to define your space. Remeber if things don't display go back and check your code for a forgotten quotation mark or a missed end bracket or make sure all the images and documents are in the proper folders and spelled correctly. Its usually some minor typing error or some other silly mistake that causes your code to malfunction. To view additional Tables and a table using the Invisible Pixel Trick Click Here and view page source. |