Access: 5min walk. Approach via Boundary Road on the S side of Waverley cemetery. Where the road turns S, walk N 80m and a touch NE and you're on top of the cliff. Descend at the N or S end. Mail Sorter is the obvious roof crack near the centre of the crag. Flexi Time (24) 10 m L of MS looks good, as do Poste Haste (21) and Hook Line and G-String (23 M1).
Not Wot It Seams 18m 14 (YP)
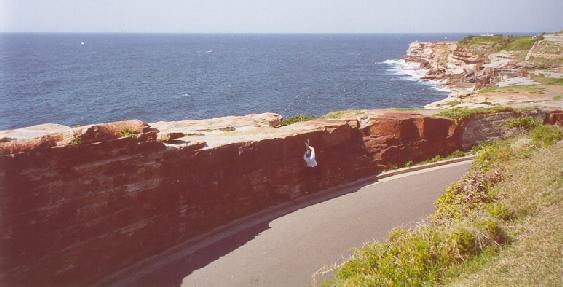
Considerably milder than most here. Start on the blunt arete about 10m R of MS, behind giant block. Climb past BR to ledge, move L around overhang and climb wall past BR. BB well back, and friends near edge. Water rushes in here, so don't go on a rough day, unless you're a good swimmer!
? 20m 12 (YP)
An unmarked climb on the N side of the rubbishy gully, in the centre of the cemetery. Bolts at top, mantle your way boringly to the top.
Access: It can be found in the road cutting 100m S of Bronte Beach (ie about 150m N of the crag). This is often used as a paid car-park on weekends, so beware cars roaring past. If you don't want to pay their exorbitant parking fees, you can reverse into the top end of the cutting for free! :-)
West Side Traverse 30m V0 Good feet, interesting hands, excellent warm up.
The rest of the problems are on the East side, described from R to L (uphill to downhill).
East Side Traverse 30m V0/1 Go either direction. Marginally harder, mainly jugs, but crap feet with the odd crank required. Your second warm-up.
** The Right Side Traverse 6m V3/4 Start in break 10m L of steps, in the middle of the compact 2.5m-high section (excellent frictional rock). Goes L to R, no hands on top! Up R to small crimps, tricky footwork to reach out R to smallish R hand. L hand cross-through to the slightly higher very slopy crimp. Extremely delicately unravel to latch good R hand at end of wall. The slopy L hand crux crimp has a few alternatives -deduct grade(s) and a star if you use them instead.
Here's a view of Peter crossing through to the crux slopy crimp. The Bronte seacliff crag can be seen 200m away, below the corner of the cemetery.
* Drill Hole 4m V2 Start on the initial crimps of TRST, reach out L to the drill hole. Delicately sidepull and cross through to furthest jug on top.
* Sloper Problem Number One 5m V1 Start 2m R of a waist-high alcove, about 10m down from DH. Crap feet to start, work slopers L then up, using cross throughs only - no matching.
** Sloper Problem Number Two 4m V2 Start in the small waist-high alcove. Squat/stem the alcove with hands on slopiest part of break. Up to poor L hand sloper, then up R to the last sloper on SPN1 (not the better lower one!). Crank to high jug on nose.
* Yoga Master 4m V2 From break 1m L of SPN2, reach high to L hand gaston, put your R foot next to your R hand (Yoga masters only), then crank the gaston up and R to furthest jug.
* A 4m V2 About 50m R of surfclub is a good jug on the lip of one of the blank overhangs. Jump to jug/plate, then a big foot-free crank to high hold (not the lower slopers to the R!). Brave souls might even venture to the top, bring a crashpad...
At the R end of the big blank obvious overhangs/caves, the bulge/lip gets much lower (25m L of TSO). Several good short problems are here, big jugs but very poor feet make for some powerful cranking moves. Depending on sand levels the sit-start can be like going caving!
5m L of TSO is a possible problem out a slightly soft roof using a pinch and a pocket - looks like a damn good problem, if a little desperate! Probably want a crashmat unless the sand covers the rock shelf.
* The Stormwater Overhang Traverse 6m V1/2 The highball traverse L-R along the lip. Heelhook or just go foot-free. Committing when the sand isn't covering the rockshelf! Here's me fooling round out on the lip...

*** The Outlet Roof 5m V3/4 Start both hands in deep so-so break, L hand on crystally sidepull. Crank a big span move out conglomerate roof to R hand on lip. Out to hang on the lip, then tricky L hand heelhook move to jug, then fun steep cranking to both hands on top. An excellent steep problem.
* D 5m V2/3 Start R of TOR, avoid hard roof start, traverse in to same L hand heelhook move then up TOR.
There's more variants on TOR and D in the V1-V4? range.
For a complete description of all Sydney crags, go to the Sydney Rockclimbing Club's on-line Sydney Guide.
© 2002 Will
![]()