> Will's Climbing Page > Crags > Sydney > Lindfield
Lindfield Rocks
The Word: Fantastic bouldering venue.
Sun/shade: Afternoon sun.
Wet weather options: Pipe Dreams, and maybe try The Overhang Block.
Style of Climbs: 0-6m bouldering, a toprope is often handy. Mainly vertical but some steeper stuff too.
Grades: V0-V9?
Best Problem(s): Heaps, but Overhang Block (V1/2) and Pipe Dreams (V3) are both mindblowing.
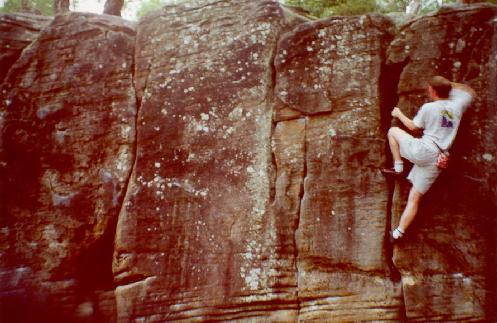
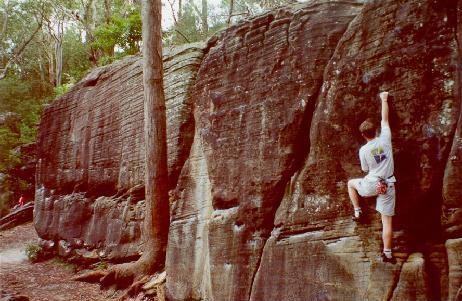
The Details: The longest used and heaviest used bouldering in Sydney - and for a good reason too: this place rules! Extremely simple to quite hard, but mainly vertical stuff. Crackwork of almost all descriptions - finger and hand cracks and offwidths. There's plenty of top rope bolts for those slightly freaky top outs, and it's well worth taking the time to set up a toprope, cause there's some nice problems. Pipe Dreams boulder resides about 60m L and 30m downhill, and provides a bit of overhanging stuff. Go for it. Gets a lot of use.
Access: To find it, go 1km down Tryon Rd from Lindfield Station. After crossing Archbold St, turn L to the tennis courts and walk 50m past them.
Problems are described R to L, using the same numbering system as for Peter Balint's excellent "Sydney Bouldering Guide".
Walkdown Wall
Don't confuse this with the little wall first encountered at the base of the steps, rather it's the recessed wall further on (with another walkdown past it for descending after topping out).
(8) 4m V2 Short crimpy wall staying R of the crack which goes all the way and staying L of the crack which only starts 8foot up.
* (10) 4m V2 Nice wall L of crack, steep from break over bulge then thin wall.
** (11) 4m V1 Even nicer, the L arete. Should be one of your Lindfield standards.
Kenny Boulder
(no, not a South Park reference!) The N side has stacks of smear/layback problems, while the S side is easy and good for warming up or trying hands-free problems! Also fun to try a "not on top" traverse of the whole thing - L to R round the E nose is a classic sequence, the N side is hard!
* (3) V1 6m: a good layback problem up the W arete of the boulder but an ankle breaking landing.
** (5) V1 6m: Start just L of (3), better moves, same scary landing. Friction conditions are important, some days it's desperate, some days it's easy!
(10)/(11) V1 5m: Avoid 11's overhung start then step L and up to it's slopy hold.
Four Cracks Wall
Rather obvious from the name, really.
** Upper Traverse 15m V1: An excellent traverse from the Downclimb Slab all the way left to Abseil Wall, with feet staying about 5 ft off the deck mostly in the obvious break. Good warm up and not too difficult so don't worry about the height, plus the moves to the arete are great.
* (6) 4m V0: The R crack. A good jam problem, harder if you don't layback past the niche like Peter is here.
(8) 4m V3: The next crack, no using faceholds, it's pretty hard (toprope it).
(10) 5m V1: Next crack L, still no faceholds, and also tricky.
** (11) 5m V0: Classic warm up, you should be able to do this asleep/blindfold/backwards etc! Juggy wall between the two left-most cracks, with one slightly tricky move to gain the face above the break. Here's Peter enjoying it.
(12) 5m V2: the L crack, fingery through half height.
Abseil Wall
A concentrated offering of thin crimpy wall problems, with a big tree against the wall at the R end.
** (8) The Tourist Route 5m V2: Left of centre, crimp up the wall. It's the 'easiest' thing on the wall, but I'd still toprope it, it's not easy. While desperately clinging on, think of Bryden's regular solos of every problem on the wall...
Black Wall and Wide Crack Area
The alcove L of AW.
* (9) 5m V1: Climb the arete at the L end, staying on the R side and using a nice sidepull flake right on the arete.
One Hold Wall
Shocking landing and hard problems. The traverse is hard.
* (9) 6m V0-: Nice warm up on the juggy front of the buttress on the L.
Pipeline Wall
** Layback Crack 5m V1: classic laybacking, but get a spot in case a foot pops.
* (14) 5m V2: 2m L of LC, slopy holds in break and poor feet, crank to R hand gaston and through to better holds in horizontal. Easy to top or swing L.
Snout Rock
** (5) 5m V0: classic slopey slabby traverse opposite the Layback Crack.
She Oak Wall
Quite a few highballs here.
* She-Oak Crack 6m V0: Straight up the crack, watch for dirty rock and loose holds up high. Bad landing.
** (7) 7m V0+: Follow the diagonal crack up and L. Beware loose holds up high.
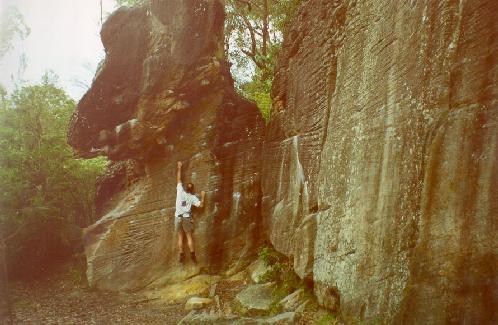
The Overhang (aka Isolated Block)
Home to probably Sydney's best boulder problem. Here's Ron on a thin problem R of TO, with the rather high She Oak Wall on the R.
* (1) 4m V2: Start below R side of the obvious overhang, off R hand pocket, up small flake then R to top.
*** The Overhang 8m V2: A megaclassic highball with a roof and a steep tiring headwall providing some scary moments! Not so hard but a real mental challenge, a brilliant tick.
* The Overhang Dyno 3m V2: From the juggy side of the cave, dyno to jugs on the lowest part of the lip of the roof - a fun airy swing will follow.
Pipe Dreams Boulder
* (4) 4m V2: Good steep jugging.
For a complete description of all Sydney crags, go to the Sydney Rockclimbing Club's on-line Sydney Guide.

© 2002 Will