Available Grades; Best Grades: 4-22; 13-20
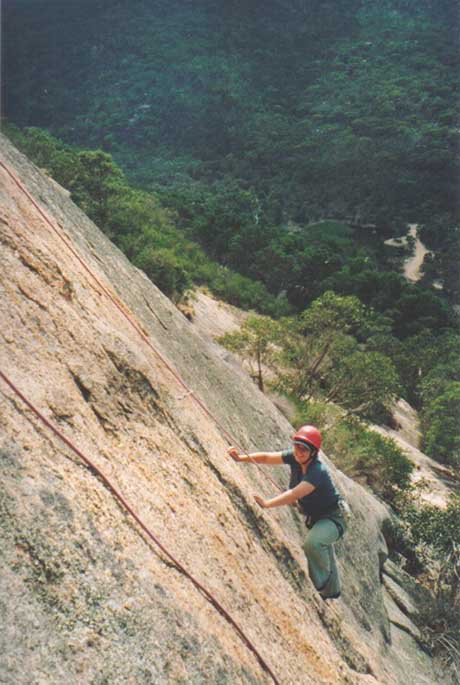
The Details: Good slab climbing and a great view - you’re up above the surrounding plains and can see the Bay, Melbourne city and Geelong - a lovely place to be.
.

| Will's Rock Climbing Page > Crags > You Yangs |
Last updated: Mar '04 |
Access: 45min drive from the centre of Melbourne to the park entrance, plus 2-15min drive round the park to your crag of choice. Walk-ins vary from 1-15min. Follow the freeway towards Geelong (warning, heaps of speed-cameras), and take the exit to Little River which is also well signposted for the You Yangs. From here the way is well signposted. Drive through Little River, the road will veer sharply R then cross a railway line. Turn L just after the railway which puts you on a road headed straight for Flinder's Peak, the highest hill. Follow this to the T junction at the end, turn L for about 2km, then turn R and continue for about 5km to the park entrance on the R, at the southern end of the park. There are some 2-way roads close to the entrance station, but otherwise a 14km one way loop road goes clockwise around the park (~20mins to do the full loop), and crags are described in the order you access them on this drive.
Also note that the gate at the entrance to the park is locked at 4.30pm. While there are some one-way spikes which allow you to drive out whenever you like (strictly speaking you have to leave by sunset), what this does mean is that you have limited park access in the afternoons. This is not a huge problem so long as you plan ahead, and so the Youeys are still one of Melbourne's best "after work" crags throughout daylight savings. After 4.30pm the car parking options, with associated accessible crags, are:
Outside Main Entrance: Big Rock (5 minute walk), Turntable areas (10min?);
Toynes Rd (bottom of Branding Yard Rd): Westauwant Wall (5min), Corio Ridge (10mins?),
Nightfall Pinnacles (12mins); and
Drysdales Rd: Lust Buttress (5mins?), Shooting Range (if no shooting! 20 mins), The Rock (5mins), Cressy Gully Rd Crags.
In fact, if you download the map from Vicparks (link below) and compare it to the great maps in the latest VCC South West Victoria guide, you'll find there's even more options than these. So all you need is to remember a headtorch for the walk out!
|
Sun/shade: The climbs from Andy Pandy to Psychedelic Termination start getting shade around midday, the rest later in the afternoon. Available Grades; Best Grades: 4-22; 13-20 The Details: Good slab climbing and a great view - you’re up above the surrounding plains and can see the Bay, Melbourne city and Geelong - a lovely place to be. .
|
Flinder's Peak viewed from the Little River road. The biggest section of rock is the Flinders Slabs.
|
Descent(s): Rap off DBB.
|
* Andy Pandy 19m 13 (OS) Rap from the southernmost DBB (to the far R as you walk down to the top of the wall). Cam behind a big flake off the deck, then stem 5m up chimney. Do a balancy lunge/step onto small holds on the slabby right hand face, then easier climbing leads to the bolt at 12m. Some awesome climbing on orange rock leads over a bulge and up the slab with the odd crimpy flake to the DBB rap anchor.
Crinkle Cut 18m 14 (OS)
** Tewkesbury 25m 16 (OS)
|
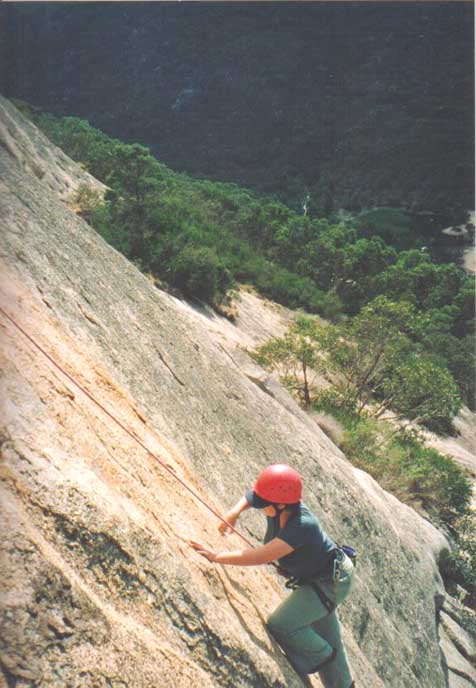
Nic cruising Tewkesbury.
|
|
|
Sun/shade: Either at anytime, except midday when both sides will be in sun. The main area (shown on the right) faces WNW so gets morning shade. The Eastern side gets morning sun, obviously. Available Grades; Best Grades: 4-26; 14-23 The Details: Climbing banned on Sundays and Public Holidays. A nice sweep of rock. Looks like the main wall slabs should be quite pleasant, while the Eastern side looks short and hard. Access: 2min drive from the entrance, well signposted access, with a 1min walk in. Descent(s): Walk down wherever. . . . . .
|

|
Access: 2min walk. Drive round the loop road to the northern end. It will start to head uphill, and where it swings sharply left a carpark appears on the right, with a locked gate. Walk past the locked gate and follow the road/track downhill for 100m until it flattens, at which point a set of granite steps and a small emergency sign appear on the L. Walk up the steps and continue 80m gently uphill to the base of Aiming to Please (* 15).
Descent(s): Walk down either end.
Pissing on a Friend 18m 17 (YP)
About 3m R of where the walk-in arrives is a well defined black streak leading to the R end of a large overlap flake. Up the black streak with some (but not enough) nice moves on small edges past a BB, then better holds appear near the flake (cam possible - though the flake wobbles a bit). Hands-free 10m slab finish.
* Round the Bend 18m 17 (YP)
Good. The hardest thing I did here - definitely harder than RF. The walk-in track deposits you below an overlap/flake 7m off the deck. This route takes the black streak leading to the L end of the overlap/flake. The lower half takes the black streak past 2 BBs, with a long sequence of insecure moves on poor footholds, then the upper half being the usual hands-free slab finish.
* Aiming to Please 18m 15 (OS)
After leading this to start with, I reverted to toproping because of the scary belaying of my extremely hungover belayer! :)) Probably the best route I did here - certainly has the most moves at one grade. 2m L of where the walk-in arrives, a L leading diagonal joint/seam system cuts down the slab. Use the good holds on this mainly for your feet, head up past 2 bolts. Hesitant leaders might find some solace in slinging a jug/flake up higher (though take something heavy to weigh it down with), before the usual hands-free slab finish. DBB on small boulder at the top can be used to toprope everything from PoaF to RF.
* Royal Flush 18m 18 (YP)
NOT a 3 star route. In fact it's not even as good as AtP or RtB, and wouldn't even get one star from me at any other area. Also seemed very soft for 18 (admittedly on toprope). It takes the concave section at the left end of the slab, just R of the nose. Some tricky polished moves off the deck, then easily up to the carrot. From here some excellent positive footholds lead up just L of the FH - it's really quite straightforward.
Access: 15-20min walk, described how we did it though the new guide suggests otherwise. Park as for Urinal Wall. Walk past the locked gate, veer L at a fork in the track to the Saddle Carpark (10mins). Then start along the Eastern Walking Track - take care here, there is a much more obvious track (which starts between two wooden posts) which is not it, and is a dead end after 500m. The best way to be sure is to walk right up close to the signpost at the uphill end of the carpark, and from there you can see the start of the Eastern Walking Track, obscured by a dead tree over the start. Follow this track up and around to the other side of the small valley for 10mins to a steel pipeline cutting across the track. Continue to a small rock platform and cleared area on the left - about 150m after the pipeline (not "just after" the pipeline like the old ROCK guide says!). The track goes straight downhill from the rock slab, over some more slabs and through lots of f***ing prickly bushes, to a big open slab of rock above the climbs.
Descent(s): Walk down to the very top of the climbs, and an obvious descent gully becomes visible on your left (facing out), requiring a squeeze at one point.
* Fig Leaf 25m 10 (OS)
Yeah, a fine route at the grade, and you might persuade me it earns another star for someone at their limit. But let's face it, it's hard to get excited by a 10 at the You Yangs. Up the nice line (may be seeping), then some nice moves where it steepens and when stepping left to the next crack. Up easily to the v-corner, and 3 stem moves gains the belay.
Access: Drive round the loop road, when it is heading East at the northern end of the loop, it winds up a hill. Almost at the top of the hill is a small parking bay on the left, while some granite steps lead up R from the road. The crag is a 2min walk up the track.
Descent(s): Walk down at the L (N) end.
Corner R of Jack of Hearts 8m 8 (OS)
Did this to set up a toprope for a 7 year old beginner...who couldn't even get off the ground! Taks a big cam or two if you want to protect it.
* Dead Queen in the Middle of the Road 15m 17 (OS)
A really nice slab route up the proudest section of the crag. The lower third is really just to get going, then the upper 2 thirds is really nice sustained slabbing.
Live and Let Di 14m 16 (OS)
An ok slab just R of DQitMotR, and just L of the crack (no bridging!)
Lord Louis Mountsplatten 13m 18 (OS)
A desperate thin start then easier to the top.
|
Sun/shade: Afternoon sun. Available Grades; Best Grades: 8-28; 16-28 The Details: Probably the best single chunk of rock in the park for climbers. However, the guide comparing it to the Cathedral at Buffalo is stretching it way too far!! Access: 5min walk in. Continue round the loop road past Royalty Wall for another 300-400m or so. The tor becomes obvious ahead and to the R. A picnic area appears on the R, however the parking is just past it on the left. Walk towards the tor and tracks will appear heading up the hill. Descent(s): Generally, walk off the back and back down the left (N) side. . .
|
Gravel Pit Tor viewed from the carpark, with a climber atop Can't Buy a Thrill (18). The top of Silver Knight is visible being the crack splitting the low central buttress. Also note the steep crack of Orpheus (M5) on the left.
 |
|
Can't Buy a Thrill 18m 18 (YP) Another ok route, in fact it's quite good by Youies standards. The slab is really thin and I thought it was harder than the 17 it gets in the guide. The first bolt is a little bold to get to but ok. The top crack is nice and pleasant.
Can't Buy a Thrill (18) viewed from the base  |
* Countdown to Ecstasy 10m 19 (OS) A lovely but rather short arete, just R of the crag classic, Silver Knight (16). Worth a star at the Youies. Not your typical holdless granite smearing but rather a nice series of moves on small but definite holds. 2m R of the climber in the shot below.
The very popular Silver Knight (16)  |
Take a Hard Ride 10m 23 (L)
As the seventh route of the day it was always going to be a tip shredder. Starts in the gully above/behind Silver Knight (visible in the overview shot above), it's the leftmost of 3 bolted routes up the R wall to the summit. Some rather nice moves past 3 bolts, the crux being stepping up and L from the 3rd bolt.
Climber starting on the corner crack of Opossum (16). A Question of Ethics is a highly rated 20 up the middle of the slab with just 3 bolts. Harder things are on the R of shot.
|
Same slab on the left behind trees, this time showing the imposing overhung section of the crag. A 24 and a 26 go up either side of the overhung arete.
|
The Details: A surprising number of ok little routes.
Access: 5min walk in. After passing Gravel Pit Tor, the road winds down the hill and heads southwards. As the road flattens out you emerge into an open area with picnic tables and parking spots, park here. Looking up the hill, the pinnacles are off to the right as seen in the picture below. There is a diagonal path up to the pinnacles which starts climbing almost from next to the road, which is probably the straightest line though not so easy to find/follow. More obvious is to walk from the road through the flat open area until directly downhill from the pinnacles, where an obvious path blats straight uphill.

|
Descent(s): Double rings above Nightfall (12m rap). Double carrots above Wilkinson's Sword and Fade to Black et al. To get off the Fade to Black boulder I recommend slinging the massive boulder forming the chasm at the base of Night Breed, running your rope through the 'notch' in the boulder, and rapping down Fade to Black, taking extreme care not to swing right!! Other routes have walk downs.
* Nightfall 12m 15 (YP)
|

|
|
Things That Go Bump in the Night 12m 19 (YP) This takes the booming flakes on the R side of the near-vertical face just uphill from the Nightfall Boulder, and just to the R of WS which is marked in the photo above. A little tricky off the deck, then a one-move wonder crux from the top of the first flake into the second. Not too hard for 19 but the gear would be suspect. DBB.
Things That Go Bump in the Night - Ben trying not to pull any holds off.  |
Wilkinsons Sword 12m 20 (OS) Marked in the photo above. The guide gives it 19 but the loss of some holds makes it solid 20 at least. Up the same scary flake start as TTGBitN, plug some dodgy gear then an easy enough clip of the first bolt. Some heinous cranking on razor-sharp edges (sounds like an advert for a shaver company doesn't it) leads up to the 2nd bolt where the climbing eases, past an optional small cam in a horizontal to a runout finish. DBB.
 . .
|

Night Breed 8m 22 (YP)
Takes the uphill face of the Fade to Black boulder, with L hand on the arete. Thin climbing getting desperate past the 2nd bolt. If leading, beware the potential swinging fall into the chasm formed by the large boulder behind.
Falling Dark 9m 16 (YP)
A death lead but a nice little toprope if you've got the anchor set up. Takes the R arete of the slab on the Fade to Black boulder (ie just R of FtB and just L of NB). Easy enough slabbing leads to a tough move over the top bulge.
Fade to Black 10m 17 (YP)
Gets 18 in the guide, which is fair enough given its boldness. Technically only 17, nice thin slabbing leads up the middle of the slab past a bolt, then another tricky move over the top bulge with only a dodgy flake offering any pro.
The Left Hand of Darkness 11m 16 (YP)
The L arete of the slab past a single bolt is probably the easiest of the lot. It's not that bold to get to the bolt but the top bulge again is the hard bit and would be bold on lead.
![]()
© 2001-2004 Will
![]()