The "Ins" and "Outs" of
Making a HoleHog-like Device.
I first learned of a "HoleHog" while visiting Kellyco in Florida. It seemed
like a good idea, but they were priced too extravagantly for the time that was
actually put into manufacturing them. So I didn't buy one.
but......the idea stuck with me...and I, having a little experience with tools and
such, figured I could make one with a personal touch....that would out-do the model I saw
in the Kellyco store....
This is How I did it.....
1. First, I had the advantage of handling and examining the actual
"Prototype"....so I knew what I didn't want. The one in store
was very short, the wall thickness was .125 inches, and it was not even sharpened. The
handle was a 1" plastic ball and I could see that digging into the hand after short
usage. These were the features I would 'repair'.....
2. Material.... Basically, all you need to create one of these puppies is some pipe. I
would recommend going to your local electrical hardware and getting the pipe for the main
tube. I used an old hydraulic cylinder and turned it down on a lathe.
You could effectively produce the same tube using EMT conduit. (EMT is thin, and comes in
the sizes needed.)
A list of material would be.....
- 2" EMT conduit for the Main Coring Tube.
- 1/2" Black Pipe (i.e. Gasline pipe) for the Handles.
- 3/8" Steel Rod for the Plunger Rod.
- One 3/8" nut with the threads drilled out of it.
- and a few other pieces we'll discuss....using pictures....
So, First, lets take a look at the finished product.....
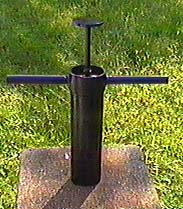 |
Not too bad for next to free, huh? I know it doesn't have handlegrips, but
hey.....
It is 18" long and thinner that you would think by just looking at it.....
Lets take a closer look....What would be the first thing you would do?... |
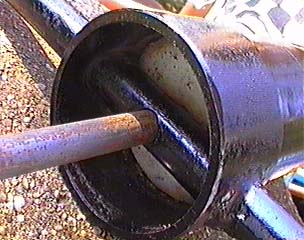 |
Drill the Main Tube to accept the "handle".... I drilled
completely thru the Main tube with a 3/4" drill so that my 1/2" black pipe would
slide in. After drilling thru the Main Tube, go ahead and drill a 3/8" hole thru the
center of your Handles....(so your Plunger Bar can slide up and down) When you finish
drilling both of these you can slide your handles in until the hole you drilled in
the handles is centered in the Main Tube. Now we get to make the Plunger Rod. |
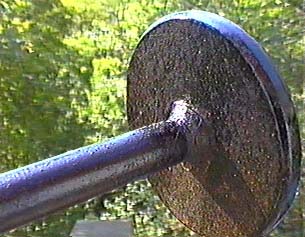 |
First thing I did is make up a end piece that would fit the palm of my
hand, yet be strong enough to smack into a tree to dislodge a stubborn
"core"...So, I welded a flat 1/4" metal disk (2") to the end of my
Rod. (If you drill a hole thru the center of your handle, it'll stay centered while you
weld. Next, I had to drill and thread the other end of the Plunger Rod for a 1/4"
bolt. Center your drill on the end of the rod, and use a #7 drill bit. (A 1/4-20 threading
tap requires a #7 drill bit) This is so you can mount your Plunging attachment. |
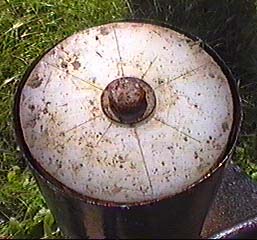 |
In this picture, you can "see" the other end of my Plunging Rod
. All you can really see is my Plunging attachment. My attachment is made out of UHMW
(i.e. Teflon....) but you could easily use Plywood or anything else that would stand up to
the abuse of rocks....The attachment is only about a 1/4" thick. You
drill a 1/4" hole thru the center of it so you can pop the bolt thru and crank it
down nice and tight. |
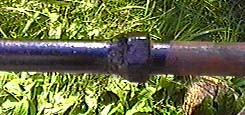 |
And now...a VERY important addition. If you notice from the finished
product, the plunger handle stands up above the hand handles for some unknown reason. The
picture on the left is why. This nut is slid onto the plunger shaft to hold the handle up
so it doesn't let the plunging attachment slide all the way out and also....so the plunger
handle doesn't slide down and smash a unsuspecting finger!! |
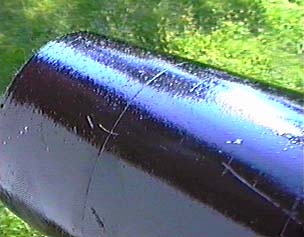 |
I marked the outside of the casing in 2" increments so I could tell
how deep I was plunging. (not required, but neat.....) |
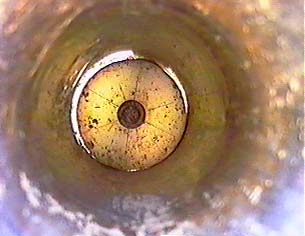 |
A view form the inside....with the Plunger pulled all the way back. Notice
the light you can see around the Plunging attachment. It cannot be a tight fit. If it is,
You will not be able to push out a core. (grass and dirt will bind the attachment to the
walls of the Main Core tube) |
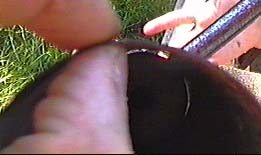 |
A image of how incredibly thin my "hog" is....And yet it don't
bend too easily. I did use a torch and some "Caseinite" (a metal hardening
powder) to harden the first 4" of the Main Tube that enters the ground. Not required,
but makes the Main Tube last alot longer (although I have yet to wear one out......) |
The whole project only took
about 2 hours.The Materials
were free for me, but I can't
see them even coming
close to what the actual price
of a 'real' HoleHog is.... |
This page hosted by  Get your own Free Home Page