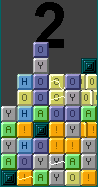
The ingenious aspect of Towers is different powers. Powers come in twelve different varieties (not counting minor and mega variations) plus the three special cells. There is one respective attack and defense per colored block. Each attack is characterized by electricity while a defense piece is characterized by spinning. Powers are received based on broken blocks.

Towers keeps track of the number of blocks of each color you have broken. Whenever you have broken four blocks of any color, the next available three-piece will have a power of the same color and towers resets the count to zero. I will term this the rule of four from now on. The first power received is always an attack, the next is a defense and then the next is an attack and so on. For instance, early on, total_kik_azz_of_towurs_but_not_spelin breaks three purples on one turn and three more purples two turns later. He has now broken over four blocks. The next available three-piece that contains a purple block will instead now contain a defuse. 

MEGA POWERS
Furthermore, ever wanted to know how a minor dither ends up being a mega dither? It has nothing to do with the time. The first attack and the first defense you receive will be a minor. The second attack and second defense will be a normal power. The third set? Mega.

BERSERK PERIOD
One more thing. Here's something I bet a lot of you have been wondering. The "berserk attack time period," isn't based on time. When all of your powers have achieved a "past mega" status or in other words when each color has been broken six times in sets of four or in other words when you have gotten to your fourth set of attacks/defenses for every power, this is when the berserk attack period happens. The "berserk time period" is when you notice all your powers are attacks and you cannot receive anymore defenses. Towers brings down the number of blocks required to be broken to receive powers to three I believe (research on this topic is needed). So essentially, a player receives around three times the attacks during this period. It is incredibly important and pivotal that a player reaches this time period faster than his or her opponent.

Calculation of berserk time period increase in powers- 

It takes usually a break of three, then another break of three, then a breaking of a power to receive a power. Remember, half the powers are defenses. So it takes 6 drops to receive an attacking power. In the berserk time period, it takes one drop to break, then one drop to break the power and there are no defenses. So it takes 2 drops to receive an attacking power. Hence, 6/2 ("three" for you smart guys) times as many attacks and 3/2 times more powers.

Anyhow, let's take a look at the powers.

Pic:
Profile: Add row
Color: Grey
Letter: Y
Description: Adds an additional row to the bottom of an opponent's screen. Doesn't have stronger versions.

Syn_Envy says: It's not as strong as people think. A single add row adds the equivalent of six blocks. Six blocks is the same as two misplaced three-pieces but two misplaced three-pieces is actually more detrimental since they're on the top. However, six blocks is still 1/13 of the grid size, so it's still significant. Just remember that poor stack control is the equivalent of getting more add rows.

Pic:
Profile: Dither
Color: Green
Letter: A
Description: Changes the position of a certain number of blocks so that there is never a break or setup of breaks after the dither is used. Dither does not move stones. Minor, normal, and mega versions exist.

Syn_Envy says: My favorite attack piece. See Power Usage for more details.

Pic:
Profile: Add Stones
Color: Blue
Letter: H
Description: Minor adds one stone, normal adds two stones, and mega adds three to an opponent to the top of the stack of one opponent.

Syn_Envy says: Most people's favorite power and there is a great reason why. See below on the Stone and how it cripples a stack.

Pic:
Profile: Defuse
Color: Purple
Letter: O
Description: There's some confusion to defuse. It's known that a black stone replaces a purple power lodged in the stack of an opponent. However, there is some confusion to whether a purple defuse then appears on the bottom row third column. Likewise, if a purple power is already on the third column bottom row… well, let's just say research is needed. Minor, normal, and mega versions exist.

Syn_Envy says: Color blast in my opinion is the strongest defensive piece. Defuse is the answer. Without perfected power usage, defuse is a waste.

Pic:
Profile: Medusa Piece 
Color: Yellow
Letter: O
Description: Sends a flashing three-piece of stones to your opponent. Any adjacent pieces that it touches when it comes to rest turn into stones. No minor or mega versions.

Syn_Envy says: Against any decent opponent, a medusa piece isn't that effective. It is however a minor add stone in most cases and has the very important aspect of disrupting flow and time.

Pic:
Profile: Remove Powers
Color: Orange
Letter: ! 
Description: Takes either one, two or three powers depending on minor/normal/mega from opponent's power bar and places them on the bottom row of his/her stack.

Syn_Envy says: Against a beginner who isn't using his powers fast, it's good. Against a normal player who fires once he gets his powers, it's bad. Against an expert player who knows how to save his powers (and has read my Power Usage section), it's decent again. Remove powers is key to disrupting a good power user. However, this power is probably the worst power. I'll talk about why it's still no good in Becoming the One.


Pic:
Profile: Remove Row 
Color: Grey
Letter: Y
Description: Removes the bottom row from a stack. Doesn't have different versions.

Syn_Envy says: The antithesis of add row. The same logic of stack control applies here. However, remove row is actually stronger than add row because of one fact - it can remove stones. Likewise, it can remove powers so watch out!

Pic:
Profile: Clump
Color: Green
Letter: A
Description: Opposite of dither. Clump rearranges a certain number of blocks in a stack to setup breaks. It will not however set up a break directly (in other words, it never sets up three in a row). Clump comes in three flavors - minor, normal, and mega and does not move stones.

Syn_Envy says: A mega dither is so strong. A mega clump is an answer and is good when you've run out of breaks. 

Pic:
Profile: Drop Stone
Color: Blue
Letter: H
Description: Takes one to three stones depending on minor, normal or mega and places them on the bottom row of the same column; the rest of the blocks are moved up. If a stone already exists on the bottom row, the stone is dropped to the next highest row without a stone.

Syn_Envy says: It may not remove the stone but it's not worse than its counterpart add stone. Drop stone has a unique way of creating possible collapses and is my favorite defensive piece.

Pic:
Profile: Color Blast
Color: Purple
Letter: O
Description: When used, any purple power within the stack suddenly becomes the center of a 3x3 purple square. In other words, all surrounding pieces of either a defuse or color blast already in the stack become purple blocks. No different versions.

Syn_Envy says: What an amazing piece. You can use this power to help you in so many ways; it's like baking soda.

Pic:
Profile: Midas Piece
Color: Yellow
Letter: O
Description: A half orange, half yellow three-piece twizzler falls. Any adjacent blocks it when it comes to rest turn yellow. Stones are not affected. Yellow pieces formed are not sent during YAHOO! attacks. No different versions.

Syn_Envy says: I don't really like this power even though it has some major clearing potential. It's the antithesis of baking soda.

Pic:
Profile: Color Plague
Color: Orange
Letter: !
Description: Removes the least abundant color in a stack. No different versions. Does not affect stones.

Syn_Envy says: Color plague saves the day so many times. So many people love a good color plague because of its mass break opportunity. Careful, it removes powers too.


 (these are mentioned in the codes section)

Special cells cannot be removed.

Pic:
Profile: Special Cell #1 
Appearnce: Crystal diamond with two electrical surges.
Description: Increases the speed of one opponent's fall rate. The speed adjustment seems to be four to five times faster than regular fall rates.

Syn_Envy says: Sometimes I wish I could normally play this fast. Save the crystal until your opponent is dangerously high… then BAM! 

Pic:
Profile: Special Cell #2
Appearance: Crystal diamond with one electrical surge.
Description: Removes all powers from an opponent's stack and power bar.

Syn_Envy says: For maximum effect, just wait until your opponent has a lot of powers in her/her stack. It's fun to watch two newly placed color plagues disappear from the stack of an opponent who is four rows from death. *malicious smile

Pic:
Profile: Special Cell #3
Appearance: Crystal diamond
Description: Removes all stones from your stack.

Syn_Envy says: I hope this is a no brainer. It's been called broken because of its ability to totally swing favor towards one player. Use it when you have too many stones and even better, use it right after a mega stone or series of mega stones. 


Pic:
This loner block, different from the rest, the black sheep in the family. The black stone has the quality of being unbreakable in any circumstance, unmovable except by drop stone or natural fall, and non-removable except by a remove row, color blast or the third special cell. 

I'll tell you right now. The essence of Tower's strategy balance is very dependent on your ability to create stones on your opponent's side and for you to make the stones on your side ineffective. 

It's pretty hard to actually make a stone get removed from your stack. There are only four ways. 

  1. The stone is on the bottom stack and it gets removed during a remove row.
  2. The stone is adjacent to a purple power and converted to a purple block during a color blast.
  3. Special cell #3 is activated.
  4. The stone is located on the bottom row, third column and a color blast replaces it after being activated on a stack which previously contained no purple powers within it. 

The third and fourth methods are rather rare and dependent on fortune. Basically, methods one and two should be the main and therefore practiced methods of removing stones.

Ok, let's examine the hazard caused by the single placement of one stone alone. 

Here we have the example of three stones. One on the side, one on the bottom row and one straight smack in the middle of the stack. 

Why does a stone seem to hurt so much? Usually, you can break any single block from eight directions (however the down direction requires a combo). A piece on the side/bottom row can only be broken from six while one in a corner can only be broken in three ways. 

These same numbers can be attributed to the number of directions a black stone PREVENTS you from breaking pieces. Each stone in the middle prevents eight directions of breaking. Save yourself trouble and keep it on the side. 

If you played Towers, you know how much these suckers prevent you from doing what you want with your stack. In essence, at almost all times, one of your main goals is limiting how stones affect your game.