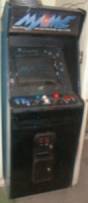
III. Internal computer and monitor
One thing you can always count on is that Zeno always has spare computer parts lying around. Among my previous coworkers I was described as being an “electronic bag lady”. For this project I decided to take the good stuff right off the top of my rickety shopping cart.
For the monitor, I installed a 19-inch Philips Brilliance 109P. This was actually the monitor off of my primary PC. My original intention was to install a spare 17-inch Dell Ultrascan in my possession. The first thing I noticed was that the original cabinet monitor was a 21-inch tube. Installing a 17-inch screen, therefore, meant that I would have to try and find a way to cover about an extra six inches of dead space around the screen. This could be done by making a bigger trim piece, but it seemed like I should be able to do better than that. Glancing over at the Philips monitor on my desktop, I realized that this is what I needed to do it right, and so the Philips went into the MAME Frame while the Dell resumed its original station on my desk.
Test-fitting the monitor into the cabinet I got my next big revelation; that the body of the monitor would have to be completely stripped away in order for it to fit dead-center in the cab without any special reinforcements. I was a little leery to do this because, again, I had this idea in my head that I might have to “go back” at some point in case something went wrong and I didn’t feel like sacrificing a perfectly good 19-inch monitor if this all turned out to be a wash. But once again, my zeal to see this project done right overrode my sense of caution and I bit down and removed the monitor body, leaving nothing but the naked tube.
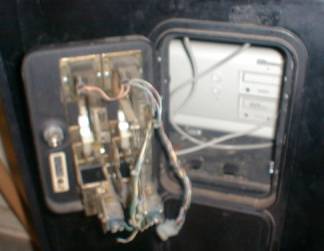
The power switch was an electrical one so it had to be taped into the “on” position. Since the machine would only be on when being played, this was alright for the time being. One nice thing about using the Philips Brilliance monitor was that the monitor controls were on a separate piece of circuit board which connected to the tube via a wire harness. Mounting this board on the inside wall of the cabinet gave quick access to the monitor controls without having to remove the cabinet glass and monitor trim piece to make adjustments to the display. Plus there is an LED on the board which illuminates the keyboard and mouse inside the cabinet – a nice side benefit.
There was a built-in shelf which the old monitor frame mounted onto which was set at a perfect angle, the only issue was to how brace the back of the monitor from sliding back against the rear cabinet door. Nothing fancy here, as you can see from the pictures.
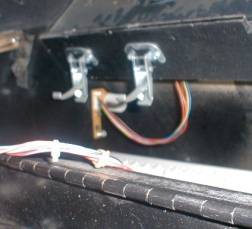
Super-sophisticated 2x4 cut
to size and held to the inside Close-up
of the monitor controls inside the cab
of the cab wall by custom
brackets, made by my brother,
which allow for easy removal
of the support beam and monitor.
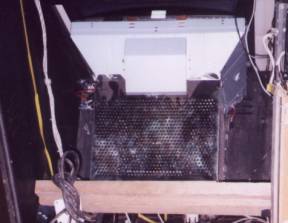
The
computer originally sat on the floor of the bottom of the cab. Later the raised
section of the floor of the cabinet had a sheet of plywood mounted flush behind
it to accommodate the computer, which could then be accessed through the coin
door in the front as opposed to the back.
Some of the original wiring harnesses and grounding strips were
left inside the cab
in case they were needed to ground future dreamed-of modifications
such as
a master power switch, cooling fans or internal lighting. If
nothing else, they provide a
useful function in making
this setup look a lot more technically complicated than it is.
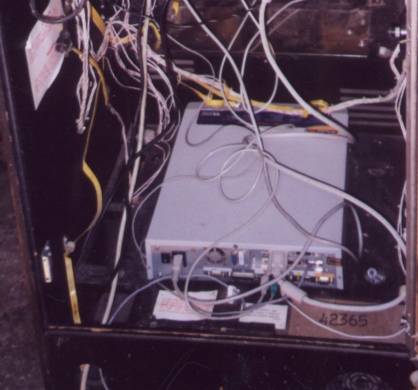
The
original control computer (in the picture) was a Hewlett-Packard Pavilion 3266
with a Pentium 233 MMX CPU, 128MB of RAM, an ATI 3D-Rage video card and
a 3Com 3C905-TP network card.
This was my original dedicated games-only PC and was more or less, this
was dropped into the cabinet as-is.
Some folks
I have seen who make MAME cabinets actually just take naked PC parts -
motherboard, power supply, etc. with no casing – and attach them directly
inside the cabinet. I think this a great way to do it, especially in an
aesthetic sense since one is building a “new” machine. However I opted not to
go this route myself. The main reason for doing my cabinet with a just a
dropped-in PC is that it will potentially minimize upgrade time. As newer,
faster computers fall into one’s possession, you can take care of all the
upgrade requirements outside the cabinet, then just swap out the old one when
you’re done fine tuning it.
In
February 2002 I proved my point by replacing the HP with a Dell Optiplex GX1.
This PC has a Pentium II 400MHz CPU, 256 MB of RAM, a NVIDIA-TNT 16MB
video card, Crystal Audio SB-16 compatible sound and the same network card as
the HP. The Labtec speakers simply run up into the marquee and are
cranked up for maximum probability of developing a hearing loss. The system has
two CD-ROM drives: One 16x reader for general use and one 32x reader dedicated
strictly to running Dragon’s
Lair. This upgrade vastly improved the performance of some of the
later-day ROMs I run on the system.
Dude, I got a Dell. And its drives are accessible through the coin
door.
The
last little bit of shelving that needed to be installed was a shelf for the
keyboard and the mouse, which reside under the control panel that can swing
open for easy access.
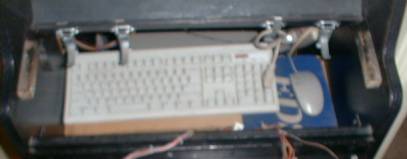
EDS is in no way affiliated with
Zeno’s Zone or the MAME Frame project
and does not condone the use of its mousepad in the above graphic.
I told you this was going to get better, didn’t I?