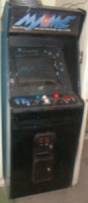
IV. Control Panel
If
you’re building a cab of your own (and how many of you have I inspired thus
far, hm?), the control panel may very well be the most critical component of
your project.
As
previously stated, my Original Vision was to replace the existing control panel
of the cab with a Hanaho HotRod. The
Hanaho would simply be mounted in the place in the existing panel.
I wasn’t terribly crazy about this idea after I built the shelf for the keyboard and mouse (q.v. – last page) because since the Hanaho was somewhat heavy and awkward I didn’t really like the idea of having to flip the whole thing over in order to access the PC controls.
But the biggest consideration turned out to once again be cost. As the Hanaho sold for about $200 (and that price has been consistent for three years now) that was just yet more money to throw into this thing, coupled with the fact that I’d probably wind up having to hack or drill into the thing somehow. Again, I think the Hanaho is a great product, and I have seen some great examples of the HotRod being molded seamlessly into other cabs.
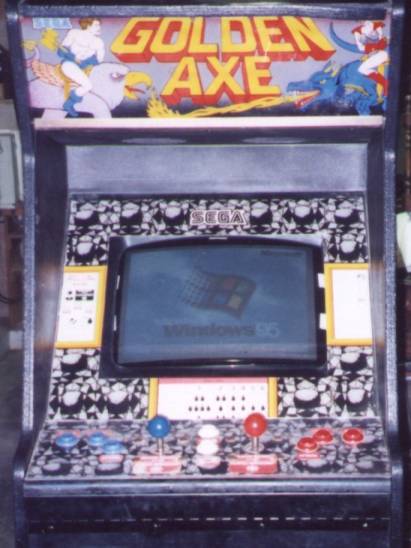
By this time I knew I wanted to find a more cost-effective idea for a controller, so I decided to stick with the original controls…for now. I have seen some cabs with just absolutely amazing control panels built from the scratch – four joysticks with six buttons per player, trackball, spinner as well as buttons dedicated to MAME program functions. These folks truly deserve a tip of the hat. But besides cost-efficiency, one of my other driving guidelines was expediency; how to get the thing up and running sooner than later; Later was for worrying about enhancements. Thus my decision was made to stick with the existing control panel. The controls as I got them were two joysticks (players one and two for Golden Axe) with three buttons per side plus two start buttons; one for each player. I thought long and hard about the kinds of games I expected to play and decided that this would be okay for now. Since most of the games I play anyway are pre-1990 the controls are comparatively more simplistic, it really turned out to be the right decision. Other than playing Tempest with a joystick and Tron with two buttons substituting for the spinner I have no complaints.
After much more angst-ridden searching of both my soul and the Web, a solution appeared to manifest in Jolly Olde England, where a company named Ultimarc makes an amazing little gizmo called the I-PAC. The I-PAC is a device which allows one to directly connect the wiring of an arcade cabinet to a PC by sharing in the interrupts of any standard keyboard. The I-PAC was actually designed with MAME in mind, demonstrated by the fact that by default it uses the same keyboard commands as MAME, but is optionally programmable to accommodate any keystrokes the user wishes to employ.
Most appealing of all was cost. The I-PAC cost merely US $55 including shipping. I ordered one over the web and had it exactly one week later; very impressive for shipping from a company across the pond.
The control panel was temporarily detached from the MAMEframe and attached to the I-PAC and control computer just to make sure everything worked okay. Connecting the I-PAC to a PC is a complete no-brainer as it requires no soldering or anything similarly elaborate. One merely runs the contact wires of your control board into the corresponding plugs on the I-PAC card, connect your kevboard to one PS/2 slot, then a PS/2 straight cable from the card into the PC and you’re in business.
I can’t say enough good about the I-PAC: inexpensive, easy to configure and has room for expansion. Ultimarc also makes connection devices for trackball and spinner support as well. You can find a link to Ultimarc on the links page. Order yours today!
The last big step in primary assembly was putting all the computer components back into the cabinet. The I-PAC was mounted on the inside wall, closest to the player side, between the keyboard and control panel for easy access.
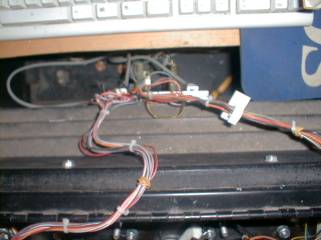
Detail of the control panel
wiring running into the I-PAC.
Lastly for central power a heavy-duty with surge protector with a master switch was mounted on the inside right wall for easy access. Everything turns on/off with one flick of the switch.
It was finally time to breathe some life into this beast. I heard the voice of my father, as he used to say to me whenever I used his garage to fix my motorcycle, “Are you done yet? I’m ready to go for a ride.”
1st Spectacular
Boot of the fully assembled MAMEframe
As evinced by the spectacular
failure of Windows CE integration with the
DreamCast, Sega hardware and
Microsoft operating systems do not always mix well.