Here is the information and photos of my recent installation of the Allied Electonics volt meter. This was recommended by Larry in his email to the Ducati List. After having a System melt-down I decided it would be better if I knew what my electicals were up to. It was a $25. part, and very nicely designed.
If you look on their site, use the search option for Part #. DVM 572-0002
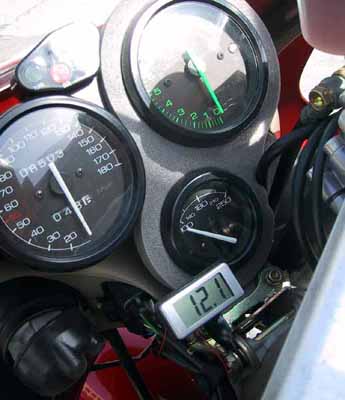
The volt meter installed on my 916. It is waterproof, and only has two wires to hook up. I used a little gasket-maker on the edges of the rubber pad on the back of the unit, as it is designed to be mounted on a flat surface. Without the glue, the rubber backing would not lie flat as my little mounting bracket squished the rubber in the middle only.
Only 8,500 miles on the odometer! How depressing...
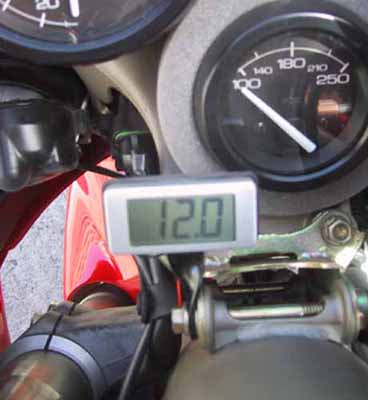
The view from the cockpit. It is very easy to read, though I have decided not to add a light to see it at night, as it might be distracting. If you decide you need a light on the subject, Radio Shack has very nice little 12volt bulbs that could be wired in. I have not yet found a suitable holder for those types of lights, though. In a perfect world there would be a flexible "goose-neck" that could be used to shine a light where you want it.
It only shows 12 volts on the display because I just rode the bike through dense traffic at 5 mph. Also the engine is not running. With the bike on, the display reads 13.5 volts at 3k rpm, and peaks at 14.5 volts at around 5k rpm (estimate).
You can also see the rubber headlight boot is pulled off the left side low beam. That is because for city riding in the day I disconnect the low beam light by pulling off the connector. It certainly helps the electrical System keep up, but it is a poor method of disconnecting. I've heard there are European switches for turning off the headlight, but I don't know anything about them.
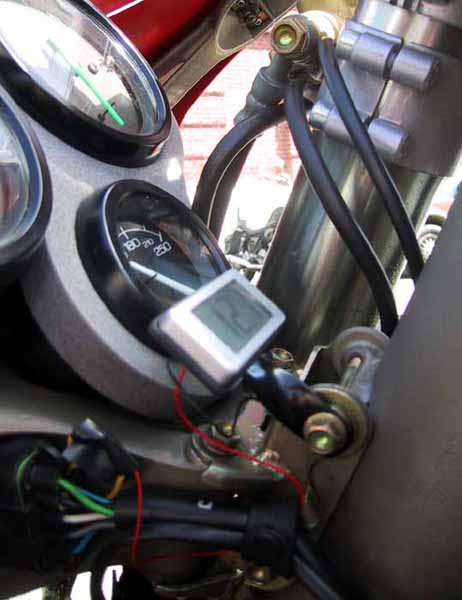
Here is the side view of the volt meter. I wired the ground (-)to the bolt holding the front nose bracket on. I used a ring connector soldered to the tiny wire from the volt meter. The positive (+) wire from the volt meter attaches to the yellow "looped" wire from the headlight wiring harness. This yellow wire seems like the easiest place to attach the positive lead to take a reading. The volt meter uses the power from the positive connection to run it's tiny LCD display. I checked the voltage at the yellow wire and compared it to the voltage at the battery terminals. It seems that by the time the power gets up to the yellow wire it has dropped about .3 volts. This means very little, as I'm just trying to see ballpark figures on the state of the charging system. However there is a little adjuster on the back of the volt meter that is probably used for dialing in the right voltage range, if you feel like being anal.
The bracket the volt meter is mounted on I made out of a scrap piece of steel in my garage. It was a flat piece about 1.5"x.75" that I twisted in the vice with a pair of pliers. I drilled a hole in each end for the bolts, and painted it black.