
|
WET #45: Bouquet
September 26, 1999
|
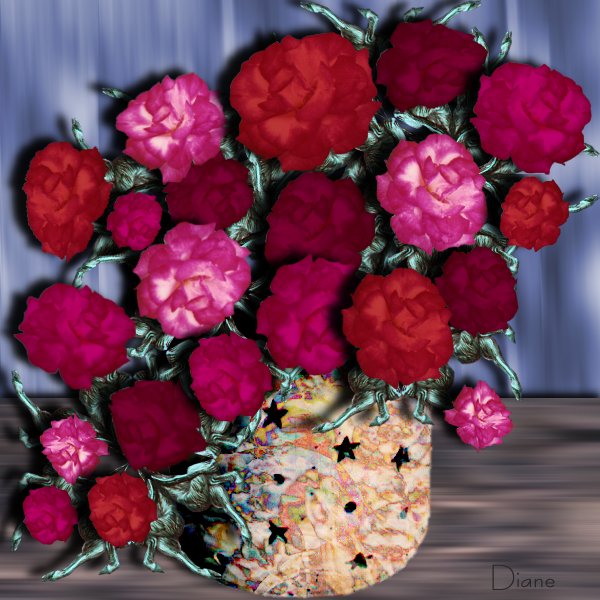 |
WET 45: Bouquet (again!)For the foliage, I adjusted the color on the faun to a brassy green, then mirrored and pasted to put 2 facing each other. I then perspective deformed horizontally at 50%, vertically at 50%, and then circle deformed the pair. I then copied this and made a "pinwheel" effect by enlarging the canvas and pasting one image in the original position, one rotated 90 degrees, one 180 degrees, and one 270 degrees. I made a 600x600 image and put 2 copies of these pinwheels on one layer, then put 4 copies (rotated 45 degrees) on another layer. Each layer was drop shadowed separately. The jester looked rather....evil?...to me, so I decided to use him for a pattern rather than as a separate object. I opened a new 600 x 600 image and layered copies, one at a time, unevenly over each other. Each time, I blended the layers at 100 "difference" before adding the next image. I repeated this process till the whole "canvas" was covered, then merged all. I now copied this jester pattern and pasted as a new layer over the vase. I blended the layers at 80 "burn," merged the images, selected the background, inverted, contracted 2, feathered 2, then copied the vase and pasted it as a new layer on the foliage image, sending to the back. I dropshadowed this layer in the same dimensions as everything else, but at a much lower opacity. The roses are the most recognizable elements. I did lots of color changing using the histogram and the Hue/Saturation/Lightness functions, then did some resizing at 50, 40, 30, and 25 percent. I also used the deform functions on some blossoms (horizontal and vertical perspective, and pinch) as well as rotating, mirroring, and flipping at various times. Each color of blossom was done on a separate layer of the main image, and each flower was drop shadowed separately. For the table surface, I simply pattern filled a large image with the original colored faun, then motion blurred horizontally at 40 a couple of times; copied and pasted back into the image off center; motion blurred again; copied and pasted into itself again; then motion blurred one more time. I then cut a rectangle out of this and pasted as a new layer on the main image, drop shadowing it there. For the "curtain" background, I did a similar process to the table, except that I used a full sized rose image for the pattern and blurred vertically instead of horizontally. It was originally a blue/lavender color, but that didn't look right, so I adjusted the color to get a silvery blue tone instead before pasting it as a layer. After adjusting the layers so they were in order, I saved as a .psp5 file, then saved a copy as .jpg for the web.
|
 This is a smaller version of the original image posted for us to use. Thank you! |
You can express your opinions in my guestbook or send an e-mail below
I'll be glad to hear from you. :)
This image was created using Paint Shop Pro 5, especially for the WET #45 project.
It is my original creation based on the original WET image obtained on-line from David Beards
through alt.binaries.comp-graphics.
Thank you!
|
|
|
|
5acreart@usa.net |

All original graphics on this site
Copyright 1999
by Diane at
Five Acre Graphics
This page hosted by
GeoCities