The following text was drafted a few years ago, therefore not all statements are current. With improved technology pocket computers apparently have been displaced by "handhelds" with Bill Gates software. Unfortunately not all "improvements" are better. With a pocket computer, no hard drive is needed and the entire operating system is on ROM including basic. Only two lithium cells power them for several years. There is no waiting for loading of obsolete MS DOS (CPM V 965+++???) and Windoze. Handhelds do not fit well in a shirt pocket and BASIC may not be included; thus prohibiting the user from developing simple, non monopoly, programs for personal use. Other languages could be used, including my preference, Assembly Language; but timing would be much more difficult. In any case, the basic philosophy should serve as a guide for those who do not have BASIC.
One day while using my pocket computer, a thought popped into my thick head. Can this thing be used as a stop watch? Only a starter, counter, stopper, divider and displayer are needed. Loops were made for counting, so in a short time a simple BASIC program was punched in which had a loop to count in 0.1 second intervals. The output was set to display in second and tenths so it could be checked against a count down timer on a digital watch. It worked but the time was anything but right. Standard procedure is to adjust loops with phony instructions that do nothing but take time. After about an hour, it finally read close to 60 seconds for a minute. After some five minute tests and adjustments it was ready for insertion of the division instruction to output speed. On the test track, speeds agreed very well with those recorded previously. It worked!
Why use this fancy device? It's flexible and portable in your pocket, so it can measure speeds anywhere, even the prototype with a little juggling. Several copies of the program could be entered, one for each application or one copy could be modified to handle many. Our HO test setup has four loops. A 15 in., an 18 in. and a 22 in. radius loops are used to test new types of locos from our hobby shop, so we can advise our customers on the running qualities. The last is a not too carefully laid loop with 34 in. radius Shinohara snap curves, some flex and snaps for the tangents, even including some dips and sags. The philosophy: if it runs on this, it should run very well on my proposed new layout using much more carefully laid track with 36 in. minimum radius and easements . All that is needed for each loop is a different magic number as derived in the first article. The computer can be taken to a friend's layout to test locos under his conditions. The only necessity is to figure out his magic number and store it in memory for the future. Our N scale loop L values are not shown, since they would be redundant. Other programs, for finding motor speeds, gear ratios, car and loco weighting or anything imaginable, can be entered. Enough sales pitch.
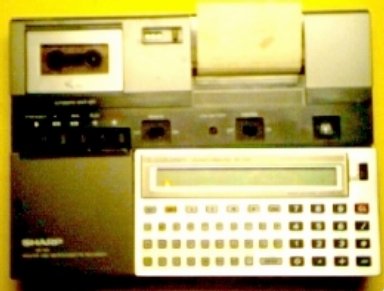
What do you need, how do you do it and can you do it? Don't let it scare you, it is not that difficult. The whole process will be covered step by step, explaining the traps you could fall into. First look at pocket computers. They came in all different types with many different frills, just like cars. To save money keep it simple unless you feel a need for the frills. The only necessity is that it can be programmed in BASIC. For speed measurement on test tracks, I use a Sharp PC-1250 = Radio Shack PC-1 over 15 years old with no frills.

Note: Adjust brightness and contrast for optimum viewing.
Sharp EL-5500II Scientific Computer
Most useful is the, over 12 years old, Sharp EL-5500II, scientific calculator-computer combination, which can handle all the odd spur of the moment figuring jobs around the model railroad. On the right is a full scientific calculator including statistic functions and single memory. To the left is the computer key board. In the computer mode, all calculator functions can be entered with standard key strokes. Always in my shirt pocket at work or shopping, I feel undressed without it.
Frills came built-in and external. For internals there are language dictionaries, phone directories and the kitchen sink. Somehow they don't appear to be useful for modeling. Then there were preprogrammed plug-in modules with all sorts of goodies, if you can find a use for them. Extra memory could be added, if you really need it. Mine remains idle yet. Newer models apparently had more memory.
Externally there were two useful devices normally requiring an interface or black box that allows the computer to talk to and control the externals. A printer is handy for hard copies of output data or program listings, since most pocket computers had one or two short lines, displaying only small segments of a program line at a time. Last, a micro cassette is useful for safely storing programs or data, in case cells go dead . But all you really need is the computer, just remember to keep safe copies of the programs you enter.
Note: Adjust brightness and contrast for optimum viewing.
Sharp PC 1250 Computer on a CE 125 microcassette & printer w/ ni-cads..
Although this setup is used for for local testing and recording, the computer can be removed for pocket traveling..
With an idea of what, where can you buy it? Radio Shack was handy with limited offering. Electronic specialty stores, computer stores or mail-order may still offer a wider variety. Used ones cost less, if you can find one. Usually only the cells wear out, but check it out before you buy. Included should be a manual of operation with all the BASIC instructions and maybe an applications manual with example calculations and programs. I even found a program for the clothoid curve or as railroaders call it, an easement. Good luck.
Before programming, read the manual section on allocating variables. Often these are shared by numeric (X) and text string ($X), limiting use to one or the other.
Two programs are included, one for speed measurement, the other for motor RPM using the speed found. Actually there are three versions of the speed program; a single loop, a multi-loop and one for time adjustment. Adjustment may not be needed, but even computers from the same assembly run vary by a few percent, so it is advisable to start with the adjuster.
Before starting, a discussion of some of the ins and outs should help to avoid problems. First BASIC was designed to be user friendly and transportable from computer to computer. The second part is not totally true. Each manufacturer decided to add some goodies and rename the new version "Extended BASIC". All extendeds are not equal in power nor in the names they used for instructions, however all have basic BASIC. Beware! Possible variations that may occur in the programs will be pointed out.
Syntax is very important just as grammar and spelling are in writing English. If you do not say it right, the computer can not understand what it should do. Each punctuation mark has its own meaning; use them carefully. In some BASIC's spaces are used as punctuation, but Sharp's, for one, is very friendly and will correct most problems on entry. Next BASIC uses line numbers from 1 to 999 or 9999 on pockets. Numbers can be skipped, but if the computer is told to GOTO one that is not there, an error comes up. With multi programs in memory, END must be at the end of each program to prevent running into the next one. Unfortunately BASIC can not be covered completely here.
Look at the TIME ADJUSTMENT PROGRAM first. This is used to get into the ball park. Assume a SHARP model is used, call the computer SHARP and use PK to refer to Pocket computers in general to save words.
NOTE: Using your browser's forward and back buttons, you can jump back and forth between the explanation and listing.
Use: Hit the [DEF] (define) key to set up, then when ready to start timing hit [SPC] (space) key and the screen will go blank. Sharp eyes will catch a very tiny BUSY in the upper left. At 1 minute as precisely as possible, hit any key to stop. The display will show the time lapse in tenth seconds. If it is not close enough, adjustment is required. Now to the program to find out how.
On the left are line numbers with colons followed by short instructions. To the right there are semicolons followed by remarks. DO NOT type in the remarks.
Line 900 contains a label. These are used to jump to starting places easily without referring to line numbers. SHARP uses the "key" format and there is a space between the quotes entered from the [SPC] key. Some BASIC's use forms like LAB "[key]" or LBL "[key]". The [DEF] key tells SHARP the next key pressed is a label to start a program. Other PK's use [LAB], [LBL] or [GOTO] keys or none. If no key, you must type in either: GOTO [key] or RUN [key] and a label or line number then when ready to start press [ENTER].
Line 920 contains "house keeping" chores to set up the variables. These are places where you can store things by name like A, B or Y to store pure numbers. A second type known as a string variable of the form A$ is used to store strings of words and everything else not a pure number. The dollar sign always refers to string. With SHARP and most PK's you may use either A or A$ but not both, because the same memory location is used for both. Beware!
The counters T and I are set to zero to assure the counts are right. K$="" empties the string, since there is nothing between the quotes.
Note: multi instructions can be on one line, to save line numbers and memory, if separated by colons. Be careful, some combinations do not work well together.
Line 930 is a counting loop time killer to eliminate a double entry from shaky fingers or contact bounce. This would result in speeds of many thousands of MPH in less than a second. FOR sets up the counter I to start at 1 and count through 5. Normally there would be instructions that do something between FOR and NEXT. When NEXT I is reached the program jumps back to FOR to repeat until the fifth time, when it goes to the next instruction. If you have real shaky fingers, the count can be increased by changing 5 to 6.
Line 940 starts the timer loop. SHARP adds 0.1 to the count in C. Then we insert some time killers to lengthen a bit. REM = REMark and is used by programmers to add notes. Normally computers do not use them, but they do read them, which takes time. The only trick here is to use instructions that do not mess up the program.
Line 960 tells SHARP to read in the last key hit with INKEY$ and place it in K$.
Line 970 makes a decision by asking if K$ is still empty, meaning no key was pushed. If it is, go back to line 940, add 0.1 and try again. (Some BASIC's require the format: IF [condition] THEN GOTO [line].) When INKEY$ detects a key press, IF takes the next instruction. By using this any key is a stop key, to avoid looking around for the right one in a hurry.
Now the reason for the FOR-NEXT loop is evident: to prevent the first loop INKEY$ from reading a second [SPC] pulse.
Line 990 tells SHARP to display the time. The octothorps, that's what they really are called, represent digits to the left and right of the decimal point. I don't measure in thousands of MPH, but the extra digit helps in recognizing the results of a shaky finger. PRINT C displays the time count. All you do now is try it after entry.
Note: All SHARP instructions have abbreviations for easier entry ie. PRINT = P., PR., PRI.,or PRIN. and some PK's have the more common instructions in the shift positions above some keys, accessible by the shift key.
How do we adjust it? It should be fairly close as is. You could sit around and fiddle with the loop instructions or do it the easy way by adjusting L when entered into the SPEED PROGRAM. Assume that the magic number is L = 1080 and your count is C = 62.4 then your new L = 1080 * 62.4 / 60 = 1123.2. Since the time is longer, make the distance appear longer. S = L / t sec = 1080 / 60 = 1123.2 / 62.4 = 18 smi/hr. Multiply by the measured time longer or shorter. Sneaky? No, just math. Save L just in case.
The worst is over, just edit the program to output speed using the SINGLE LOOP SPEED PROGRAM as a guide. First don't forget to enter the new value for L in Line 900. Insert line 980 to compute speed, then edit line 990 by changing T to S to print speed. Now go measure speeds.
It is easy to go to the multi-loop version. Observe in the MULTILOOP SPEED PROGRAM , that it is only necessary to insert one line for each additional loop with the label, magic number L and a GOTO instruction to skip over the other starts and go to the rest of the program. Line 905 can be used on the real world interstate highway with mileage markers to check a car speedometer. To calculate the magic number, remember:
60 mi/hr = 1 mi/min = 60 * 60 /60 sec mi/hr = 3600 / 60 sec mi/hr.
Since you are dividing by 60 your magic number must be multiplied by 60 to keep things even.
Adjusted L = L X C / 60 = 3600 X C / 60 = 60 X C
In the above example C = 62.4, so L = 60 * 62.4 = 3744. Don't get too worried if you don't fully understand it, it works. Next time you find some measured miles, check it out.
For those who desire to know motor RPM under track conditions, a bonus MOTOR RPM PROGRAM is included. Measure drivers with a scale rule. One manufacturer's 80 sin are really 75 sin, while their 63 sin are 65 sin. If the gear ratio is not available, count the teeth.
Line 800 introduces a new instruction, WAIT, where 64 is the number of "jiffies". 64 jiffies = 1 second approximately. This displays MOTOR RPM for that long and then continues.
Line 812 flashes the driver diameter presently stored in D, then INPUT queries if you want to change the value. Enter a new value or if no change just press [enter]. The semicolon tells SHARP to wait until [ENTER] is pressed.
Line 815 does the same for the gear ratio.
Line 819 enters the well know locomotive design constant for axle RPM at which the speed in MPH = the driver diameter in inches.
The WAIT in line 831, without any value, tells the next PRINT to wait forever or until [ENTER] is pressed. The little equation does all the calculations.
Note: Speed (S) from last speed test, along with all other data, remain in memory as long as cell power is applied. Since static ram is used, switching computer off does not erase data.
The MOTOR RPM/SPEED/DRIVER DIAMETER /GEAR RATIO (MSDG) PROGRAM is a more complete version which calculates speed, gear ratio. driver diameter or motor RPM; if the other factors are known. This is very useful in repowering locos, especially in the "what if" stages.
Lines 800-803 are the entry points, each going to line 809. The variable N is set to direct SHARP to the correct lines.
Line 809sets the print format.
Lines 810-815 determine which inputs are required by eliminating the unknown variable with the not equal [< >] functions based on N.
Line 820 uses the ON GOTO instruction to branch to next sequence of lines based on the value of N.
Lines 831-833 calculate the unknown value, print it and return to the original start upon pressing [ENTER].
Line 834, 835 and 836 print the total gear ratio and ask for the bottom or driver ratio and then print the upper ratio for double gearing. The driver gear is usually determined first since it is limited by the driver diameter.
If the algorithms are understood, these programs could be ported to any other language including my favorite, Assembly Language, for use with any computer.
BACK TO MEASURING SPEED
