A fence and hold down clamps can be made from bar stock, 1/4" x 1/2" for the fence with 1/4" x 1/4" guide bars screwed to each end. Since the short guide bars are on the outside of the table and the width is about 7.1", the fence bar should be about 7.6". The guide bars will be 1/2" long to match the fence. One will be drilled and tapped for the clamping screw. Break all edges after cutting. Scribe a center line lengthwise on one face of each guide bar. Then scribe cross lines .10" in from ends and center punch at intersections. True up one end of the fence bar and clamp a guide bar flush to it with scribed face away from fence. Clamp fence in vise and drill one hole clear through with a #2 tap bit #50. Unclamp and tap guide bar 2-56. Enlarge fence hole with clearance bit #42. Clean up holes. While carefully lining up inside edge of guide bar front edge of fence with a machinist's square, screw together tightly. Clamp in vise and drill clear through with tap bit. Repeat tapping and enlarging. Assemble with both 2-56 x 1/2" screws and very carefully align with square. Check alignment on table. Do not round or chamfer the lower front edge of fence. This would permit thin sheets to slide under and cause misalignment.
Note: Adjust brightness and contrast for optimum viewing.
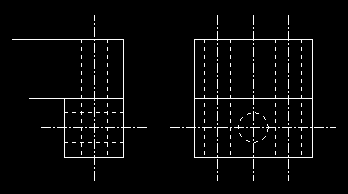
NWSL RIVETER FENCE
Left: Front view.
Right: End view.
Drill and tap clamping screw hole 1/8 - 40 (5-40) in the second guidebar. Allen cap head screws permit finger tightening or if need be, the use of an allen wrench. With fence on table, align second guide bar with .002" shim between it and table to provide free movement and clamp to fence. Remove shim. Drill and tap one hole as before. Screw together and test alignment for free movement. Drill and tap second hole. Assemble and insert clamping screw for final testing. Check guide against table with a machinist's square and adjust as required.

Note: Adjust brightness and contrast for optimum viewing.
NWSL RIVETER FENCE CLAMP
Top: Slot to adjust distance from fence.
Bottom: Clamp mounted on fence.
Since normally, pressure will be light, two or more clamps should be made by bending a .032" x .25" brass strip to form a "J". To eliminate holding clamp, when placing sheets, a spring is added to lift it when loosened. The slotted base should be about 3/8". The short fulcrum leg should be about 1/8" to provide room for spring. The longer pressure leg should be 1/4" longer or 3/8".
On base scribe a longitudinal center line and two cross centers about 7/8" from corner edge. Drill #49 clearance holes on centers, then drill several overlapping holes between them to start slot. File away teeth to complete slot.
Round off end edges on both legs to reduce marring fence and sheet and to provide better clamping.
Scribe a line about 1/8" back from fence front at desired clamp locations, center punch, drill #38 clear through and tap 1/8-40. Mount clamps. Extra holes can be drilled to permit moving clamps to hold various sized sheets.
BACK TO RIVET DETAILING
BACK TO METHODS INDEX
BACK TO TOOLS INDEX
