 |
||||
|
Introducing:
The Advanced, Precision Engineered,Wiggly, or TAPEWHERMS Yes folks, it's finally here, the brewery you've been waiting for... |
||||
|
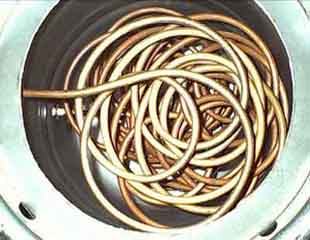
"What is that hideous mess?!" I hear you cry. Well, it's an aerial view of my HLT.
Because my method of controlling the mash temperature is by controlling the HLT temperature, not the flow, I am looking for the best possible heat transfer using a consistent flow rate. I also chill the boiled wort by pumping it through the same coil but with the HLT filled with circulating cold water instead of hot. I had previously used a coil of about 8m (25') of 1/2" copper tube, but I wasn't happy with the heat transfer I was getting, so I decided to go for a longer length of thinner tubing. I bought an 18m (60') roll of 3/8" copper tubing, and decided to use the whole thing to see what happened. What happened was that the flow rate was just about perfect with the pump I had, and heat transfer was excellent. So I have left it this way. It might not be pretty, but it works like a dream! The messy coils are a bit of a legacy from my old immersion chiller. I designed an improved version of the standard immersion chiller, which suspended from the rim of the pot instead of sitting on the bottom, and had deliberately messy coils as I had a feeling that neat coils encouraged convection currents to form in the liquid, thereby partially insulating the wort from the cooling effects of the copper pipe. This immersion chiller did seem to work better than my previous one, so I kept that element of the design when I put a coil in my HLT. |
|||