Egg Art Tutorial #2.


11. Activate the main image. Add a new layer and name it "door." Click on your "Preset Shapes Tool," Preshapes Toolopen your "Tool Options Pallet" Tool Options Pallet and select "rounded rectangle/stroked/line width=5/antialias=checked/vector=unchecked. Click the left mouse button and start at co-ordinates width=120 x height=130 and drag down and to the right until you reach co-ordinates width=200 x height=240. Click Ok.
12. Click on the "Magic Wand Tool." Magic Wand Tool Touch the inside of the "Dusty Gold Door Shape." The "Marching Ants will appear. Go to "image/effects/sculpture" and choose the settings: "Presets=Gold; Size=100%; Smoothness=10; Depth=3; Ambience=0; Shininess=46; Color=white; Angle=315; Intensity=30; Elevation=56." Click Ok. Deselect.

Click on the "Selections Tool." Selections Tool Select "rectangle." Starting at co-ordinates width=30 x height=30, hold down the left mouse button and drag down and to the right until you reach co-ordinates width=340 x height=170. Go to "Edit/cut" and the top half of the door will disappear. Deselect.


13. Activate the main image. Turn off the "background layer." Go to "layers/merge/merge visible." Right click on this new merged layer and rename it "egg bottom." Turn the "background layer" back on again.

14. Add a new layer and name it "ellipse1." Click on your "Preset Shapes Tool," Preshapes Tool open your "Tool Options Pallet" and select "ellipse/stroked/line width=5/ antialias=checked; vector=unchecked. Start at midway point on the top of the bottom half egg and draw an ellipse so that each end touches the outside of the half egg.


15. Click on the "Magic Wand Tool" Magic Wand Tool and then left click inside the "Ellipse shape [the golden area]." The "Marching Ants" appear. Go to "Image/effects/sculpture" with the following settings: "Presets=Gold; Size=100%; Smoothness=10; Depth=3; Ambience=0; Shininess=46; Color=white; Angle=315; Intensity=30; Elevation=56." Click Ok. Deselect.

16. Click on the "Magic Wand Tool" Magic Wand Tool again and now click on the inside of the "gold ringed" ellipse. The "Marching Ants" appear inside the ellipse. Go to "selections/modify/expand" expand by 1. Click on the Flood Fill Tool" Floodfill Tool and then right click inside the "Marching Ants." The area inside the ellipse nows turns "white." Deselect.

17. Make sure the "Layers Option Pallet" Layers Option Pallet is open. Turn off the background layer [layer 1]. Go to "layers/merge/merge visible." Right click on this merged layer and rename it "egg bottom." Turn the background layer on again.
Go to "File/save" and your work will again be saved as "egg1.psp."


18. Open the "topegg.psp" image that you have minimized. Go to "Edit/copy." Activate the main image and make sure that the "egg bottom layer" is highlighted. Go to "Edit/paste/as new layer." The top half of the egg will appear. While the "Marching Ants" are still active around the "topegg," position it towards the top of your work image area. Right click on this new layer and rename it "topegg."

Now would be a good idea to save your work. As you have already saved it in a "egg1.psp" extension, go to "File/save" and click on Ok.


19. It is at this point that you can decorate the "Top egg." Go to "File/new" and open a new image 100 x 100, 16.7 million colors, foreground color dusty gold ["#DCCC96"].

20. Double click with your left mouse button on the "Selections Tool." Selections Tool A new "Tool Options Pallet" box will appear. Change the settings to: "Left=25, Top=25, Right=50, Bottom=50." Click on Ok. The "Marching Ants" will appear. Go to "Image/rotate/ and rotate left=45 degrees."

21. While the "Marching Ants" are still active, go to "Image/effects/sculpture" and apply the following settings: "Gold; Size=100%, Smoothness=10; Depth=3; Ambience=0; Shininess=46; Color=white; Angle=315; Intensity=30; Elevation=56." Click Ok.

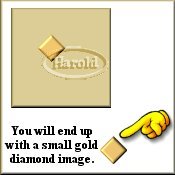
22. Go to "Edit/copy," and "Edit/paste/as new image." You will now have a small Gold Diamond image. I would suggest that you save this "Diamond" as a "diamond1.psp" image. I have made it into a Tube as well.


23. Go back to your main image. Activate the "Top egg layer." Go to "Selections/select all," and "Selections/invert." The "Marching Ants" will surround the "Top Egg" half.

Click on the "Flood Fill Tool." Floodfill Tool In the "Tool Options Pallet," Tool Options Pallet change from solid color to pattern. Click on the center tab and scroll down until you have "diamond1" as the image selected.
Left click in the center of the top egg and the diamond pattern will "fill" the top egg. Do not deselect.


24. Go to "image/effects/inner bevel" and with the same settings as before. Click Ok. Now you can deselect. The "Marching Ants will disappear.

While the "Flood Fill Tool Options Pallet" is still open, change back to solid color. Go to "File/save" to preserve your work. There is nothing worse than to lose all your hard work and to have to start all over again.


25. Make sure you are still on the "topegg" layer. Add a new layer and name it "ellipse2." Click on your "Preset Shapes Tool," Preshapes Tool open the "Tool Options Pallet" Tool Options Pallet and select "ellipse/stroked/line width=5/ antialias=checked; vector=unchecked." Start at midway point on the bottom half of the "Top egg." Draw an ellipse so that each end touches the outside of the half egg.

Make the ellipse2 "Higher" than ellipse1 on the bottom half of the egg.

26. Click on the "Magic Wand Tool" Magic Wand Tool and then left click inside the "Ellipse shape [the golden area]." The "Marching Ants" appear. Go to "Image/effects/sculpture" with the following settings: "Gold; Size=100%; Smoothness=10; Depth=3; Ambience=0; Shininess=46; Color=white; Angle=315; Intensity=30; Elevation=56." Deselect.

27. Click on the "Magic Wand Tool" Magic Wand Tool again and now click on the inside of the "gold ringed" ellipse. The "Marching Ants" appear inside the ellipse. Go to "selections/modify/expand" expand by 1.
Click on the "Flood Fill Tool" Floodfill Tool and then right click inside the "Marching Ants." The area inside the ellipse nows turns "white." Deselect.

28. Make sure the "Layers Option Pallet" Layers Option Pallet is open. Turn off the background layer br[layer 1]. Go to "layers/merge/merge visible." Turn the background layer on again.
Go to "File/save/" and click Ok."


Next: Back: