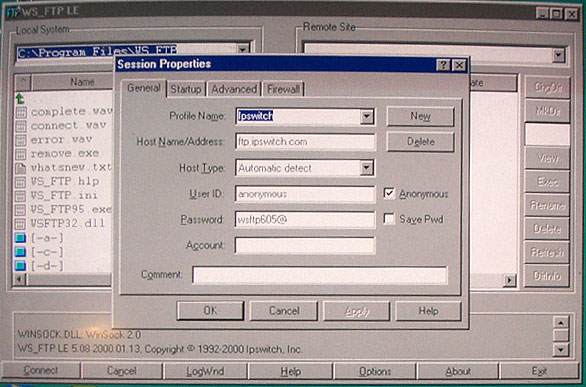
WS_FTP_LEThere are two versions of WS_FTP. A professional version which is payware and a Free Version WS_FTP_LE. When you install the program as long as you register as a student or government employee it works for free and will be all you need for FTPing your files. You can search for it on your favorite download site or: Once you install and open the program it will open to the login window wich is where you enter the login parameters and connect to the backend of your website.
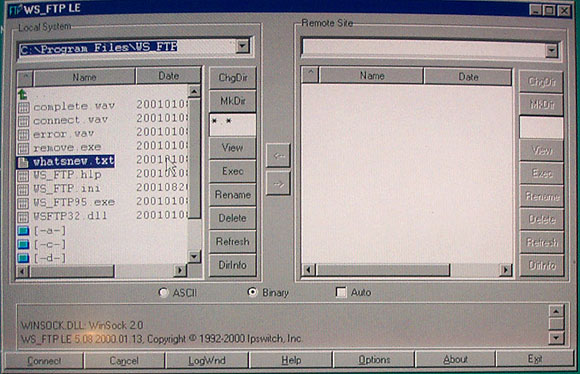
Enter your Host Name or IP address, User ID and Password and connect to your backend. Once you are connected you will see the screen with two windows. The left side is your Harddrive and the right side is the backend of your space on the Server. Use the top box under Local system and navigate to wherever your website files are on your harddrive or disc. Your files will appear in the larger window.
Select the file (in the Left Window ) you wish to move to the remote Site ( your space on the Server). In the middle bar there are two buttons with arrows. Click the arrow that points to the remote space and it will move the file to the Remote site. Note: There are three buttons on the bottom. ASCII should be selected when transfering HTML or text documents (such as javascript files). Binary should be selected when transfering images, audio or multimedia. Or select auto and it is supposed to be smart enough to know what file is what.
You can move Folders or individual files. If you have loaded a folder such as an image folder to the Remote site and need to add a single file to that folder then you must navigate up one level into the folder on both sides of the window and make sure you load it into the correct folder. You can then navigate back down a level to the Root if you wish to load more HTML documents or other files. Much like navigating through your harddrive. Make sure you load the files and folders exactly as you have them arranged in your safety copy of your website. CuteFTP Tutorial by Webmonkey |