Making Curved Text
Now
we're going to add the text to your
image... we've almost finished now!
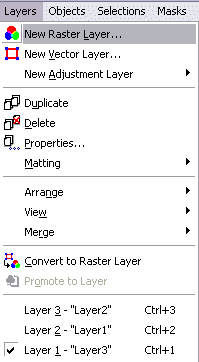
First we need to add a new layer for
your text to go on, so go to "Layers"
then "New Raster Layer"
Select your text tool
 and hover over the very edge of your
white shape. You'll notice your
cursor has changed to a crosshair with
an A at an angle and a downwards
pointing curve underneath it.
That's cool. It means that PSP
knows you want to write your text on the
edge of your white border.
With
your text tool still selected, go to
your Tool Options window (the one that
was getting in your way at the start of
the tutorial) and use the following
settings:
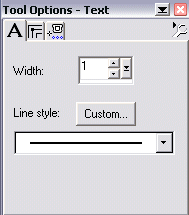
Width: 1
Line style: straight line
Go
back to the very edge of your white
shape and hover over it again.
When you see the crosshair and angled
"A" again, single left click to bring up
the Text Dialogue box.
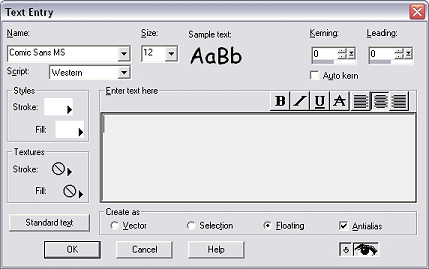
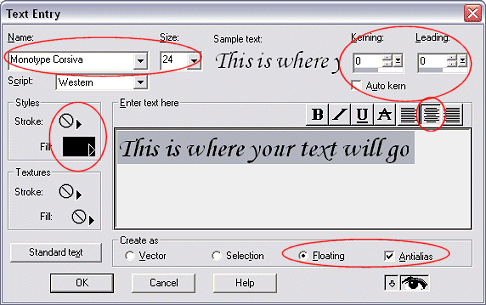
Change your colour settings so that they
look like this:
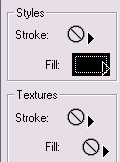
Styles section:
Stroke: Null
Fill: Colour of your choice - I'm
using black
Textures section:
Stroke: Null
Fill: Null
We
only want to have the "fill" in the
styles active 'cos using a colour in the
stroke makes it really bold and yucky
and we don't want textures on our text
this time - it will be too small to see
anything so we just want it to be a
plain colour.
Now
you need to choose the font you are
going to use and the size you want it to
be. I'm using Monotype Corsiva at
size 24 but you can use anything you
would like to.
Type
whatever text you want to appear around
the edge of your image in the text box.
Make
sure that "kerning" and "leading" are
set at 0 and that "Auto kern" is
unchecked

Make
sure that your text is centered and not
bold, underlined or in italics.
It's very important that you make sure
the text is centered as this
tells PSP that you want your text at the
top of your image, right in the middle.

Make
sure that "floating" and "antialias" are
checked.

When
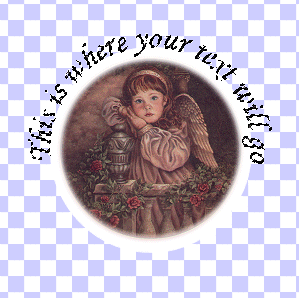
all that's set, hit "OK" and your text
will magically appear at the top of your
image!!
**
A little note here... some people find
that when they get to this bit, their text
is upside down. If you find this
when you get to this stage, just go to
"Image" then down to
"Flip" then back up to
"Image" and down to
"Mirror"... this will make your
text appear the right way up, now just use
your mover tool (the 4 headed arrow) to
put your text where you want it and carry
on with the next step! :o)
We've nearly finished now... just got to
tidy it up a bit and make it look a bit
better :o)
Save
your work as a .psp file and when you're
ready, let's go to the last page :o)

