 |
Making Dark Cork "FOOTBALL" Style Decoys |
| |
Making Dark Cork "FOOTBALL" Style Decoys |
 |
 |
 |
 |
 |
 |
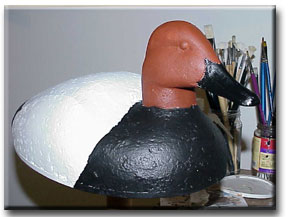
| I prefer a light grey back on my Cans, so I add it next extending from the lower point at the rear forward. You can omit this step if you prefer a whiter bird. | 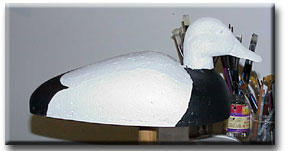 |
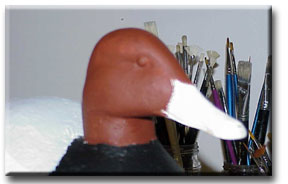 |
The body is done, and now for the head. Using "Burnt Sienna" paint the head minus the bill. This colour is a standard artist colour and available at any art store. You can also get it mixed at the paint store. |
|
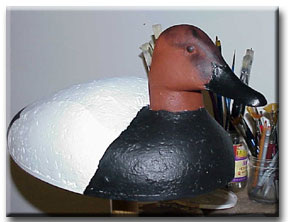
With the head done, you now paint the bill black. If you wish you are now done, well almost. If you like a satiny looking bill add 50% poly to a small puddle of black paint, mix and apply. |
 |
 |
If you prefer the "blackened face" look of a can, you simply have to dry brush that in. Wipe away almost all the paint on your brush and little brush the areas where you wish to add the effect. Takes a little practice, but this is what it should resemble when finished. |
| Now if your bird has glass eyes simple scrap off the paint covering them. If it's plastic, you either had to paint carefully, or repaint the eyes now. Testors model paint works great. | 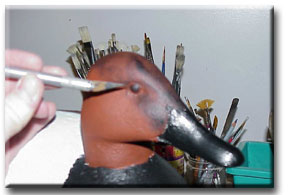 |
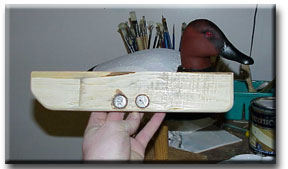 |
Time for a Keel! Depending what your kit came with you may be good to go or not. I make a simple keel that's 2 1/4" deep with 2, 3/4" holes drilled equally on center which are then filled with molten lead. |
| Counter sink a couple of holes to attach and place a hole for the line to attach and glue it to your bird using your preferred waterproof glue. | 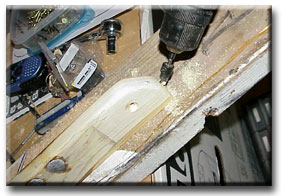 |
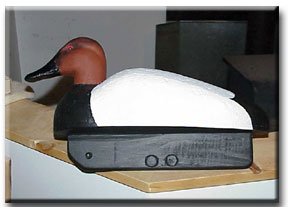 |
Last step to get your bird ready for the water is to paint the bottom and the keel. Time to head to the marsh! |
 |
 |