

I started off with an extra set of steps. Not sure what happened really. I planned side views and everything. So mid-project, I had to redesign parts of the project to allow for the missing steps.
I used the rough side of the glass to give a more realistic stone step look. The steps needed to be planned in advance. Each main level of the floor has a stair on it. The proper side (the rough side) of the glass had to be showing. This was important. The bottom of the floor has a side, however it will be upside down. The stair is on the side that's viewable. So the stair had to be on the smooth side, when it was soldered on. So when it was flipped over the rough side was up. A little confusing...
The stairs were placed in the corner, because that's where there was space. If I put the stairs in the center's, there wouldn't be any hallway left. So I placed it in the corners of the building. And placed a curved wall to match the curved corners - keeps continuity.
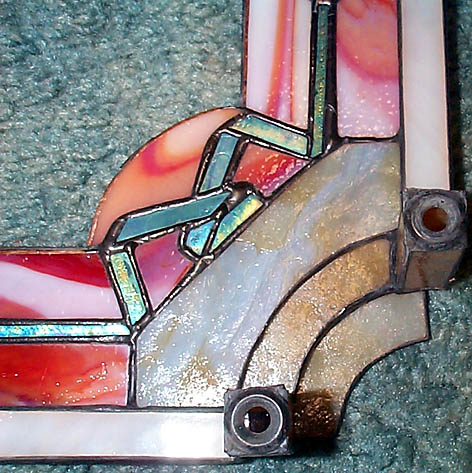

The posts are made up of art glass, I think Chicago art glass. Each post is about 2 inches tall. The sides were chamfered with my Twin Spin. Each post was a 1/2" wide, 64 pieces in all, 2 sides each. Let me tell you, it's difficult to do. I know it sounds easy? Well, what happened a few times was my thumb nail touched the disk at a steep angle a few times...ouch. It wasn't pretty... The posts were chamfered to give it an even profile when soldered. I didn't want to have real fat seams on these things.
I cut a notch in the floor where the posts would fit. Apparently they weren't needed, since I put the white trim on. The white trim is a part of rail system (it was easier to put it on now). Trim molding was attached to hide the gap in between floors, and to make it look nicer. Hopefully I added the extra pieces in somewhere for my pieces count.
Each post sits on top of the top part of the lower floor - that makes sense doesn't it? Of course it does. Take the thing you saw on the page before this one. And put the posts on top of it. Anyway, there's a small gap underneath each post, I filled it with solder, it'll be ok, no one should really notice.
It took over 6 hours to cut, grind, foil, and solder the posts. And another 4 1/2 hours just to solder the posts and outer trim on. It was very tricky because the unit had to be on it's side. I forget what I used exactly; but I think it was a combination of heavy weights and clamps, in order to keep it upright for soldering. The trim pieces were a real pain, because the floor didn't line up properly. The main floor was a little bigger then the lower section. The trim had to be put on straight, it would be noticed if it wasn't. So there is a slightly wider bead at the bottom, in other places it's on the top. The top parts are ok, because the white glass hides it.

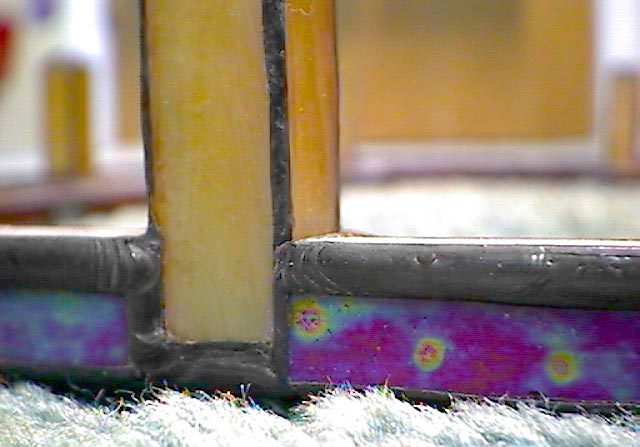
This page is slightly out of order, because I forgot to take pictures of the main floor. This page covers the posts, stairs, and the connecting of the two floors. I attached the spacer's first. The above photo shows the 1/8" x 1/2" brass square stock. I lined each one up over a seam. The spacer's are there to keep the floor from sagging, and to make sure that it's completely evenly spaced throughout.
Next the stairs were put into place. I had to be sure that the middle stair was even, and not showing any gaps. Once everything was set, I could then attach the posts. The trim sit's in between the posts, I allowed 1/8" space for the trim. When the posts were planned, I made sure to push the post out an 1/8" to make allowance space for the trim. However, it should have been 1/4" because I wanted the posts to stick out a little.
Total Time: 11 Hours


Home | About Me | Aliens | Foil | Miscellaneous | Shop | Projects | Tips | Shopping List | Links | Awards

Started on 11-28-98