There are several good books on the subject of kaleidoscope construction. Check Amazon.com but make sure you are not getting a book on romance, suspense, or directions on making a kaleidoscope quilt which is a poplar thing to do nowadays. The book by Cozy Baker is a known good resource. Jim has the 1989 Second Printing "Through the Kaleidoscope... and Beyond" by Cozy Baker. This book is good for listing makers at the time as well as pictures of their work. Other sources must be studied to become familiar with the physics of it as well as detailed construction techniques.
Several authors of kaleidoscope books have spent years in research and effort and obviously offer better images, diagrams, and words than we can ever produce here at this setting.
We recommend taking a class from a person whose work you have seen and admire. We recommend the John C. Campbell Folk School.
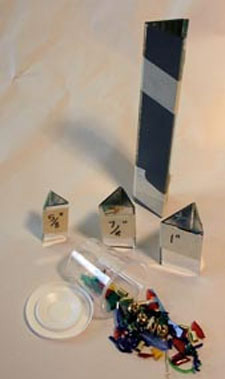
Tools you will need. First, you need a good carbide wheel glass cutter. Glass cutters with steel wheels that you get at the hardware store will not score front surface mirror. You will require a good carbide cutter. You can not tell the difference by looking at the wheel so you have to get the cutter from someone who knows what you are talking about. Never score more than one pass or you will not only get the break confused but you will ruin the cutter. Also, you need a suitable jig or t-square to accurately make repeat identical sizes of mirror. We use the Morton's system.
If you have never cut glass before, it's a good idea to take a class such as a stained glass workshop. Many stained glass principles such as copper foil technique are applicable to kaleidoscope making. Stained glass workshops are conducted at some art museums, stained glass stores, colleges, and institutions such as the John C. Campbell Folk School. Here you will first learn safety such as wearing proper eye and hand protection.
CAUTION: You can get yourself seriously injured by handling glass improperly.
A glass grinder is almost a must have. This machine is used to trim the sharp "finger nails" off broken pieces of stained glass before wrapping them with copper foil. Also it is necessary to make or finish circles or triangles used for end pieces. One does not never, ever, no way, for any reason, grind the mirror.
If you want to get serious about kaleidoscope production, you will need a strip cutter and a circle cutter which greatly speeds up the process. Many kscope styles require a soldering iron that either has a variable heat/temperature control or tip of required heat that works well for you. Use solder and flux designed for stained glass use.
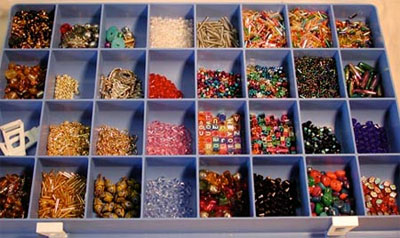
There is no limit to the materials you could use. You can use fender washers for eyepieces or you can purchase ready-made solid brass ones. You can drill a hole in a jar lid or what ever for the eyepiece. Your object chamber can be just about any vessel that permits clear light to enter illuminating the objects or allowing light to pass through them. The object chamber can be either external or internal to the scope.
Our kaleidoscopes are constructed using three pieces of front surface mirror. Bathroom-like mirror will not work because double images will result from reflection from both the front and back of the glass. There is good front surface mirror and better front surface available; the better naturally costs more. We use the latter since the cost per scope isn't very much compared to your investment in time