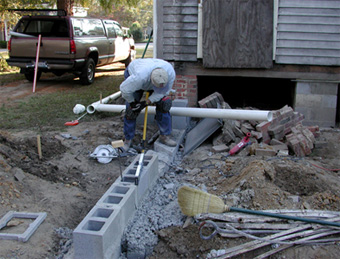
Sometime while building the footer and foundation, the chief architect realized that we needed a sewer line leading from our addition to the street. In the image above we laid out several sections of pipe along with the fittings we planned to use to get a birds eye view of the installation. At this point we discovered we are not deep enough. So we get out the masonry blade for the saw and proceed to slice a 45-degree notch in our newly-laid and filled in with concrete foundation.
|
 |
 |
 |

We had to dig a ditch from the house to connect to the city sewer. Before we could dig, we contacted all utility companies. The city sent out a "special" person with a divining rod to locate the water line. He used the spray can to mark his findings. We were somewhat in awe of this procedure as our local water company in WV also has someone that uses the exact same device to locate hidden water and sewer lines. While we have no express opinion about divining rods, anything that helps you figure out where a buried water line is in clay soil is OK in our book.
|

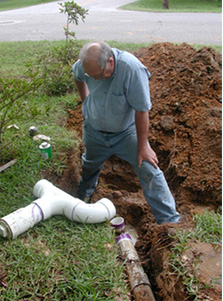
Doc and his crew had located the sewer stub when they installed our new water meter. They drove a stake in the ground and put in a piece of PVC pipe that ended at the stub. In the picture above, Elizabeth digs down by hand to locate the stub as it will become our target for our sewer line. She got down about four feet without finding the end of the PVC marker.
Admitting defeat we asked the city if they could please come out and find it for us again as we were now ready to lay the line. Doc, supervisor in the department, knows where every water and sewer line in the town are located. The new guy on the crew drove the backhoe over and started very carefully digging down. After a bit, Doc said, let me show you how to do it, put the throttle all the way open and the dirt was flying. In a few minutes a man-sized hole appeared right next to the old clay sewer line. Doc even knew exactly what part we needed to connect our approved 4" PVC to the old clay tile.
|
 |

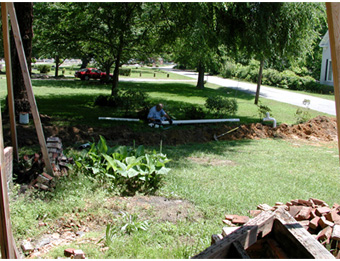
We now have an aim point from the house to the street. Using 22-1/2 degree fittings (Doc's requirement) and sections of 4-inch PVC we laid out our line and marked it with spray paint. Then we removed the sod and saved it for installation later. We put a taller piece of pipe above the sewer connection for sighting the trench path.
|

We rented the tractor again and Jim dug a trench from house to street. We laid pipe in the trench as we dug to check our slope. As can be seen below, it's not a bad trench for a beginner.
|
 |
 |
The assortment of parts is our street cleanout. This special "T" enables someone to insert a cleanout probe into either direction in case of line blockage.
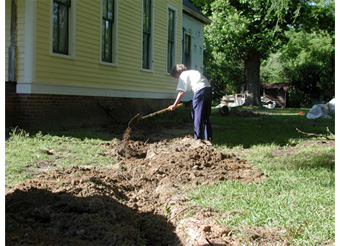
After the city approved our sewer line, we sprinkled sand from our pile on the pipe and settled it with water. This ensured the pipe was buried completely in a bed of sand and there would be no sagging spots. Also we knew there would be no rocks or sharp objects in contact with the pipe which could pierce it when heavy vehicles drove over it. After several inches of sand were applied, Elizabeth filled the trench with remaining dirt and sod.
|
 |
|
|