
By Sam HarperAnother English Longbow build-along
Roughing out
Today is Saturday, July 14, 2007. I haven't worked on this bow in a while, huh? It seems like something comes up every weekend. This weekend it was Harry Potter and the Order of the Phoenix and Ratatouille. Thankfully, they didn't take all weekend, so I had a little time to work on the bow.
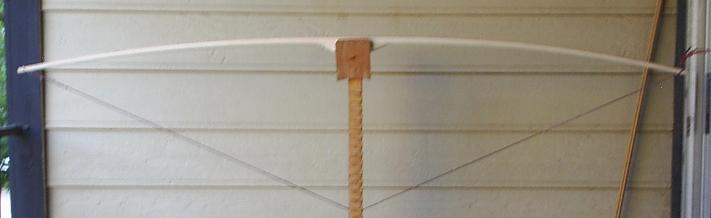
After taking the bow out of the oven and unwrapping it, I cut it out with the band saw. That is, I cut off the excess maple on either side of the pecan backing. Then I used my belt sander to clean it up--get the glue lines looking good and the tool marks out of the sides. Here's how it looked:
See how it's got some reflex? That'll probably go away, and hopefully I'll end up with a straight bow in the end.
English longbows are supposed to have round bellies. I could get it round with a belt sander, but it's easier to at least start with a rasp. I clamped the bow to my chair so I could hold the rasp with two hands.
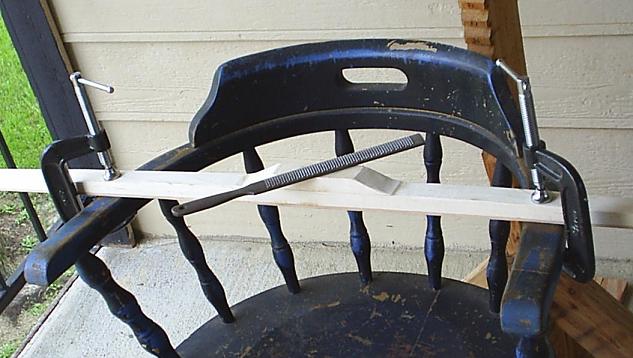
I rasped the corners off all along the bow and rounded it a bit.
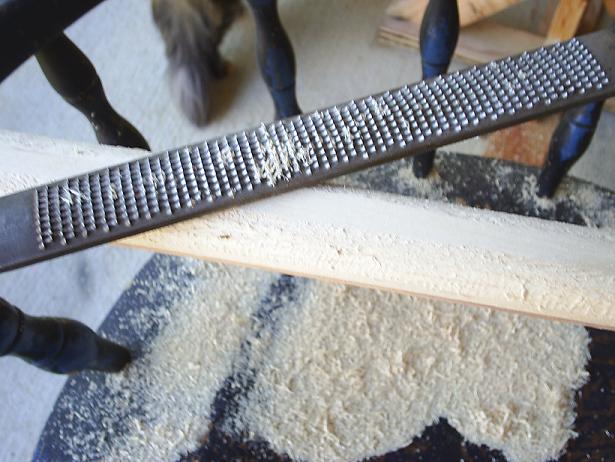
Then I rounded it the rest of the way with the belt sander. I used the flat part of the belt sander and sort of rolled it to get it round and uniform.

I know the roundness is hard to see with this picture, but it's the best I could do.
Tillering
Some people floor tiller at this point. Floor tillering isn't really necessary. You could accomplish the same thing by putting it on a tillering tree. But if your roughing out is really rough, floor tillering isn't a bad idea. I always floor tiller anyway just to see how stiff it is. I mean if it's incredibly stiff, there's no sense in putting it on a tillering tree. You need to reduce it to where you can bend it a little. The more bows you make, the better you can tell how stiff a bow is when floor tillering. Mine is about where I want it to start tillering it on a trillering tree.
Since I'm going to put horn nocks on there later, I only want my nocks to be temporary. I want to make nocks I can remove later, so I make them sort of close to the end, and I don't make them too deep. First, I draw a line across the back 1/2" from the end.

I use that line as a reference for filing my nocks. I file them at a 45 degree angle, as close as my eye can tell. I start them with a triangle file, then finish them with a rattail file. If you start with a rattail file, it could slip and slide all over the place before it finally takes. First I do one side. Then I use that side as a guide while doing the other side.

And that's as far as I got today.
I worked on the bow a little yesterday. Today, I'm going to show you what I did.
Tillering with a long string
I decided to aim for somewhere between 35# and 40# at 27" of draw. That seems to be about right considering who I'm making the bow for. Jawges recommends using a long string until you get the bow bending 10" before stringing it. So I put a loosey goosey string on there and pull the string until it's taut. My string became taut at 13", so I want to get the string moving to 23" before I string it the first time. And I want it to be at about 35# when I get to 23".
After making sure it could bend a little by floor tillering, I stuck it on my tillering stick. (For those of you who shudder at the idea of using a tillering stick instead of a tillering tree with a pully system, well, I wish I could use a pully system, but living in an apartment, I have my limits.) And I pulled it three inches just to see if there was any obvious difference in stiffness between the limbs. Here it is at 16" (i.e. 3" of draw).

The right limb looked a little stiff to me at the time. It was hard to tell, though, so I just excercised the limbs 30 times and pulled it to 18". I could tell from the feel that it wasn't 35#, so I didn't worry about it. You should never pull the bow past your target weight. There's just no reason to. Here it is at 18".

This time it was more obvious that the right limb is stiffer than the left, so I attempted to weaken it a little. I decided I'd use the belt sander. Rounding the belly with the flat part of the belt sander went so well, I thought I might as well keep doing it that way. I just put it on the belt sander and rolled it from side to side, keeping it round as I removed wood. I mostly worked from the fades to mid-limb. Here it is at 19".
This time it looked about right, so I decided to pull the bow to 35# and see how far it went. It went to 21", which is 8" of limb travel. Just two more inches, and I could string it. Here it is, 35# at 21".

The right limb still looked just a wee bit stiff, so I worked on it a little more, excercised the limbs, and had another look-see. Here it is again at 21".

It looked even to me at this point, so all I had to do was reduce both limbs evenly so I could draw the bow farther and not go over my target weight of 35#. I wanted the bow to bend a little more toward the fades, so I worked about midlimb to fade and left it alone from midlimb to tip.
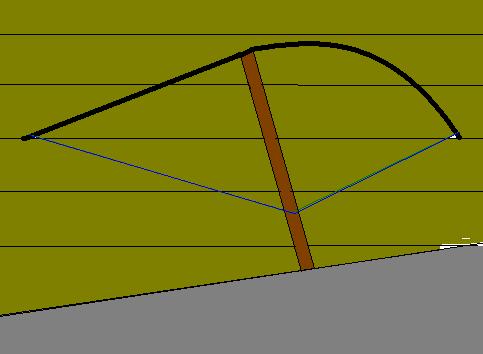
Lemme explain why I do that. When you use a long string, the force on the tips is more in a downward direction. But when you string the bow with a shorter string, the force is horizontal. That puts more pressure on the tips. The difference might look kind of like this:

If you're not careful, the bow could be whip-ended or even cause a hinge.
Also, I like to keep the tips stiff because I'll want to narrow them later. If they're already bending too much, narrowing them is going to cause them to bend even more, causing the bow to be whip-ended or hinged. This is especially horrible for a reflex deflex bow, because you'll lose all your reflex due to set.
It's much easier to see how the limbs are bending if you have a pully system, because you can stand back and actually watch them flex. I worked from fades to mid-limb until I got it to 35# at 22".

Oh, by the way, I drew an arrow on the handle pointing to the right limb. That way, I didn't forget which end is which each time I took it off the tillering tree and put it back on. Anyway, at this point, I decided to use a 5" block of wood, slide it along the under side of the belly, and look at the gap. You can see hinges and flat spots easier that way. The bow looked good to me, but I found a flat spot on the left limb about midway using the slide-the-block method. I marked that with a crayon and worked on it a little.
Eventually, after messing with the tiller and reducing the weight, I got it to 35# at 23", which is what I was shooting for.

But now the string wasn't taut at 13" anymore. The bow must've taken a little set. Now it was taut just past 13". I decided to really get 10" of travel, I ought to pull the bow to 24" before stringing it.
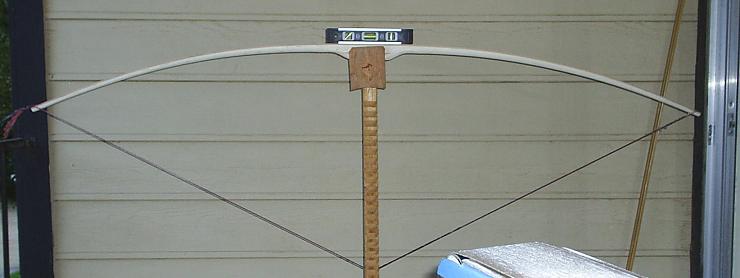
Lemme tell you what I put that level on there for. You see, I've noticed on a lot of bows I've tillered that even though it looks even before I string it, whenever I string it, one limb always turns out to be more stiff than the other. I think I may have discovered why that is. It's because my balcone is not level. Check this out:

Do you see how the gap between the floor and the board gets wider as you go from right to left? Well, the board is level, but the floor is tilted. That causes my tillering stick to lean, and that's probably why my bows come out uneven, which I don't notice until I string them. Here's an exaggerated look at what I think happens:
You see, I was using the boards on the wall to gauge whether the limbs were bending evenly or not. I figured if both tips came down to the same level, then the limbs must be bending evenly. But with my tillering tree leaning, one limb had to bend more than the other for the tips to come down to the same level. I decide to fix the problem, I would put a level on the bow while I pulled the string. That way, even though the string wouldn't pull from the center, at least the bow would be level.
Looking back on it, I guess I could've put shims under the tillering stick to get it level.
So I reduced it a tad and put it on the tillering stick and pulled it to 24". At 24", it came to 37#.
So I strung it.

So much for my theory. My theory predicted a weaker right limb, but the right limb turned out too stiff. I decided to quit at this point because it was getting too dark.
to be continued...