Things have gone awry. I was outside tillering today and taking pictures and notes as I went. But when I came back in to transfer the pictures to the computer, some of the pictures were out of focus. But worse than that, the tiller looks a lot worse in the pictures than it looked to my naked eye. Sorry about that. We'll just have to make due.
Tillering the bow
Since this is a reflex deflex bow, you can't tiller it like you tiller a straight bow. You can't just go for a perfect arc, and you can't use the little trick where you slide a block of wood along the belly and identify hinges and flat spots by the changing size of the gap. There are other tricks to tillering a reflex deflex bow, though. Rather than go into those, I just want to explain the thought behind it.
What you want to do when tillering any bow is to get each part of the limbs bending the same amount as every other part. Think about that for a minute. You've got a deflex part and a reflexed part of the bow, right?. If every part of the limb is bending by the same amount, then the deflexed part is going to look like it's bending the most, and the reflexed part is going to look kind of straight. The degree depends on how much reflex and deflex you have. If you have just a little reflex, those tips will bend inward. But if you've got a whole lot of reflex, then they might be doing good just to straighten out.
I'm not an expert at tillering reflex deflex bows, so I suggest just looking at a lot of other r/d bows. John Scifres has some on his web page. I think to see what a perfectly tillered r/d bow looks like, you could look at a r/d fiberglass bow with tapered laminations. Since all the laminations are ground to uniform perfection and tapered, it should produce the ideal tiller.
In the meantime, I'll do the best I can.
The first thing I do is pull it about three inches. It just starts to flex when I get the string to 17", so to pull it three inches, I pull it to 20".
This is just to get a feel for how stiff it is and to see if the limbs are bending evenly. A lot of people floor tiller, but this serves the same purpose. Now don't get the wrong idea. I'm not suggesting that you pull it three inches no matter what. If your bow is so stiff you can't pull it three inches without pulling harder than 40# or something, then don't pull it 3". Tug on it and see if it'll bend a little, but if it won't bend without considerable force, then you need to reduce the limbs some more. Like I said, this is the equivalent of floor tillering, and the purpose of it is just to test the stiffness and get the limbs moving.
It seems to be bending alright, so I excercise the limbs 30 times to loosen them up a bit and then pull it to 30# and see how far it goes. It went to 21" which is just 4" of limb movement.
I've got the top limb on the left and the bottom limb on the right, just soes you know. The right (bottom) limb seems to be bending more, so before I draw it any farther, I want to try to even them up. I do that by removing wood evenly along the top limb. I just do a little at a time, excercise the limbs, then check. It's important to excercise the limbs every time you remove wood. That allows the wood to get used to the loss and show the effects. I excercise the limbs 30 times each time I remove wood. By the way, I'm using my pneumatic drum sander to tiller the bow.
After a few tries, I finally got them close to even. Here it is again at 21".

That looks a little better, doesn't it? Now I'm going to pull it to 35# and see how far it goes. I'm moving in 5# increments until I get to 45#. I want to reach 45# at 10" of limb travel before stringing it. 10" of limb travel would be 27". At 35#, it went to 22".
Now it seemed to me that the left limb is stiffer in the outter section than the right. After working on that, I think I got it looking a little better. Here it is again at 22".
Now I draw it to 40# and it comes to 24".
It looked good to me so I kept going. I eventually reached 47# at 27". I know I said 45#, but 47# is close enough, isn't it?
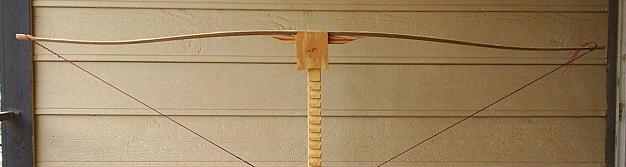
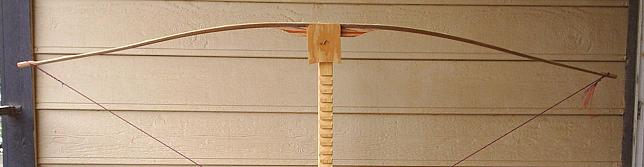
Now I string it just a little lower than full brace.

I can never quite tell if the limbs are bending evenly until I brace it. Then it becomes obvious. In this case, the top limb is too stiff. I want the top limb to bend slightly more than the bottom limb, giving me a slightly positive tiller. After working on it some, I got a 1/8" positive tiller.

A lot of people wait until they're done tillering before choosing which will be the top limb, and they don't cut an arrow rest until then. But I have found it easy enough to get the tiller I want, so I don't do that anymore.
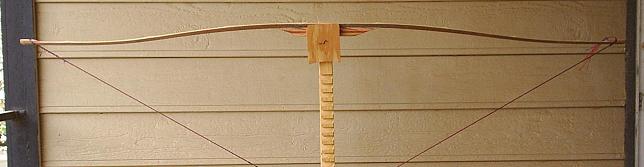
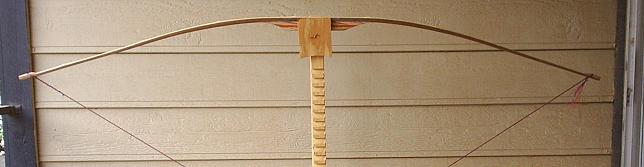
Now I draw it to 18" just to look at the tiller. This is well below the current draw weight.

I intentionally left the outter limbs stiff, because I knew I was going to narrow them later, and that would affect tiller some. That time has come. At this point, the tips are 5/8" wide. I want to narrow them to 1/2". Before I narrow the tips, I want to check the alignment. It may be that I need to take wood off one side and not the other in order to correct the alignment.

The alignment looks good to me, so to keep it that way, I need to remove the same amount of wood from both sides on either end. As long as I cut my nocks to an even depth on both sides, that's easy. I just grind the sides on the belt sander and check the depth of the nocks on both sides. I grind from about 14" or so to the tip, so I narrow the last 14". I get the tips at the beginning of the overlays to just a smidgeon more than 1/2". Here's a before and after picture:

Notice how the depth of the nocks is equal on both sides. That should keep everything lined up.
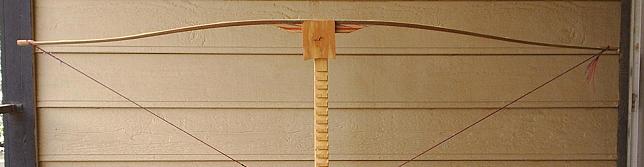
Before continuing, of course, I redo the nocks and re-radius the corners of the bamboo and the ipe. Here's another look at 18" with the tips narrowed.
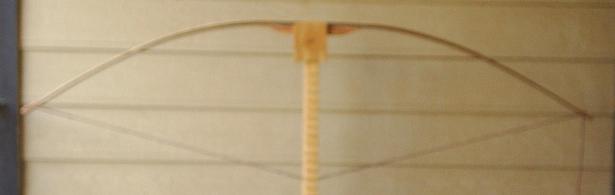
You see, I had my camera set on close-up for the tip picture, but I forgot to reset it for the next three pictures. That's why they're blurry. Sorry about that. You can still see the shape, though, right?
I don't have a specific draw weight I'm shooting for, so I'm just going to keep tugging until I get it to 28", and I'll be happy with whatever it comes out at. The next thing I do is draw it to 45# like I had it before stringing it. That brings it to 25".

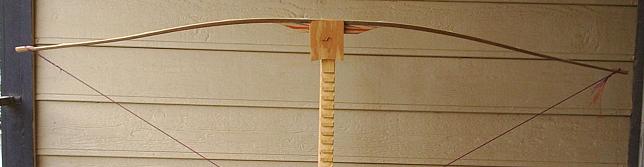
At the time, it looked pretty good to me, but now seeing this picture, it doesn't look quite as good. The right limb needs to bend more at mid limb. But not seeing that at the time, and thinking everything was hunky dory, I continued. I eventually got it to 48# at 28".
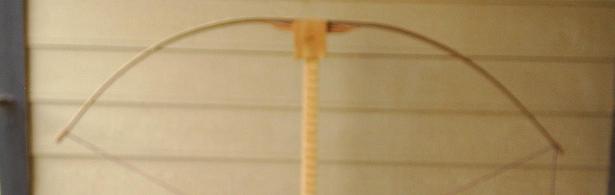
It's not gastly or anything, but it could be better. Finally, here's a look at the profile right after unstringing it.
