Stop-Motion
A general
description.
[ Home ] [ sammy ] [ Stop-Motion ] [ Software ] [ Cameras ] [ Lighting ] [ Medium ] [ Helpful links ]
Here you will find
how-to's and hints for the
do-it-yourself, stop-motion animation enthusiast. I've recently discovered
this addictive hobby, and I think
it may just catch on a little bit. My wife has taken to it as well, by
creating Whiskey, and taking photo's while I move the figures. Anyone with
a digital camera can do it. I've put all the tools you need on this very
site! It's a great family activity, and your friends will enjoy the
product.
for the
do-it-yourself, stop-motion animation enthusiast. I've recently discovered
this addictive hobby, and I think
it may just catch on a little bit. My wife has taken to it as well, by
creating Whiskey, and taking photo's while I move the figures. Anyone with
a digital camera can do it. I've put all the tools you need on this very
site! It's a great family activity, and your friends will enjoy the
product.
I purchased my camera before I was aware of this
application. which surprised me in two ways.
- It's very, very, easy.
- It's very, very, fun.
These two surprises lead to a third surprise.
- If it's so easy and fun, why wasn't I aware of
it?
After I made my first clip I went to the internet for
more information, I was surprised yet again. All I seemed to find was
sites specializing in high-end animation. This is all well and good, but
what about the guy who just wants to try it out for fun? I didn't find any
sites dedicated to this kind of animation. I decided to use my site to
help others who may be looking for simple "bathtub stop-motion"
information. If you know more than me about his stuff, please don't go
away. Drop me an email,
and I'll add your pearls of information here.
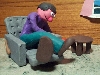
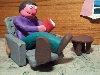
The general principal is to
capture a series of photos on a digital camera. Take picture, move
subject, take picture, move subject... etc... Until you run out of either
patience, organization, or storage space. When you've captured all
your "frames" you can use one of several software packages to cut,
paste, and edit the order of the frames. Now the "frames" are
strung together in a single movie file to be played back at a certain speed.
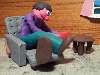
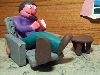
Here is where the math comes in;
you will need to decide how many pictures to take. For the Sammy clips on
my website, I tried to imagine how far I wanted Sammy to move in one second, and
then made him move that far in 10 steps, taking a picture of each step.
Then, I chose 10 FPS (frames per second) when stringing them together. The
Higher the FPS, the smoother the video. I've considered making a shorter
clip using more pictures, at 20 or 24 FPS, but I just can't imagine breaking up
1 second of movement into 20 or 24 steps, and making moves that small.
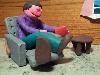
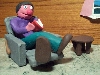
For
example, if I want Sammy to move his hand from his side to a hand-shake position
in about a second, I will move his arm about an inch or so. At 10 FPS each
move would be just 1/10 of an inch. At 20 FPS each move would have to be
1/20 of an inch! I just can't imagine doing that. It seems that I
already move him as little as I can for each picture, but it works out to look
best at 10 FPS.
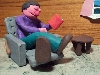
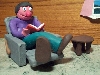
There are devices to make these very small moves
easier. They are called armatures. These act like a skeleton
inside your figure (if you are using clay) that adds stability, and enables
smaller moves. I haven't tried this technique yet, but there are plans to
make your own on The
Clay Animation How To Page.
If you are interested in trying it
out for yourself, please click  on
the links above. There, I have some useful
information about cameras, subject matter, and software to get you started
with. All the software is available for download, and it is free. A
simple clip could take less than an hour to make, from start to finish.
Windows 95 and 98 come with players for these movies,
you can make them small enough to email to friends and family, and kids love
them.
on
the links above. There, I have some useful
information about cameras, subject matter, and software to get you started
with. All the software is available for download, and it is free. A
simple clip could take less than an hour to make, from start to finish.
Windows 95 and 98 come with players for these movies,
you can make them small enough to email to friends and family, and kids love
them.
 Back
to Top
Back
to Top