
--HOME-- --STEP BY STEP-- --OUR SOURCES-- --SPECIAL THANKS-- --THE COST-- --IHC HISTORY--
May 26, 2001
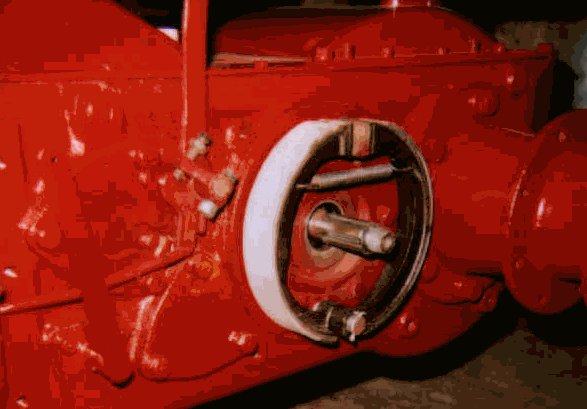
Installed the brake shoes and drums on the right side today and got the right side levers on. Cleaned and painted some of the other loose pieces.
May 27, 2001
We ran into a snag on the brakes on the left side. The shoes we picked up at the bone yard had a few too many shims and we had to drill out the bolts and re-shim them.
May 28, 2001
Everyone was over for a holiday picnic today but dad and Andy and myself snuck down to the barn and got right back into it. Andy primed and painted parts most of the day while dad clean and sanded on others. I finished the brakes up on the left side and picked up and organized the
We have the cover over the accessory drive shaft but we did find the belt pulley in the barn. It is the standard 12 3/8 x 6Ľ #2942DA.
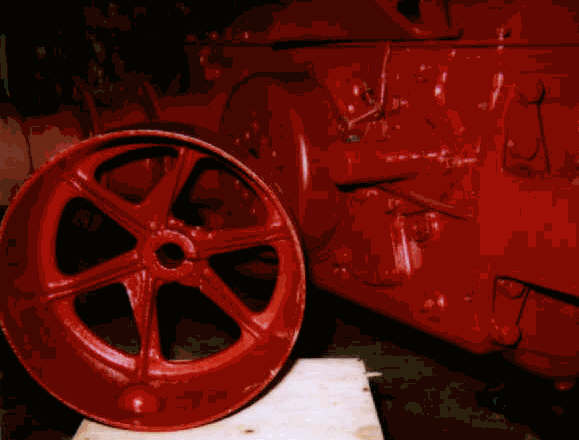
We found two of these standard size pilleys but would consider trading one for the 10" #3727D just to have both.
May 31, 2001
We clean up the forward brake controls and got them painted today and plan to install them tommorrow.
June 2, 2001
Well I spent most of the day doing prep work on the fuel tank, hood and drive joint cover. Lots of fill, prime and sand and prime and sand and prime and sand.
June 5, 2001
Well I finished the work on the hood and tank and after cleaning our air cleaner assembly noticed pin wholes in it. Weld or replace?

June 6, 2001
We got our block all cleaned and primed today.
Removed the front pulley and claeaned and painted behind it and painted the back side of the pullet and reinstalled it. We are expecting this engine to run, it was running when it was parked several years ago. We decided to clean it up and rebuild all the accessories this year and if we end up with an oil burner then we’ll deal with that next year.
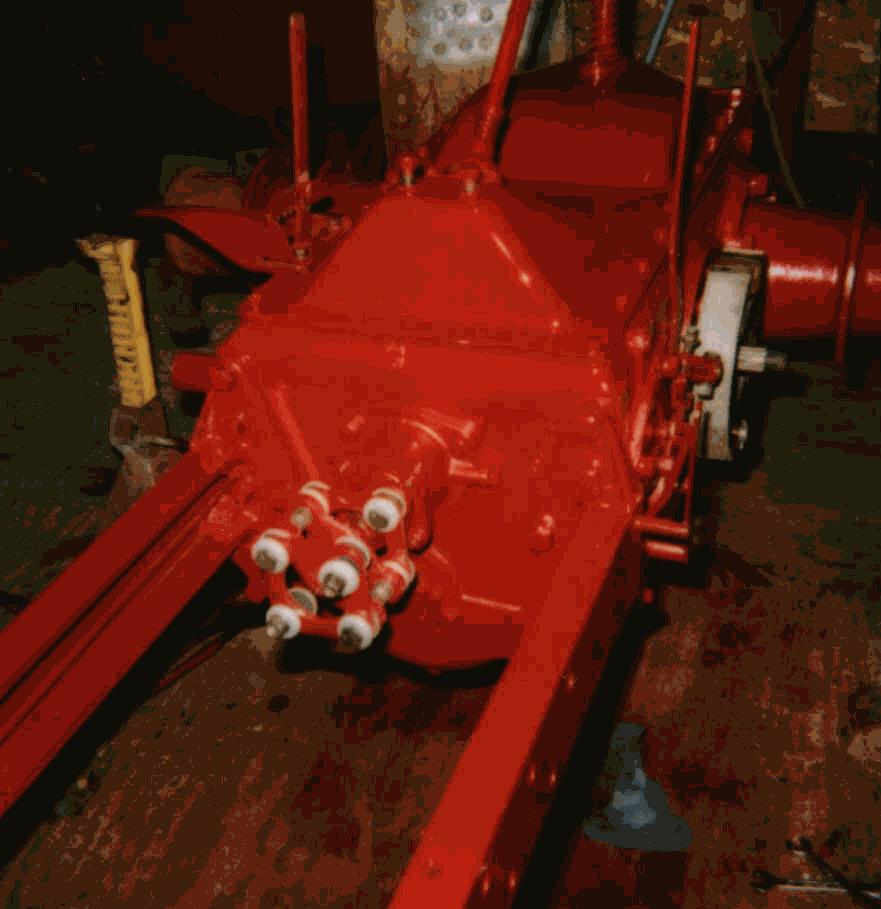
Well the transaxle or gearbox end is pretty much all back together including the top cover, shifter and seat. The new brake shoes are in place and all the brake controls are on and adjusted close enough that a little final turn here and there ought to take care of them. The drive coupler is in place with new rubbers and washers where needed and everything to this point is primed and painted. Now we can move on to installing the engine.


--HOME-- --STEP BY STEP-- --OUR SOURCES-- --SPECIAL THANKS-- --THE COST-- --IHC HISTORY--