
Index | Ex 2-2 | Ex 2-3 | Ex 2-4
Exercise 2-3: Windows
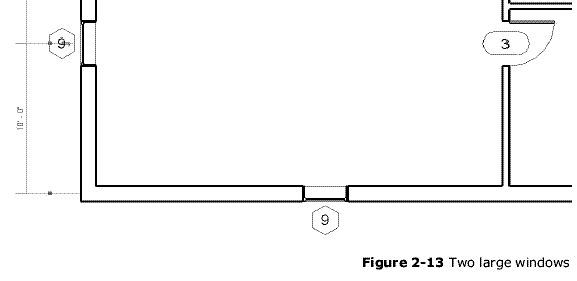
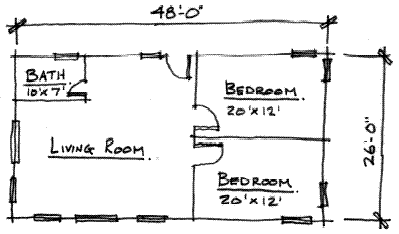
In this exercise you will add windows to the cabin floor plan.
Placing windows:
Notice that the Options Bar has changed to show options related to Windows. Next we will modify those settings.
The Type Selector indicates the Window style, width & height. Clicking the down arrow to the right lists all the windows loaded in the current project.
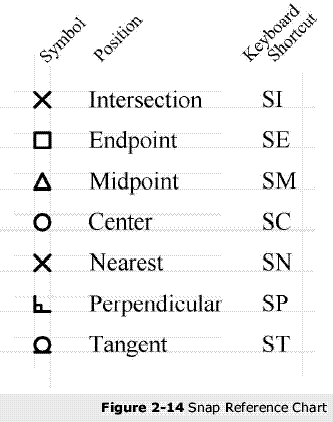
By now you should be well aware of the snaps that Revit suggests as you move yourcursor about the drawing window.
If you hold your cursor still for a moment while a snap symbol is displayed, a tool tip will appear on
the screen. However, when you become familiar with the snap symbols you can pick sooner. (Figure 2-14)
The TAB key cycles through the available snaps near your cursor.
The keyboard shortcut turns off the other snaps for one pick. For example, if you type SE on the
keyboard while in the Wall command, Revit will only look for an endpoint for the next pick.
Finally, typing SO (snaps off) turns
all snaps off for one pick.