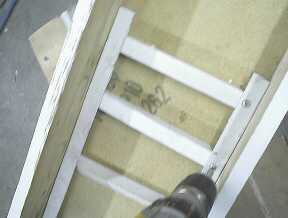


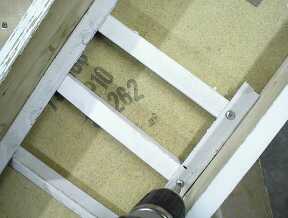
this is the direction your riffles need to be attached. |
Count the number of marks down the sides this will be the number of
riffles you will need to have. If its more that 4 you will need to cut
out a few more riffles from your "L" channel angle.
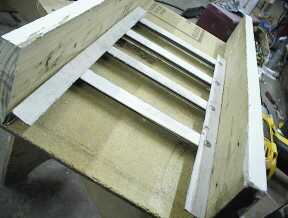
After you have all the riffles place them into the side pieces as before but this time care must be taken to line them up with the lines and make sure they are facing the correct direction. (*see pic*) the picture is looking from the bottom of the sluice up stream Each riffle should be placed with its back up stream and the open part
pointed down stream.
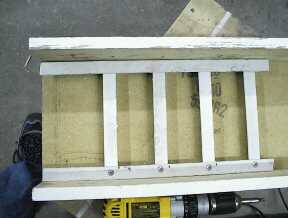
If this all looks like it is going to work them we can get the first riffle ready to be attached to the side pieces. |
|
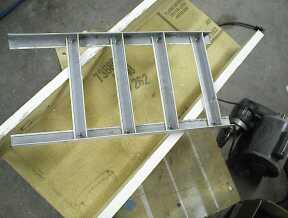
The first thing you need to do is determine if you can use a drill screw directly on the two pieces of metal or drill a pilot hole first. If you don't have drill screws i would recommend drilling a pilot hole before you screw the riffle to the side pieces. I used drill screws on thin metal in the picture so i didn't have to use a pilot hole. 1. line the first riffle up with the line on the side piece. 2. push the riffle snug against the side piece 3. screw through the top of the side piece and into the riffle 4. repeat this process all the way down one side.
|
|
Once you are done attaching the riffles on one side, do the same thing to the other. When you go to screw the other side wedge a screw driver between the side and the side piece so that there is about 1/16 -1/8 inch gap. You will need this gap so that your riffles slide in and out easy. |
|
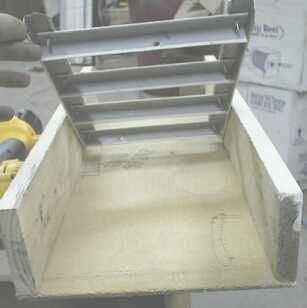
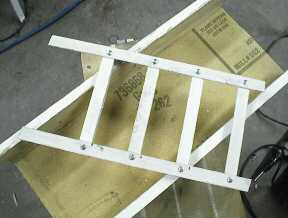
Now we have our finished riffles. please note on the set i have I could
have put one more riffle at the bottom but i choose to cut the ends off
to give a little more room to place material in at the top of my box.
Now lets hinge the riffles and we'll be done. |