TECHNIQUE

The concept is simple: A larger surface area will keep your foot from sinking in the snow. (It's why a boat floats, too.) Our native peoples discovered this idea thousands of years ago as a way to walk through deep snow to traps and fish lines in the winter. When you wear snowshoes, you become one of nature's select creatures, able to move across deep snow with minimal sinkage. In fact the big feet of the snowshoe hare and lynx use the same principal to distribute their weight in the snow.
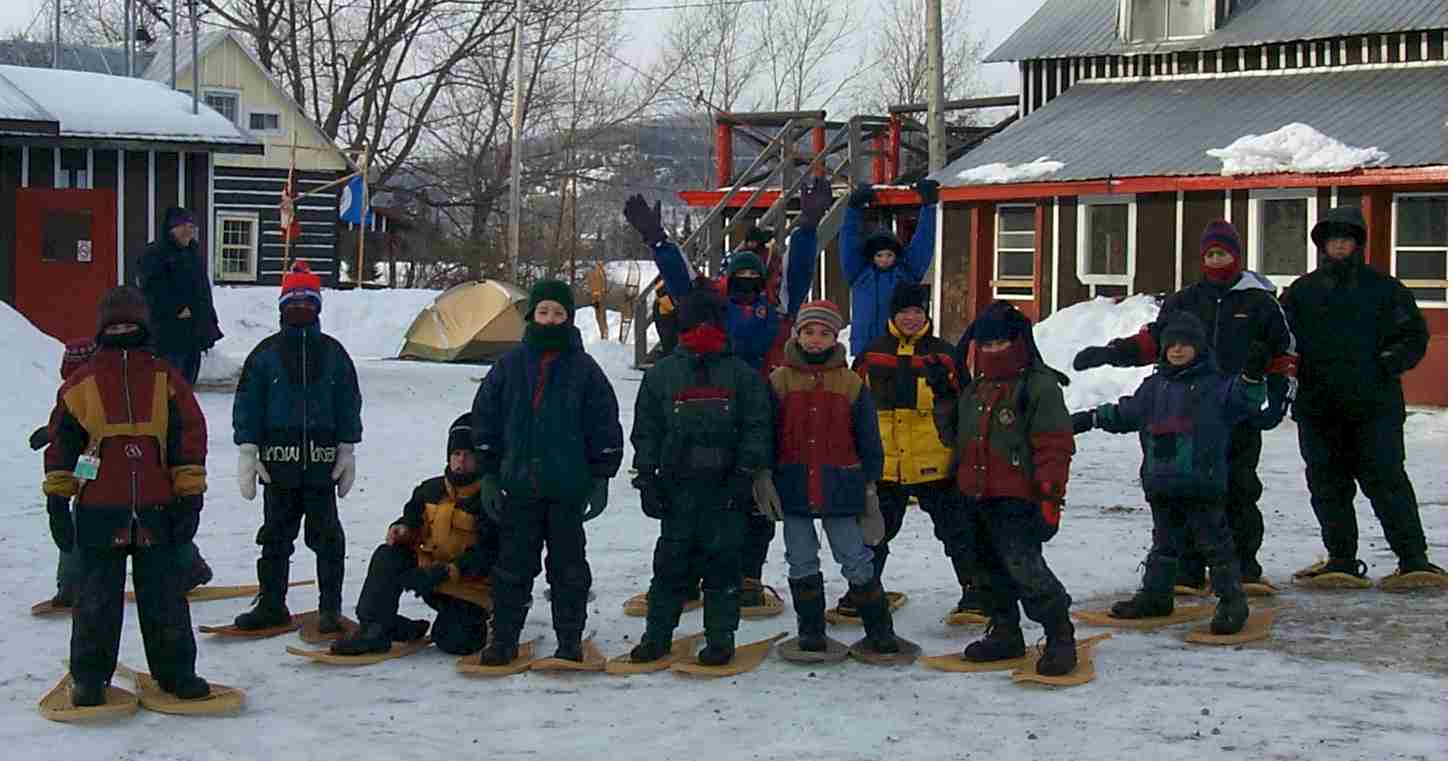
Snowshoes are a great winter activity for Cubs, allowing them to visit the forest in search of nature's mysteries. The following are key points to discuss with Cubs about the activity, the equipment and techniques.
TECHNIQUE
Climbing: To climb a slope, kick the front of your snowshoe into the snow and press down to compact it into a step. Make sure that each new step is sufficiently above the last one to avoid collapse.You can incorporate some cross-country skiing techniques into your snowshoeing. On steep hills, the herringbone technique is useful. To do this maneuver, point your toes and snowshoes outward as you climb the hill. On short, moderate slopes you can make climbing easier by leaning forward into the hill, so the toes of your boots stick through the snowshoes for better "purchase" on the snow.
If the hill extends more than a few feet, you should traverse, traveling diagonally up the face of the hill. You increase the distance you cover in your "switchbacking," but cut down on the steepness of your uphill climb.
When you traverse, edge your snowshoes into the slope to reduce the risk of slipping sideways down the hill. If you do fall and start sliding quickly down a steep slope, lie on your back and keep your snowshoes up in the air until you slow down. This reduces the chance of catching a tip or tail and twisting an ankle or knee.
Descending: Heel cleats are the key to an easy descent. Keep your knees slightly bent, lean back, and keep your weight on the heel cleats to maintain control.
Proper binding adjustment is important. If your binding isn't securely fastened or strong enough, your boot toe will slide under the cross piece or toe of the snowshoe, possibly causing a face-first spill. The best approach is to hold back your full weight and put pressure on the tail or heel of the snowshoe first as you step down the hill.
If the snow is firm and the pitch of the hill is steep enough for sliding, place one shoe slightly ahead of the other and slide down, as if you were on telemark skis. This works best if your snowshoe has an upturned toe.
Resist any temptation to jump off a small hill or drop-off while in snowshoes. The snowshoes will land on their tails, where they are most prone to breakage. Jumping in snowshoes also puts undue stress on the frames.
Edging: The best way to traverse a slope. Kick the side of the snowshoe into the hillside, engaging the cleats. Swing your heel hard towards the uphill slope, then stomp down, securing the snowshoe edge in the slope. Poles are also helpful.
Breaking Trail: When snowshoeing in a group, walk in a single line behind the leader who's breaking the trail. When it's your turn to lead, take consistent, even steps that are easy for everyone to follow.
Getting Up: If you're wearing a pack, take it off. Untangle your shoes, place your poles in an X-shape, and push yourself up while leaning into the cross of the "X." If you're on a slope, position your shoes so they're parallel to each other and pointing across the slope. Hold your two ski poles as if they were one, with one hand holding the top and the other holding the poles near the basket. With your shoulder and poles towards the uphill slant of the slope, push yourself up into a standing position. If that doesn't work, loosen your bindings and use your snowshoes as leverage platforms to perform a push up. Position your two hands on one snowshoe's tip and tail and use the other snowshoe as a platform for your feet. Then, slowly hoist yourself up.
Backing Up: Most people who are just starting to snowshoe find backing up difficult. The "tails" of the snowshoes tend to be heavier than the front of the shoe, so they catch and drag in the snow when you try to back up. To counteract this "tail drag," push down on the tip of your snowshoe with your ski pole and step back.
EQUIPMENT
Shoe Frame
The material that makes up the skeletal shape of the shoe and can either be made of wood or metal. It serves to suspend the decking material of the shoe and acts as the seat for both the binding and the crampons. A strong frame is essential not only for the durability of the shoe but also for its performance. Shoe Decking
The material that comprises the surface area of the shoe. This the part of the shoe that keeps you from sinking into the snow. It can either be solid or webbed and can be made from a wide range of materials. Shoe Cleat
The teeth that are on the bottom of the shoe that provide traction, and allow for more confident stepping. Cleats are an important accessory and come as either a standard feature or can be purchased and attached later. Shoe Binding or Harness
The connecting system between your boot and the snowshoe. The binding should hold your foot in securely without causing discomfort. There are two major types of binding attachment: fixed rotation and free rotation. In general, a fixed rotation binding offers a versatile, convenient, and fairly stable system This feature lets the snowshoe lift (or sometimes "pop") out of the snow with each step, giving you better clearance while stepping in deep snow. However, this will sometimes result in some snow being tossed against the back of your leg with each step. A free rotation binding pivot freely on a rigid crossbar, which lets the tail drop and dump the snow that falls on top. This means the tails will drag in the snow, but it also won't "kick" loose snow up from the tails like some fixed toe cord bindings. They can also be less maneuverable, since trying to take a step backwards results in the tails diving into the snow. Shoe Drag The amount of snowshoe tail that touches the snow as you walk. Some designs use drag to keep the snowshoe straight by acting as a rudder. This technique, though, creates undue work for the user and should not be necessary with an adequate binding. Snowshoe Poles
A tool that will help your snowshoes work for you. Poles not only help lend stability in any kind of condition, but they can also be used to help propel you forward.
Beaver Tail: For long distance snowshoe walking, your snowshoes need pointed tails-reliable rudders trailing lightly, keeping your shoe aimed straight ahead, assuring that your shoe will come down exactly where you intended. The beavertail lets you move your foot straight ahead in a natural walking step. Rounded tails can skitter in their tracks and can come down well off-center or even on top of the other shoe.
With round-toed shoes, you often have to lift up and then step forward-and still the front can fill with snow and trip you. A pointed toe is much easier in brush. YOU aim the shoes where you want to go-through brush and grass and between saplings. They lay grass and plants aside.
Bearpaw: Oval and rounded at both ends with a slight lift to the toe. Ideal for, dense brush and winter campsites where you need to turn in your own length. Often used as expedition spares carried on the back of a pack. Harder walking for long distances than pointed tail snowshoes.
Recent Technology: Very versatile, rugged, light weight and strong. Various shapes and sizes. Can be adapted with cleats for icy conditions. Tails can be extended to accommodate different loads. They are constructed of durable plastic, aluminum, nylon, rubber or fiberglass materials. They also are smaller, making them more wieldy than the old style, while preserving your ability to float on snow. A system of adjustable nylon straps keeps them on your feet securely, and allows for easy release Many designs have cleats on the bottom of the foot bed, allowing you to climb an incline or grab into snow that has iced over
PREPARATION
What to wear snowshoeing?
In a word, layers. It may be cold outside but once you start moving and having fun on your snowshoes you'll be warm before you know it. Snowshoeing is an aerobic activity. You are going to generate plenty of warmth and you're going to cool down quickly while resting. The ability to add and remove layers is vital. Some clothing to consider:
- Lightweight, breathable long underwear
- Wool or fleece insulation layer
- Wind resistant outerwear
- Sock liners (silk, or similar material)
- Wool socks keep feet warm and dry- Waterproof, supportive hiking boots
- Gaiters
- Gloves
- Neck warmer or scarf
- HatWhat equipment to take?
You've heard it before…Be Prepared! You never know what may come in handy when you're outdoors in winter. Also to remember, the more you carry the more you have to support on the snowshoe and lift through the snow. Make sure you size your snowshoe to your carry weight. Here are some items to think about tossing in your pack…
- Sunglasses or goggles
- Sunscreen/map/guide book
- Compass
- Ample water and food supply
- Flashlight
- Waterproof matches and lighter
- First aid kit (including bandages, tape & ointments)- Duct tape as an emergency snowshoe repair
- Notebook and pencil
- Whistle
- Plastic bags for keeping gear dry
- Camera and film
- Binoculars
- Toboggan to pull gear if necessaryOther tips for the trail...
Be sure to carry a day pack for essentials including water, food and emergency first aid supplies
Always tell someone where you are going and what time you plan to return
Dress in layers
Be sure to check the local weather forecast before heading out
Always take a map and compass
Leave no trace of your adventure :
Don't jump on snowshoes as doing so could damage the framesSnowshoe tracks are the only thing a snowshoer should leave on the trail. Avoid groomed and/or track set trails when snowshoeing at cross country centers. Snowshoeing can be enjoyed in many ways but it can present risks and hazards. Conditions that warrant special caution include avalanche danger, thin ice, and extreme cold. Regardless of how and where you snowshoe, always show courtesy to others and be aware that there are elements of risk that common sense and personal awareness can help reduce. Stay in control. Observe all posted signs and warnings. Keep off closed trails and out of closed areas. Inspect your equipment regularly.
SNOWSHOE GAMES
Trail Tag:
Stamp out a number of trails in a large open field. Make the trails with varying twists, turns, circles and intersections. Make some trails come very close together but never touch. Tell all the Cubs to go on the the trail and scatter. However the most important rule is that they must stay on the trail with their snowshoes and never go off into the snow or break the trail. Assign a Cub or Pack to be it. If caught, the victim is out of the game.Make Your Own Snowshoes:
Lash together a number of evergreen branches, ensuring that the thick part of the branches are pointing forward. Attach the branches to your boots with rope. Make a race of it with others.Compass Game:
For the compass game, nine players and a referee tramp out something resembling a wheel in the snow, the rim being about three snowshoes wide and the centre area about 10 yards (9 m) across. Mark out a bulge or niche in the snow where North, South, East and West would be on the wheel. Then add bulges for NE, SE, SW and NW. Connect them all to the centre, or hub, like the spokes of a wheel.Station players stand at all the designated compass points and select one to be "it" or the "needle" in the centre. Each person has to remember what compass point he is and what point the other players represent. The referee will call out two different points of the compass and the two players representing these points will try to exchange places at the same time the player in the middle tries to beat one of them to the vacated compass point.
If "it" or the "needle" wins, the displaced player moves to the middle. The fun begins when, after a few shifts of position, the players forget their new positions and "it" starts to beat them to the spots.
Any shortcuts between compass points is permissible, both for the needle and the points themselves.
In this game everyone sharpens their sense of direction and has a good time as well. Various changes-off can be instituted such as having the players change place with the referee or having extra players fill in and change the circle completely to further confuse matters.
If the snow is over six inches deep, the entire circle may be tramped down to facilitate changing positions. However, the fun will be even greater and the laughs louder if everyone is just left to flounder as they try to run through the deep snow.
Fox and Geese:
Fox and geese can be played on the same circle as the compass game but preferably before as once this lively game starts the wheel soon becomes unrecognizable due to the many criss-crossing tracks. In fox and geese, the fox stays in the middle while the geese run around the outside rim and dare the fox to catch them. The fox must catch them between spokes on the rim, so there can’t be too many spokes and enough distance between them to give the fox a chance.Potato Race:
For this event a basket is set in the centre of a level snow-covered field or on the surface of a frozen lake. Potatoes, or similar objects, are then laid out at equal intervals in straight lines extending away from the hub of a wheel.Each snowshoe-shod contestant is assigned to a line of potatoes and stands with the tail of his snowshoes to the basket just sufficiently distant from the basket so as not to interfere with his competitors and yet close enough so no one has an advantage at the start.
At the word "go", all run out to the first potato in their lines, pick it up and return to drop it in the basket. The process is continued until the winner has gotten all of the potatoes from his line into the basket before anyone else. It soon becomes obvious that this game requires great skill in manipulating snowshoes in addition to considerable running ability.
Dodge Ball:
Dodge ball on snowshoes can be fun when played with a soft volleyball on a level area about the size of a basketball court. Establish the base lines and boundaries, make the middle line and choose sides.Someone throws in the ball and then it’s dodge and run for your life as each side tries to pick up the ball and then throw it to hit a person on the other side. If a player is hit, he drops out until the last survivor’s team is declared the winner, or a time limit is set and the winner is determined by the number of players left on each side.
No one is allowed to go outside the boundary line without being declared out. Only three steps can be taken before throwing the ball at another player. The ball may be passed behind the centre line to players on the same side, and then thrown at an opposing player, by only twice before it must be thrown across the line, as in volleyball.
This material can be used to fulfill partial requirements for the Winter Cubbing Badge.
![]()
![]()
![]()
April 25, 2005