V. Cabinet Detailing
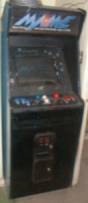
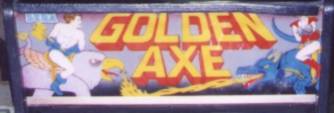
So it worked! Great! The problem is that it still looked like a Golden Axe cabinet. I never even played Golden Axe, so this didn’t seem right.
Have
you started building your cabinet yet? It’s very easy, upon completed
assembly of functional hardware, to start to malinger in the completion of your
project because you start to have too much fun playing the damned thing. You
want to pour yourself a homebrew, put on your best of the
1980’s MP3 mix and play every ROM you own on the thing until 3:30
a.m. It’s suddenly like being fourteen years old again (except for the homebrew
in your hand) with a pillowcase full of tokens and every machine in the arcade
all to yourself.
So
the above paragraph essentially sums up what I was like for the first few days
after assembly. Fine…go have some fun. You earned it. Come back in three days…
Are
you ready to get back to work? All right. The bottom line is that the cabinet still
isn’t your own creation until you put your own unique spin on it. I’ve
seen both extremes in this with other
cabs: everything from hand-built cabs with custom graphics and airbrushing to
people who have done nothing on the outside of the cab.
As
you’ve seen, the hardware aspects of a MAME cabinet can be done very simply and
very quickly. But this is the fun part. This is where you get to make something
nobody has ever seen before. Here’s how I made mine…
The
first thing I did was remove the side panel art. I had a friend who was
something of a Golden Axe fan so I peeled the crossed sword and axe decals off
as gently as possible, re-pasted them onto some poster board and presented them
to him as a gift suitable for framing. I owed him anyway since his was the
truck that brought the cabinet to my garage in the first place.
Looking
at the blank sidewalls of the cabinet, I opted to pain them but upon further
contemplation I resigned myself to the idea that the black front and turquoise
sides actually lent itself nicely to the official MAME logo (not to mention
this whole section of Zeno’s Zone) and
decided to leave them as they were.
But
there were still too many vestiges of Golden Axe on this thing. Let’s look again at the horrible 1st
boot picture, as it affords a closeup of the remaining Sega graphics, but this
time in a before & after context.
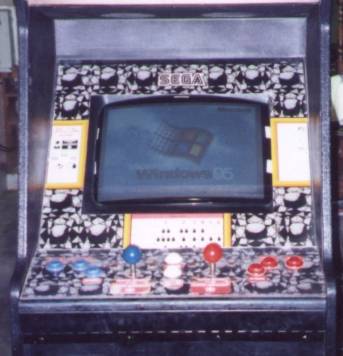
Old & Busted New Hotness
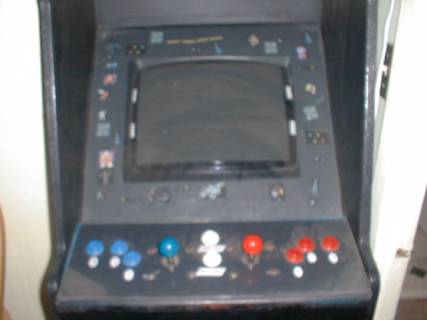
The control panel overlay was replaced with a sheet of
thick black construction paper upon which were affixed custom-printed adhesive
labels indicating generic control designations (Player One & Two Start,
1,2,3 buttons for each side). I decided to not mess with the button and stick
layout because the existing one lent itself nicely to a couple of games I enjoy
which require two sticks to play: Karate Champ and Robotron 2084. Additionally,
since MAME controls can be reprogrammed on the fly, this layout also lends
itself to quick changes if guests have a preference for a left-handed or
right-handed control layout. Currently the default Player One side is the blue
side, which accommodates my left-handed weirdness.
The new bezel (the trim piece surrounding the monitor)
was made from the same construction paper and the pattern was simply traced off
of the original and cut to fit. The little blurs of color you see are screen
captures from various games on the machine which were then printed out on
adhesive paper (Avery #6666) and affixed to the bezel. In the interest of
making this something of a family project I left my four-year-old son in charge
of art design for the bezel. This accounts for the very very long Ceintipede
you see at the top of the bezel just left of the center.
If you squint really hard you can also make out the
vague likeness of Dirk The Daring at about the eight-o’clock position. This is
the one picture that always makes people stop in their tracks and say, “You
mean you’ve got Dragon’s Lair on this thing?” Dang right I do. I love Dragon’s
Lair, don’t you?
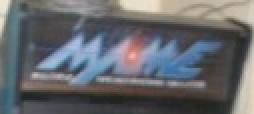
It’s a nice marquee, but it seemed silly to keep it since Nobody understands better than me my
the machine had evolved. I still have this piece along urgent need for a new digital camera and
with the control underlay and bezel. If you’re a Golden better photo editing tools.
Axe fan, email me and let’s talk about a trade. Shameless plug.
That beautiful marquee graphic is naturally not my
handiwork, but that of another MAME enthusiast named Zakk who, in the parlance
of modern kids, “0wnz j004 76m3 Photoshop sk177z”. Zakk is kind enough to make this and several other marquee
designs available for free download at his website. Hey, anybody who gives
out good work like this for free, builds MAME cabinets and drinks Dr.
Pepper is a good man in my book.
So Zakk’s graphic (and thanks again, man) was printed
out across two legal-sized sheets of bond stock paper and then affixed to the
inside of a new sheet of clear plexiglass. The plexiglass in this case came
from a professional shop and couldn’t have been easier to obtain: 1. Look in
the Yellow pages under “Plexiglass” and find someone who looks reputable. 2.
Call preferred shop with measurements in hand and ask for a piece cut to order
(if you’re not sure about thickness, ask for 1/8 inch). 3. Wait two to three hours
for call that order is ready. 4. Pick up glass when advised that it is ready
for delivery. Total cost was about six
dollars.
The completed marquee was the penultimate crown jewel
in this crown. After two years of pining, and three weeks of real work, I
finally had my own personal arcade. The dream can be yours, too, you know.