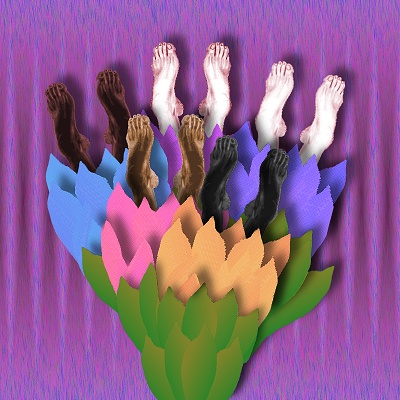
The feet in this week's image reminded me of the strong and often deformed feet of a ballet dancer. I used a fabric-like effect for the skirt/petals to create an image in homage to that calloused and lowly part of the body which is the basis for some of the most beautiful art in the world: Dance.
This has been another hectic music-oriented weekend, so again I have only this one entry for WET 17. I used one of the two different foot images from the original.
I selected the foot, mirrored and copied to make a pair, then used a combination of color adjustments and colorizing, plus blending layers, to get the different "skin" tones.
I then created 4 freeform "petal" shapes in a new image, then filled them using a linear gradient from pink to lilac. I used these to create the overlapping petal/skirt base. Then I created (on a new image) a transparent "net" fabric effect with a tiny diamond pattern, then selected (at 10 to 15 tolerance) and pattern filled various parts of the petal/skirt base at a time until it was covered with net textures.
On another new image, I created the leaf/stalk base in a similar manner...without adding the texture.
Now I made individual copies of the petal/skirt base and experimented with color adjustment (mostly in Hue/Saturation/Lightness) to find the colors I liked to go with each set of feet. I used Highlight/Midtone/Shadow to give a more pronounced color-change effect for the leaf base, then adjusted color on it too.
I then combined the various "flowers" in layers on an 800 x 800 image to create the bouquet. I added each flower at an angle I liked, then attached a leaf base to it before going on to the next flower.
For the 800 x 800 background, I first selected a narrow rectangle and filled it with a rectangular gradient from med brown to a light gold in the center. I then used this as a pattern fill on the large background. Next I added 15% random noise, then blurred with motion blur at 355 degrees, at about 15 strength. I then adjusted Hue/Saturation/Lightness until I liked the colors.
Now I added my bouquet as a new layer to the background. The rest of the time involved selecting different areas and adding drop shadow to emphasize the depth. After spending a long time with this, I think next time I would make the bouquet flower by flower on the background, adding drop shadows as I went. Then I would only need to pick up a few areas to add bits of shadow to complete the effect. Sigh. Hindsight is so helpful!
The original is 800 x 800, which is too large for practicality. I made two different reduced images. The one on this page was reduced 50% then sharpened once to regain clarity and saved at 95% as a jpg. The linked image is 600 x 600 (75%), again sharpened once for clarity and saved at 90% as a jpg.
As usual, this image was done entirely in PSP5. I really enjoyed working with it, and tried some combinations that I hadn't tried before.


