Since alignment is not as critical , removing wheels is not as difficult as mounting. However only very careful work can avoid damage.
 Caveats: Before removing
anything, examine the mounting thoroughly. There may be setscrews, keys,
flats, splines, knurling, solder, ACC, Loc-tite and possibly spot welding or
??.
Caveats: Before removing
anything, examine the mounting thoroughly. There may be setscrews, keys,
flats, splines, knurling, solder, ACC, Loc-tite and possibly spot welding or
??.
- Extended, shaped axle ends can be destroyed under force.
- Removing axle insulated metal wheels is sure to invite trouble.
- Avoid any force on tires, if present, especially on rim insulated drivers to eliminate future wobble potential. Use only center hubs as pressure points, not spokes.
- Apply witness marks to cams, quartered drivers or splined instances to help realignment during remounting.
- Long shafts should be supported to avoid bending. Machinists say they can be straightened, but with only extensive trial and error.
- Heat solder joints while applying separating force.
- Grind off welds to loosen
- Soften adhesives.
Although the basic process consists of resting wheels on a stop plate with an opening for the shaft and applying a force to the shaft end, removal methods are dependent on the tools available and special considerations for the situation.
The simplest, least expensive and slowest way requires a SMALL SOFT HAMMER, __DRIFT PINS __(1/16" up) and stop plate. The hammer head should be brass or bronze to avoid flanging shaft ends. The pin's driving face edges should be rounded to avoid bore gouging. Special hollowed cup tips are required for tapered (needle point) axles to prevent tip damage. The bore edge should be rounded to eliminate jamming on the taper.
The simplest plate should be of thin stiff tool steel with a VEE cut into one edge, to handle larger more stubborn cases. (NWSL's is too soft.) This must be supported above bench surface by blocks or vice jaws etc. A more elegant , inexpensive, self supporting version can be made from 1.5 x 2 " rectangular steel tubing.

Flush end mounted wheels and gears are placed end up on the plate and a blunt end drift pin slightly smaller than the shaft is held straight up against the end. Light tapping with a hammer should loosen the wheel. Extended end axles are similarly treated with modified pins. With a little practice you can learn to steady the plate with lower finger pressure. Extended axles are treated the same way with modified pin ends.
Removing gears from shafts can present problems introduced by shaft length. Shorter lengths can be driven by tapping directly on the end with a soft hammer until flush, then finished with a drift pin. Alternatively short lengths of appropriately sized tubing can be used to align pin and extended shaft during driving.
Longer lengths require support to avoid setting or bending. Solid blocks with holes through them are a necessity.
NWSL's Aligners or steel Jewelers 15 hole anvils can prove very useful in these cases.
Placing a block on the bench, insert the longer shaft end in a snug fitting hole for support using your lower fingers. Place the second block over the upper shaft and press down on the gear. Tap on the shaft until flush, then drive Through the hole with a suitable drift pin. Check frequently and stop just before the shaft is flush with the gear face. Then proceed as above. In case the shaft is longer than the lower block height, raise it with metal parallels or use a large hole in a jewelers block for clearance.
PRESSING
Although much faster, it requires extreme care, since the mechanical advantage of some of the devices can yield several hundred destructive pounds. The most critical factor is alignment.
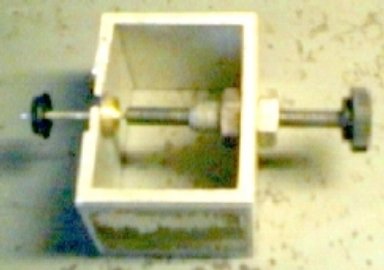
There are various pullers on the market, ranging from jewelers types to custom. Prices cover a wide range.
Due to motor lengths, removing gears using pullers with ample free space beyond the backup plate is recommended.


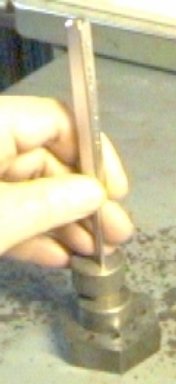
Pulling worm with bar puller.
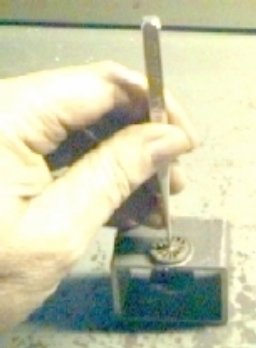
Pulling wheel from needle point axle with NWSL puller and modified tip.
The NWSL Sensipress is a light duty arbor press for delicate work with "feel". By using the accessory kit and some modified drive pins as suggested above, gears may be pressed from shafts using die type inserts in the base.
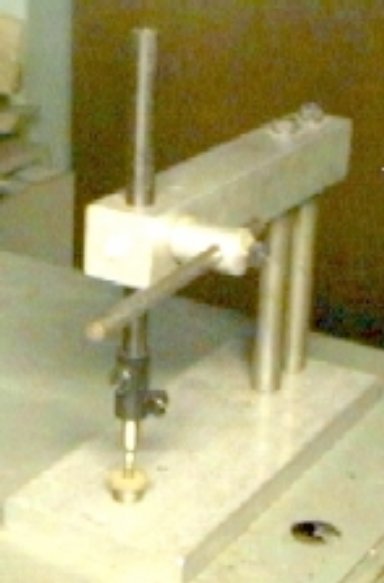
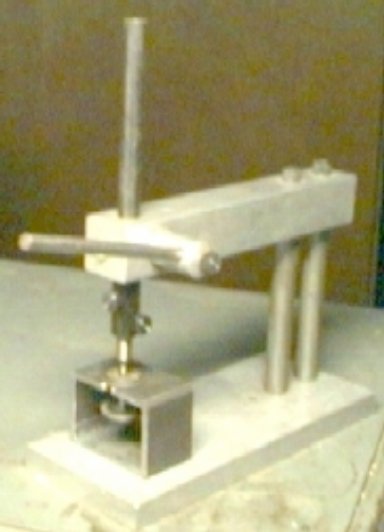
However as a wheel puller, right out of the box it is useless. By using the the above raised stop plate, it can be used to press wheels from axles.
CAUTION: Although it is rated at 250 lb force, this is not a heavy duty press. It can be sprung very easily.

The Pana-Press is a more substantial unit capable of over 1000 lb for stubborn cases. One end of the ram should be modified by drilling and tapping a punch mounting hole. Various plates can be made and screwed to the base.
BACK TO MANTUA PLASTIC CAMELBACK
BACK TO DRIVER MOUNTING
BACK TO METHODS
BACK TO MOTOR TUNING
