
Sections
updated 10 th January 2K5
Controls
I spent ages trying to decide what controls to use with my machine. I decided straight away that I wanted it to be four player, so it could be played with a group of people. I knew this then meant a wide control panel.
It's difficult when you have so many types of games and control methods. I want to play Tron properly so I will eventually have spinner and trigger stick controls, but for now I have left space on the control board design to add these items. I will also make sure I can remove the control panel from my cabinet so that I can do more specialist control panels in future.
I spent ages looking where to buy my gear and I decided on Ultimarc, they have a great range and lot's of people seem to have had a good response from them.
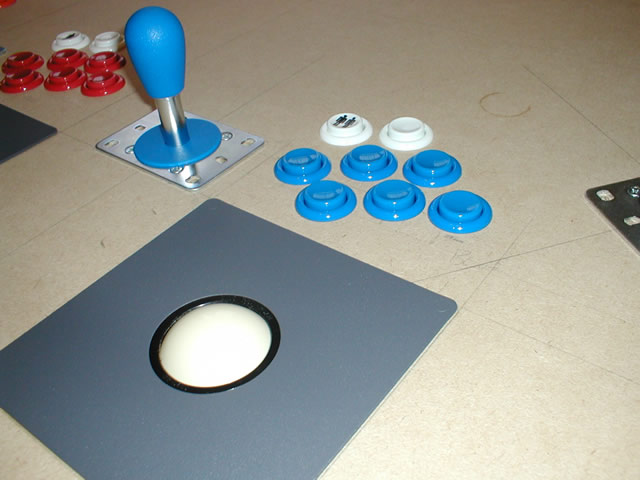
I ordered two T-Stick Plus joysticks, which have a neat method for changing between 8 and 4 way movement. I also order two regular T-sticks. I then ordered enough buttons for fighting games and four player games as well as extra ones for Pinball games. I also from the start wanted two trackballs for marble madness.
I used a 4' by 2' piece of 3/4" MDF for the laying out the control panel I'm cutting this down to 3' by 19" for the final cabinet. I hooked it up with some very hasty cabling just to test it, but it works. It all needs re-wiring when I finish the panel.
| Here are a couple of really rough sketches for my control panel (and I do mean rough). As soon as I had done these I ordered £300 quids worth of controls and controller equipment. I thought I'd work it out properly when I had the real deal in my hands. Probably not the best way to design a control panel but hey. click on the thumbs for larger ones. | |||
 |
 |
||
| Overall panel layout | Another shot of the full panel | The player four controls, buttons aligned with x and y axis of joystick | Close up of the player one controls with the Red T-stick plus, 2 1/4" trackball, player start and coin button plust 6 buttons for play |
 |
 |
 |
 |
| A close up of the player two controls with the blue T-stick plus and trackbal | The player three controls green themed with the diamond layout for the buttons | Another shot of the player one controls | A close up of the button layout for player two. buttons 1, 2, 4 and 5 are in a diamond shape |
 |
 |
 |
 |
After a few experiments with joystick mountings I decided that I wanted as much stick as possible, so went for a top mounting for each stick. To hide the plate I'm going to router the top surface (I'll also do this for the trackball plates) enough to cover with a coloured coded plastic plate for each stick.
I had considered covering the panel with formica, but I'm worried about how to cut neat holes in it, particulary around the trackball. I may have to look into this more fully.
I spent ages trying to get a nice arc on the 6 button placements for players one and two. I wanted to make sure that four of the buttons were arranged in a diamond formation for playing Gunsmoke etc... so this complicated it a bit. I carried this diamond form on with the layout of the player three and four buttons.
The buttons for pinball will be organised with 2 pairs of flippers a credit and a start button. I hope to get hold of a coin door to allow me to use the machine as a money box.
Links