
Sections
updated 10 th January 2K5
Construction
I must admit I'm not the worlds greatest woodworker. When I started this machine I didn't have experience of building anything on this scale. I didn't have many tools. Always wear goggles and a mask when messing with wood, I had spliters flying in my face and so much dust is generated when routing.
Side panels
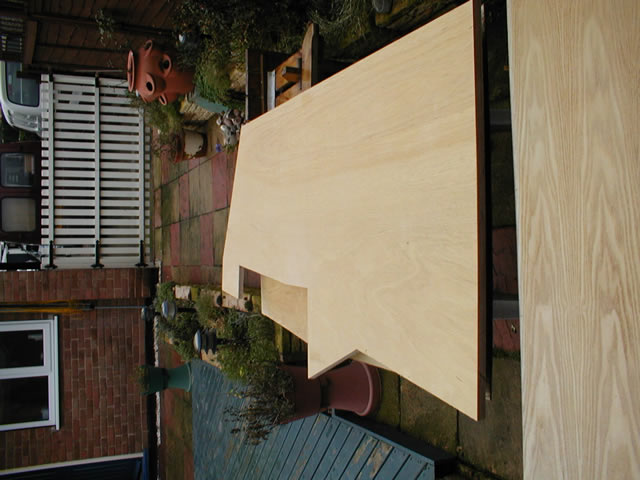
I bought 2 sheets of 4'x8' 3/4" plywood from B&Q (a UK DIY store) They run a cutting service so I got them to cut the depths for the 2 side panels (about 36").
I got my Dad to cut the side panels out using a jigsaw. Not the ideal equipment for straight edges.
We used a router with a round over bit to do the edges of the side panels. I had to do this first stage at my Dad's because he's got a van and the wood wouldn't fit in my car until the side panels were cut.
Click the pictures below to see a larger view |
||
 |
 |
|
Cut side panels |
Side panel prior to rounding |
|
 |
 |
|
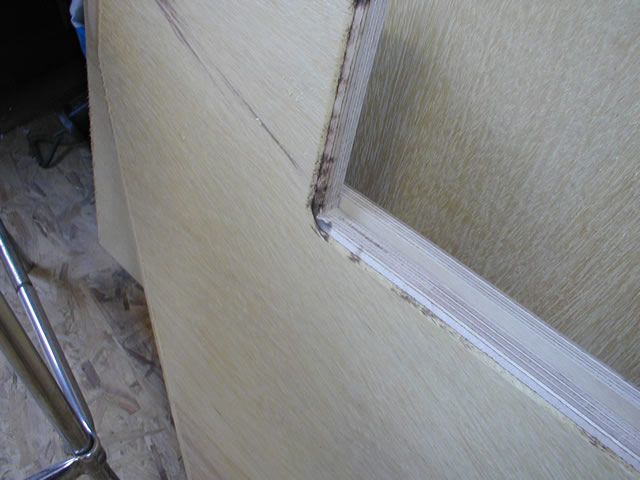
Another picture prior to routing |
Round over bit burns |
|
 |
||
| Comparison of rounded and plain cut side panels | ||
Control Panel cutting and building
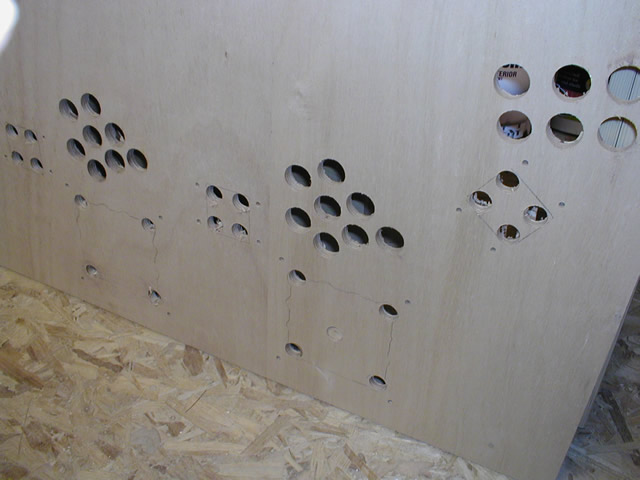
We also used my MDF template to cut out the final cp in 1/2" plywood. We used 2 28mm flat bits for the button holes, we had to keep changing them over has they got pretty hot. The back side of the cp splintered a lot, which we could have avoided by flipping the wood over but it's a trade off with the time I had to get this done before going home again. The final dimensions of my cp are 38" wide by 19" deep. We also got time to knock up a box for the cp.
Click the pictures below to see a larger view |
||
 |
 |
|
The MDF template clapmed to the plywood |
Another shot showing the drill with the flat bit |
|
 |
 |
|
A look at the drilled plywood |
The template (left) and the finished plywood |
|
 |
||
| A plywood box for the cp to sit on, 3" at front 6" at the back | ||
Once I got these done I loaded up the car and came home. I then had to go out and buy a router & jigsaw to enable me to do other cutting and recessing jobs.
The control box has a overhang. I originally intended to use piano hinge to open the lid, but I couldn't get this to work. I chose a pair of hinges for flush mounting that you get with kitchen and wardrobe doors. These work great but I had a really fiddly job getting them in the correct position. It's good if you've got someone there to help. I hold the cp open using an offcut. I was going to fix a proper locking arm but couldn't be bothered in the end. I needed to recess the trackball mounting plates and the joystick plates. I made the decision to top mount my joysticks so that I got a decent length of handle. I rigged up a little test to check out the difference in over under mouting. The mounting plates for the T-Sticks are pretty ugly and I didn't want these to show on the final table so I cut some clear plastic from a folder and painted these to match the control buttons for each player (Red, Blue, Green and Orange). It's not perfect but it does a job.
Building the cab
You need sash clamps or long quick grip clamps to hold everything in place while you glue and screw the wood together. Make sure they are tight and everything is in place. If you don't stuff will move. I had to take this steady but once the bottom shelf for the computer and the front panels were in place the unit become reasonably rigid. When I finished the skeleton I tried to put my TV in place. It wouldn't go, some of my measurements were out a couple of mm. I couldn't face trying to router out some wood, I wasn't confident enough to do this (at the time) so I decided to get my little block plane and shave a few mm of each side of the TV! I'll admit it wasn't the nicest looking TV after this but it now fits nicely in my cab!
The cp box is secured using 6 bolts which i glued to the underside of the shelf that supports the cp box.
Click the pictures below to see a larger view |
||
 |
 |
|
The skeleton with the cp box in place |
Another shot with the cp laid on top |
|
 |
 |
|
another angle of the same thing |
You can see the six bolts in this pic |
|
 |
 |
|
| The left hand side of my block planed TV | The other side. I recommend that you use exact measurements. It was a laugh planning the TV tho! | |
I cut out a TV bezel in 1/4" plywood and then stained it to match the rest of the Cab. I then attached a strip light (10W) to light up my marquee. I had to move the position of the strip light so it iluminated the whole marquee evenly. I created my marquee using Fireworks MX 2004 along with some art found through the BYOAC links. I made a picture frame to enclose the marquee and then had to scale my marquee so no images were obscured by it. I am pretty impressed with the quality of print from my inkjet printer.
Finished cab pics
Click the pictures below to see a larger view |
||
 |
 |
|
The Ikea stools (perfect height and comfy too!) with my Mario beanies where my marquee should be |
The bezel was cut from 1/4" plywood. You can see the plastic covers for the joystick mounting plates here. And a scratch where I dropped a rasp onto the trackball plate |
|
 |
||
Another shot of the control panel and bezel |
||
 |
 |
|
Inside the control panel. You can see one of the hinges and the scrap of wood. I tried to keep the cables as tidy as possible with tape and cable ties |
A shot from the other side of the machine. The I-Pac4 is mounted on the cp and the Opti-Pac is mounted in the box |
|
 |
 |
|
The strip light in its original high position. This didn't really illuminate the entire marquee. So mounted it centrally on a vetical piece of wood which worked much better |
This marquee was created before I decided on picture framing to fix it, hence some of the graphics are obscured. |
|
 |
||
The final marquee lit properly. You should be able to make out MAMEWAH as my front end |
||
 |
||
The simple Marquee |
Click here for Fireworks PNG format 1.28MB Make sure you right and do 'Save target As' |
|
Finish
I used 600 grade sandpaper to rub down all my wood before staing with Wax. I then used sanding sealer on top of the wax (3 coats) with a final rub down with 1200 grade paper (car shops sell this stuff).