
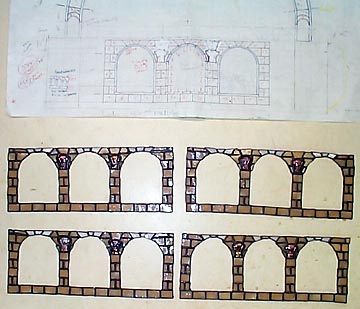
These are the main walls for Sky City, with them it will finally start to look like a real building. I also included a part of the pattern for your viewing pleasure. Hours wise, these didn't take too long. Though it did take several months to complete. Why? I hate pieces that repeat themselves (one of the reasons why I don't build too many lamps). The straight pieces were easy - cut and break. The other pieces were small, curved, annoying. I tried very hard to get the arches to be even, but some still shifted. Taping it wasn't any easier either. If I taped it on the front, I would have to flip it on the back. That wouldn't be so bad, but I made up little sconces that stuck out. And if I soldered it on the back that part would be in the wrong place. This Actually happened, everything on the back was soldered. I had to re-heat sections and push it down so it was flat again. Each day I just pecked at it, a little here and a little there, until it was done.
I used packing tape, upside down to stick the back down so I could solder the front. I placed the tape sticky side up, like contact paper. I don't have any contact paper that's why I used the tape. By the way, the arches will look better when the window edges go in.
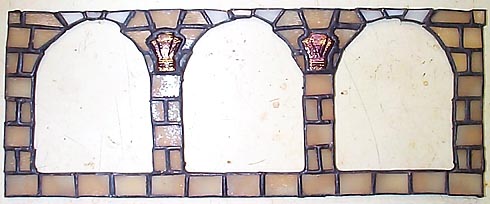
This shows one wall. The pieces in the center are a 1/2" wide. All the bricks (except for the halves), are 1/2" across. I made glass filigree wall sconces for an extra touch of detail. To see how I made these sconces click here.

I tried, and tried to get all the sconces to look the same. Each sconce takes quite a bit of time to make. It takes a day for the material to cure, and another day for the kiln to cool. And I only have 3 pieces of filigree to use. It took a long time to make these. I forget how many batches I made, but there were quite a few. I think I mixed the time it took to make these with other parts of the project (probably the making of the lamp mold) so I don't know if I have the actual time it took to make these things. In the above picture, (you can sort of make it out), one of the sconces is a different shade of brown. All the other's are chocolate, this one is more like caramel. I tried re-firings, but none of the other's worked, the design didn't come out, or it was also the wrong color. In any case, this one still looked better then the others.
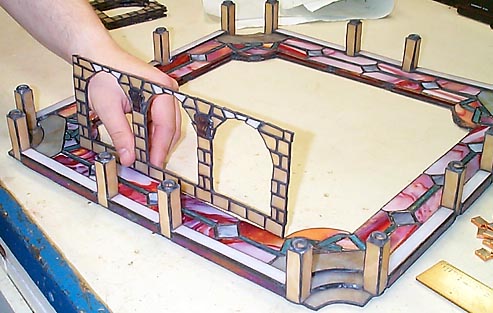
Unfortunately the sconces don't actually light up. They're too thick to see through. I beveled the back, hoping that would help light it a little. I was also going to leave a small space at the top to let light through, but it didn't look right. Originally the sconces were going to be positioned higher then it is now. It wasn't until I was ready to build them when I discovered my Faux Pa. If the sconces scraped the ceiling, you wouldn't see them, because the header would be blocking them. So I revised it, actually making it a little harder to build, due to the small pieces surrounding it.
Total Time: 18 Hours 45 minutes
P.S. I was way, way off in the timing of this thing. I used 6 pieces an hour and apparently it was way off.


Home | About Me | Aliens | Foil | Miscellaneous | Shop | Projects | Tips | Shopping List | Links | Awards

Started on 11-28-98