
Doing the handle
After sanding the bow with 120, 220, 400, and 1000 grits, I put three coats of Deft on it. Then I wrote my name, length, draw weight, and stuff. Then I put a fourth coat of Deft. The next part was the handle.
I decided at the last minute that I should put some thick leather on the handle to sort of round it out a little more and make it more comfortable. I glued (using Titebond II) one narrow piece on the belly, and two on the back, stacked on top of each other. I figured that might also protect the back from blowing apart, too. Here's the back.
See how I have the one on top smaller than the one on bottom? That helps round things up. Before I glued them on, I also sanded the edges down with the belt sander. I didn't turn it on; I just rubbed them against the sanding belt. That gave them a bit of taper so they smoothed into the bow a little more. I figured I didn't need to be pretty with it since I'm going to put a handle wrap over it anyway.
I also put suede strike plates on there with Barge cement. I glued them close enough in so that the handle wrap will wrap around the bottom of them.

Last night, I was reading in The Bent Stick by Paul Comstock that a bow really has to be shot in a lot before it arrives at its final tiller. Being indecisive about which limb would be the top, I decided to make it to where I could shoot it either way. I put strike plates on both sides.

Don't know how traditional that is, but it's got to be practical!
This morning I wraped green twin around the handle to finish it off. I used the same method I used to put the finishing line on with, except that I used no glue.
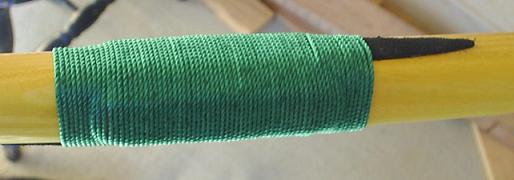
The cool thing about this handle wrap is that it looks cool, it costs almost nothing, and it's easily replaced. I can just take it off and do another string wrapping if it gets dirty or I just want another colour.
I also put wraps around my tips for aesthetic reasons. I could probably come up with something a little better sometime, but this is better than nothing at all.

And that's it. Here's the final product.

Thank you for joining me on this grand adventure. Now I must go make another one...
Oh yeah, I forgot to mention. The total length of the bow, antlers tips and all, is 80". It's 73" nock to nock. It came out to 41# at 28".