
Preparing the Osage
Here's a picture of the osage I'm using.
I've had this for a long time, thinking some day I'd make an ELB out of it. It was about 8 ft long. Today, I cut it down to 75" and sanded the back side to prepare it for gluing the hickory on.
Before I do the glue up, though, I want to taper the belly some. I think it will be easier to taper the belly before glue-up, because I plan to glue in a little reflex.
Here's a look at the width and depth.
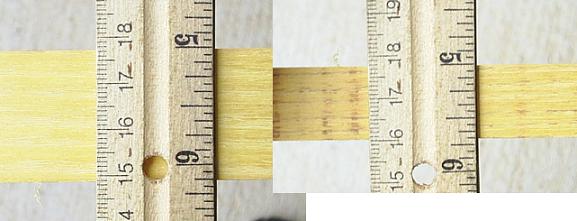
It looks like it's a little more than 1" wide, and a little less than 1.25" wide. That is just fine with me.
Before doing any tapering, I had to make some pencil marks on the bow, and the first thing I wanted to find was the center where the handle will be. I do that without actually taking any measurements at all. I just put the yard stick flush with one end of the bow, and make a mark at the other end. Then I put the yard stick on the other end of the bow and make another mark.

Now I've got two marks sorta close to the middle. Now all I have to do to find the middle is find the half way mark between these two marks.

I can do this in a matter of seconds without even thinking. It even works if the bow is shorter than 72". As long as the two lines are within 12" from each other, it's easy to find the midpoint with a ruler.
I like to leave myself a little wiggle room on the handle, so I mark 5" on either side of center and taper from there. That gives me 10" of handle, which is plenty of wiggle room.
This is how I want to taper:

Ordinarily what you'd do in a situation like this is make two marks and use a straight edge to connect the marks.

But it isn't that simple with my piece of osage, because one end has a slight backset. Do you see the problem here?

To truly get the end with the backset tapered the same as the straight end, I can't use a straight edge to draw the whole line. Instead, what I did was mark the straight end at intervals of six inches. I measured from the back to the line on the straight end, and whatever I measured, I marked the warped end the same. Then I used a ruler to draw my tapered line on the warped end.
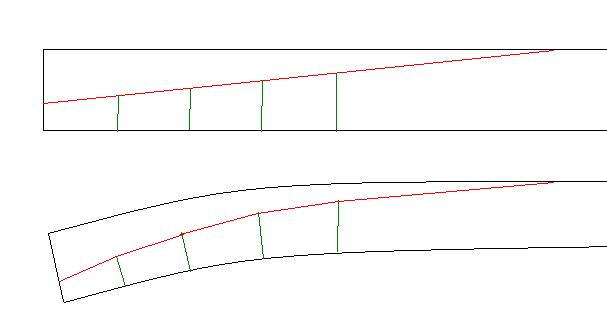
This way, both ends are tapered the same.
After I got it all measured, and the lines drawn, I cut it out with the band saw. I love power tools. I used to do this with a Stanley surform rasp, and it took me an hour, and left me plum worn out. After the band saw, I used the belt sander to sand down to the line. Here's a before and after shot.
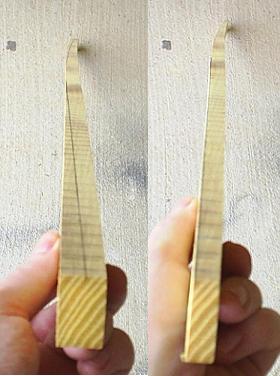
Now, I don't worry if I sand perfectly to the line or not. The purpose of all this roughing out is just to make tillering easy later on. Once you start tillering, whatever imperfections you had will be taken care of. The whole idea of a "rough" shape is that it's rough. It doesn't need to be exact.
But in case anybody is wondering, I tapered down to 5/16". 1/4" seemed too thin, and 3/8" seemed too thick. 5/16" seemed just right. The only reason I measured is just so I could get the same measurement on the other side and tell you what I measured. When I'm not doing a build-along, I don't even think in terms of 1/4", 5/16", or 3/8". I just see what it looks like on the ruler and replicate it on the other end. That way, both ends are the same, regardless of the precise measurement.
And I don't use a formula or preconceived notion of what the original measurement ought to be. I just use my eyeball and see what looks right.