
Taking a Stand
Or What's Beneath It All?
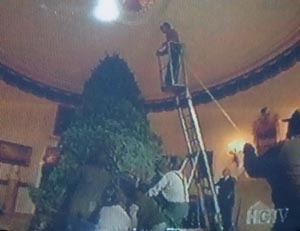 The only tool missing from this picture is a block and tackle. A chandelier has been removed so this heavy tree can be roped to the ceiling. The tree has to be upright to decorate it. Taking the stand off a decorated theme tree invites disaster. Cinching the stand under any tree you plan to move invokes Newton's Curse. Can the stand withstand the torque and forces of motion? If the stand is plastic the answer is NO! Only sturdy wood or metal stands can withstand being tipped sideways on one leg and dragged out the door. The solution is to have a carry bag under the tree stand.
Layering your tree begins with the plastic carry bag underneath the tree stand. There's no point in wiring a tree without the bag. The instant you try to move it every doorknob between you and the destination tries to tear the wires off. Get a mattress dust sleeve from a furniture warehouse. They seldom charge more than a buck for one. The Festival uses a plastic tube that resembles a dry cleaners bag. The plastic is very heavy, like a lawn clipping bag. If you use a tube sleeve, knot the bottom and secure with a twist tie. Spread the bag out. Put the tree stand in the bottom. Get the tree upright on the stand. It helps to have another person stand back and check. Cinch the tree onto the stand. Decorate. Cover the plastic carry bag with the tree skirt when you are through. Walk around the tree and glare at it a lot to catch bad areas. When its time to ship, flick the bag over the top, knot it. Tip everything sideways and haul it out the door.
The tree carry bag is essential for a Sub for Santa delivery to the elderly. There's a reason they don't have the live tree up in the 1st place. Half the time there is an artificial sitting in the basement. Usually that reason is - Because it is so physically exhausting to take it down. Assure them you will return before New Year's to clear it out. A tabletop is not as tarnatin' aggrivatin' as a six footer during a meditation over cleaning up the mess. When you do a tree for the elderly, make sure you return to take it down. Bring a box for the skirt and ornaments they want to keep. Then draw the bag over the top, and haul it out the door. Sweep up any needles. Make sure you practice the Scout Outdoor Code: Leave it better than you found it.
IT DOESN'T SAND UP
I have a question for you seaside fans. Did you ever consider someone eventually has to remove the tree from the house? Why would I ask such a thing? Well every year some gifts from the sea turn up at the Festival of Trees. Seashells make great ornaments. Swimming toys look bright and cheerful under the tree. The kiddie pool you've filled with sand to stand the tree in - WEIGHS 200 POUNDS! Ok I've exaggerated. It only weighs 150 pounds. Delivery crosses their fingers when they call the buyer. Do they want the sand? If so, it has to be scooped out a little at a time. You have the luxury of carrying it in secured in bags. Have you ever tried to put sand back into a bag?
Covering the stand and the wires gives a real polish to the tree. A well made tree skirt is best. You can work more of the theme in, and cover blights at the same time.
Recipe for Easy No Pattern Treeskirt
2 or 3 yards Material
4 yards of String
1 Straight Pin
1 Pen
1 pair Scissors
Spread the material flat on the table. Double the string. Tie the center to the pin. Pin on the center fold. Stretch the string to one edge of the fabric. Check against the width. Tie the pen onto the string at the point just before the salvage edge. Using the string as an anchor, draw a perfect circle between the top and bottom salvage. Cut out the circle. Fold the circle in ½. Do it again. Now that your circle is in a perfect 1/4, cut a slit up
one of the folds. You have an opening for the back, hooray! Fold the circle again, and again so you have a pie wedge shape. Clip a 2'' notch off the center for the tree trunk hole, or 1'' notch for the artificial's pole.
Make the ruffle from the remaining fabric. Fold the length end in quarters. Clip a notch on each fold. Pull open the notch. Grab a string or two that frays up. Pull the string all the way down the fabric so it leaves an empty channel. Use this channel as a guide. Cut a perfectly straight length. Repeat down the 2nd channel, etc. Hem the 4 pieces end to end for one long strip. Baste the entire length. Fold in half. Pin to the half fold of the circle. Gather the ruffle on each end so it fits around the skirt. Sew ruffle to skirt.
Now the Awful Horned Toad Truth
THE FABRIC:
The type of fabric really does matter. Felt doesn't ravel, it doesn't need finished edges; it sucks up fibers from everything around it like a black hole, and costs a mint. I've never used felt for a tree skirt! Color matters too. Do you want your tree short and wide or tall and thin. The trees in the picture are exactly the same. How dark the skirt is can control the proportions of the tree.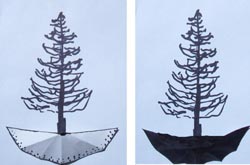
Velvet is a bigger debris magnet than felt. You can't leave raw edges anywhere. During summer sidewalk sales the $ almost becomes affordable. I've used velvet for a couple tree skirts. The deep rich look is well worth it. The awful truth is the velvet skirt isn't worth attempting the night before the tree goes up. Every raw edge needs to be zigzagged before attempting a seam. A bolt of masking tape needs to be added to your materials. Some velvets crawl around like an un-diapered baby. And getting the loose dust bunnies off the finished skirt is like the Great Cognito says, ''Its easy once you know the trick.''. Shake the rabbit with violence and he'll jump right back where he came from. Pat the bunny with the sticky side of the tape and he magically disappears. Velvet despises packing and folding. Transport velvet loosely rolled in a large plastic bag. Last minute velvet isn't worth the aggravation; pay the $40 for a ready made.
The satins ravel. They have that run for the hills attitude even underneath their seams. I wonder if my pantyhose are their 2nd cousins? Clean finish every edge after every cutting. I once had a magnificent drapery fabric. Making it behave involved straight stitching the seam line so I wouldn't loose my place. Zigzagging the edge, ironing the edge under. Straight stitching it in place. Ironing it under. Rolling the edge up again and finally applying the hem line. The shimmer looked so good I used the same fabric next year, flipped over to show its reverse pattern. Expensive fabric, watch for sales, especially the drapery brocades.
COTTONS
Are the easiest to work with. Applicate, sequins and beadwork are easiest here. Most of the pre-printed skirt kits are made of cotton. There is no end to the novelty prints on cotton. I changed the theme of my Silent Night tree in LATE SEPTEMBER because of a cotton print. It had the entire crèche in antique blue-line marching around the edge of the skirt, with the stars forming into the trunk area. I was madly beading clear seed
beads onto the stars and camel harnesses right into November. That skirt never got the dust ruffle.
Cotton broadcloth is the wimp of fabrics. It's limp and lightweight. Quilted patterns and ruffles have a tough time holding their shape on the curves. Cottons may need up to 3 times the length for the ruffle. Sewing bias strip or trim helps stiffen the ruffle. And ruffles look better with a bit of lace. Look at the difference a red border made to that Sportsman tree skirt on the bottom of the page. I've zigzagged covered wire into the hems of my most extreme cases. Even that didn't work on the Marcella's Nursery tree. 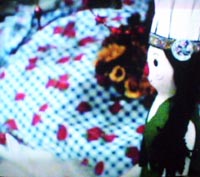 The ruffle lay there like it had taken one in the socks. It just wouldn't get off the floor. The wire was too heavy for it. The heavy beading on Forever Young is in an area that is supposed to lay flat. The thin gausey fabric helps it to lay flat under the beads, and the ruffle to stand high where the beads aren't weighing the skirt down. Quilted skirts can pucker like bad roads if they aren't quilted directly onto an under fabric. Pineapples and lone stars are the worst. They hex a straight grain into a crawling bias no matter which seam you're sewing.
My favorite is the upholstery fabric. The patterns on it are meant to be seen from across the room. It's heavy, stands up in a nice ruffle, doesn't ravel, shed, bleed, thumb its nose at you, and it is on sale most of the year in remnant bins and upholstery shops.
THE COMPASS Draw on the BACK of the fabric. Tie the thread to the pen as close to the drawing point as you can get it. Tying the pen in the middle stops the thread from falling off. It also gives a pivot wide enough for eight inches of error. No matter how you try to secure the thread to the nib - its going to slip or fall off. Expect to redraw the circle at the closing point. You can get a line close enough with a few more passes.
THE KINDEST CUTTING
You may have to pull the guide string more than once to see where you're going. Some threads, (naw make that most threads), aren't strong enough to pull the entire length. They'll break. Cut up to the point where the channel nearly disappears. Tug at both sides to ravel up a few more threads. And yank on one of them. Remember to even out the curve where the edge of the circle touched the ruffle ends. Pull a string hanging from
the center. Cut the ends straight. The Gods of quilting hath declared no matter how carefully you trim - one piece is going to be a half inch shorter on one end. You can't fight the gods. Just flip that side towards the gathered seam. Its easier to adjust into a wide seam than to hide on a thin finished hem.
DECORATING
Do it after you cut the circle and before anything else. I've had good luck with crayon batik. I pencil in detailed patterns. Then I color it with crayon. Had you ever had a crayon in a dryer? Can you say permanent? When I'm done with the color I iron out the wax between some newspapers. Outlines are done with a permanent brown or navy pen. Black is far too harsh. The Carousel tree skirt was made this way. Here it is just after ironing out the wax. 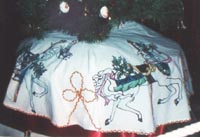 It took one afternoon to complete. The looped whip cord was done over a pencil line. I folded a paper in half and cut out a
pattern. I used the fold line to position my loop pattern on the skirt folds. Then I penciled it on.
APPLICATE
Isn't a make in a week project. It takes much more time especially if it has a needle turned edge. There is double sided iron-on to hold in fabric that ravels. Better yet, use a patch that doesn't ravel like felt. Sequins have more depth of field with a felt (or velvet) background. With felt you can sew on sequins before you cut out the patch.
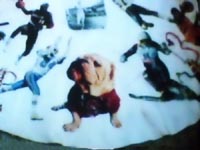 Sometimes you want the edge of the applique to ravel. It softens feathers and petal outlines. It takes almost as much time to ravel this type of edge as needle turning it under in the first place. There used to be a print transfer glue called Picture This on the market. The glue dried clear and flexible. You simply dampened and wiped the paper off the back, then glued the picture onto your background fabric. I did the Sportsman and
Carousel III skirts using glue applique method. The down side is the glue sticks to itself; even when dry it is still slightly cohesive. Pulling apart can stretch the image. These days running a strip of fabric through the computer printer is much faster. You can then use regular fabric glue to applique to skirt. Or just design in wedges and sew the panels
together.
HAND BEADING
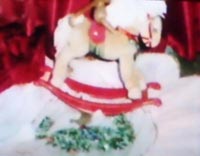 Takes the most time, and gives the most bang. The clear seed bead, called a rocaille, has the most impact. It shimmers with light. But it doesn't have the ragged effect of sequins. It took almost 2 months to do the Forever Young skirt pictured right. The pattern came from a Russian floral cross stitch. I basted some waste canvas onto my skirt to keep track of where I was. The beads are tacked down every 2 or 3 beads. A running thread goes through the entire line to keep them even. When I was finished I dampened the waste canvas, and yanked it out thread by thread with a pair of needle nose pliers.
SEWING
Finishing the edges is different for every fabric. Some need only one turn hem to stay put. Some raw edges don't look raw. The tight curve on the trunk hole isn't a problem to hem if you do the 1 cut angle described above. It will be curved by the time you finish rolling and stitching the angles. Bulky fabric lumps up on the corners. Cut the corners off before you seam the hems around them. Don't cut over the hem border. Upholstery fabric does not make crisp pleats like the thin fabrics. 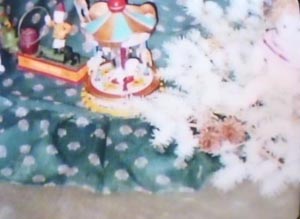
Most skirts need a finishing edge. The ruffle does just that. Compare the sport tree skirt before and after the ruffle was applied. This ruffle has an additional red lace border. Actually I lied about pinning the ruffle once. I've never had a ruffle behave that well. I usually end up folding the ruffle and skirt into eighths. Then I pin the right sides together at the eights. If I'm lucky, seldom to never, 10 pins will be sufficient. Often I have to pin the ruffle every 3 inches. I've been lucky enough not to need barrel pleats. Don't ask. It's a lot of hand sewing. 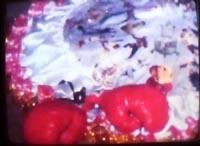 `
Never lose sight of the purpose of the tree skirt. THE DARN THING IS SUPPOSED TO LAY ON THE FLOOR, COVER THE EYE SORES, AND SUCK UP SAP! Right. Let's start layering the tree. On to the lights and wire.
Home | Live vs lifelike | Background | Stands | Wiring | Toppers | Placing Ornaments | Garland | Sources
2003 Festival Gallery| 2004 Festival Gallery